1. Olulised kaitsemeetmed
Please read all instructions carefully before using your Acekool Espresso Machine. Keep this manual for future reference.
- Ensure the appliance is placed on a stable, level surface away from water sources.
- Ärge kastke seadet, toitejuhet ega pistikut vette ega muudesse vedelikesse.
- Unplug from the outlet when not in use and before cleaning. Allow to cool before adding or removing parts.
- Ärge kasutage ühtegi seadet kahjustatud juhtme või pistikuga või pärast seda, kui seade on tõrgeteta või on mingil viisil kahjustatud.
- Hoolikas järelevalve on vajalik, kui seadet kasutavad lapsed või nende läheduses.
- Kasutage ainult tootja soovitatud tarvikuid.
- Vältige kokkupuudet liikuvate osadega.
- Ärge kasutage õues.
- Enne kasutamist veenduge alati, et veepaak oleks õige tasemeni täidetud.
- Olge kuumade pindade ja auru käsitsemisel ettevaatlik.
2. Toote lõppview
The Acekool Espresso Machine is designed to provide a professional coffee experience at home or in the office. It features a 20-bar Italian pump, a built-in grinder with 30 adjustable settings, and a powerful steam wand for milk frothing.
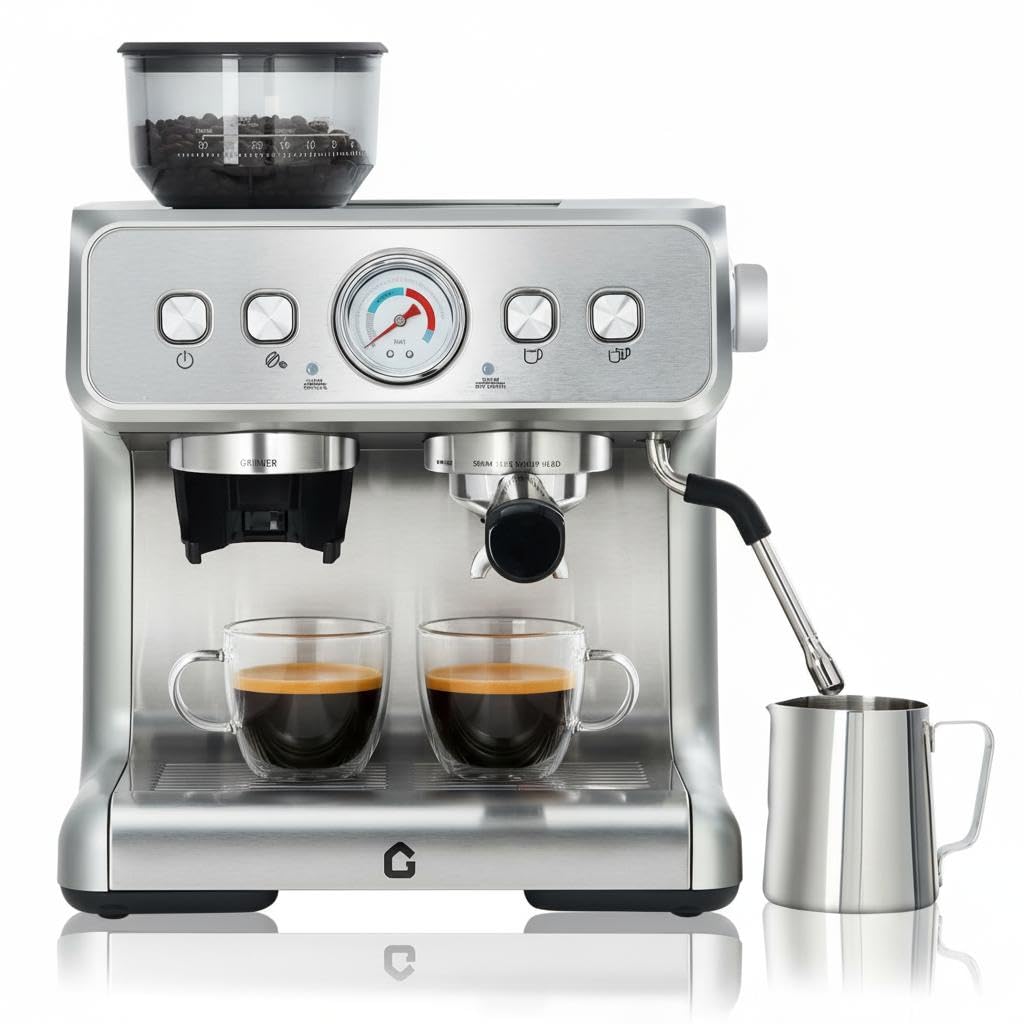
Esiosa view of the Acekool Espresso Machine, showcasing its sleek design and a pressure gauge indicating 20 Bar high pressure extraction.
Peamised omadused:
- 20-baarine professionaalne pump: Delivers optimal pressure for rich espresso with perfect crema.
- Sisseehitatud veski: Features 30 adjustable settings for fresh grounds directly into the portafilter.
- 1450W Powerful Steam System: Creates silky and dense milk foam for lattes and cappuccinos.
- Customizable Coffee Experience: Adjust grind coarseness and shot volume for personalized brews.
- Removable Water Tank (0.74 Gallon / 2.8 Liters): Lihtne täita ja puhastada.
- Eemaldatav tilkumisalus: Lihtsustab puhastamist ja hooldust.
- Automaatse puhastuse funktsioon: Mugava hoolduse tagamiseks.
Kaasatud komponendid:

Image showing all components included with the Acekool Espresso Machine, such as the portafilter, filter baskets, tamper, milk jug, and cleaning brush.
- Pressure Funnel
- Single Cup Filter Screen
- Double Cup Filter Screen
- Roostevabast terasest piimakann
- Tamper
- Korraldaja kast
- Brewing Head Cleaning Brush
- Kasutusjuhend (see dokument)
3. Seadistamine
Follow these steps for initial setup of your espresso machine.

Visual guide for the initial setup process, including adding water, coffee beans, adjusting grind, and starting the preheating cycle.
- Lahtipakkimine: Eemaldage ettevaatlikult kõik pakkematerjalid ja asetage masin stabiilsele, tasasele ja kuumakindlale pinnale.
- Veepaak: Remove the 0.74 Gallon (2.8 Liters) water tank from the back of the machine. Fill it with fresh, cold water up to the MAX line. Replace the tank securely.
- Toiteühendus: Ühendage toitejuhe maandatud pistikupessa.
- Eelsoojendus: Press the power button to turn on the machine. The machine will begin to preheat. Wait until the indicator lights signal that the machine has reached the optimal temperature.
- Esmane loputus: Before first use, run a few cycles of hot water through the brewing head and steam wand without coffee to clean the internal components.
- Veski seadistamine: Open the lid of the bean hopper and fill it with fresh whole coffee beans. Ensure the lid is securely closed.
4. Kasutusjuhised
4.1 Kohvi jahvatamine

Illustration of the 30 grind settings available on the built-in grinder, ranging from coarse to fine, with recommendations for extraction speed.
- The machine features a built-in conical burr grinder with 30 adjustable settings.
- Rotate the grind size selector dial to choose your desired fineness. Finer settings (lower numbers) are for espresso, while coarser settings (higher numbers) are suitable for pour-over or French press.
- Place the portafilter under the grinder chute. Press the grind button to dispense fresh grounds directly into the portafilter.
- Kasutage kaasasolevat tampkohvipuru ühtlaseks kokkusurumiseks.
4.2 Espresso valmistamine

Diagram illustrating the benefits of 20 Bar extraction and pre-infusion for optimal coffee flavor and complete extraction.
- Insert the prepared portafilter into the brewing head and lock it into place.
- Asetage espressotass(id) tilgakandikule portafiltri tilade alla.
- Select your desired shot volume (single or double) using the control panel. The machine will automatically perform a pre-infusion cycle, followed by 20-bar pressure extraction.
- The built-in pressure gauge will display the extraction pressure during the process. Aim for the optimal pressure range for best results.
4.3 Steam Wand Operation (Milk Frothing)

Image demonstrating the 1400W powerful steam system, showing the steam wand in action and options for hot water and adjustable steam.
- Fill the stainless steel milk jug with cold milk (dairy or non-dairy).
- Turn the steam knob to activate the steam function. Wait for the steam indicator light to illuminate, indicating the steam is ready.
- Submerge the steam wand tip just below the surface of the milk. Open the steam valve to release steam.
- Move the jug up and down gently to create microfoam. Once desired texture and temperature are reached, close the steam valve.
- Pühkige auruotsik koheselt puhtaksamp lapiga, et vältida piimajääkide kuivamist.
4.4 Kuuma vee funktsioon
- The machine can dispense hot water for tea or Americanos.
- Refer to your machine's control panel for the specific hot water button or setting.
5. Hooldus
Regulaarne puhastamine ja hooldus tagavad teie espressomasina optimaalse jõudluse ja pikaealisuse.

Image highlighting the removable water tank and drip tray for easy cleaning, along with descaling instructions.
5.1 Igapäevane koristamine
- Tilgutusalus: Empty and clean the removable drip tray daily. Wash with warm, soapy water and rinse thoroughly.
- Portafilter ja filtrikorvid: Pärast iga kasutuskorda eemaldage kasutatud kohvipaks ning loputage portafilter ja filtrikorvid sooja vee all.
- Auruvarras: Pühkige auruotsik alati kohe pärast piima vahustamist.amp cloth. Purge the wand briefly to clear any internal milk residue.
- Välimus: Pühkige masina välispinda pehme, damp riie. Ärge kasutage abrasiivseid puhastusvahendeid.
5.2 Veepaagi puhastamine
- Remove the water tank and wash it with mild detergent and warm water. Rinse thoroughly to remove any soap residue.
- Refill with fresh, cold water.
5.3 Katlakivi eemaldamine
- Descaling is essential to remove mineral buildup and should be performed regularly (e.g., every 2-3 months, depending on water hardness).
- Kasutage espressomasinatele mõeldud katlakivi eemaldamise lahust, järgides tootja juhiseid.
- Teise võimalusena võib kasutada valge äädika ja vee lahust (vahekorras 1:1).
- Run the descaling solution through the machine's brewing head and steam wand.
- After descaling, run several cycles of fresh water through the machine to rinse thoroughly.
5.4 Veski puhastamine
- Periodically clean the grinder burrs to prevent oil buildup and ensure consistent grinding.
- Refer to the machine's specific instructions for removing and cleaning the grinder burrs. Use the provided cleaning brush to remove coffee grounds.
6. Veaotsing
If you encounter issues with your Acekool Espresso Machine, refer to the following common problems and solutions.
| Probleem | Võimalik põhjus | Lahendus |
|---|---|---|
| Kohvi ei väljutata | Water tank empty; Clogged filter; Machine not preheated | Fill water tank; Clean filter basket; Allow machine to preheat fully |
| Weak espresso / Too fast extraction | Liiga jäme kohvipuru; Liiga vähe kohvi; Ebapiisav paksusamping | Adjust grinder to a finer setting; Increase coffee dose; Tamp more firmly |
| Bitter espresso / Too slow extraction | Coffee grounds too fine; Too much coffee; Over-tamping | Adjust grinder to a coarser setting; Reduce coffee dose; Tamp with less force |
| Auruotsikust ei tule auru | Steam wand clogged; Machine not at steam temperature | Clean steam wand hole; Wait for steam indicator light |
| Masinast lekib vett | Water tank not seated correctly; Drip tray full; Seal issue | Ensure water tank is properly inserted; Empty drip tray; Contact customer support if issue persists |
If the problem persists after attempting these solutions, please contact Acekool customer support.
7. Tehnilised andmed
Detailed technical specifications for the Acekool Espresso Machine.
| Funktsioon | Detail |
|---|---|
| Kaubamärk | Acekool |
| Mudeli nimi | 8414234206350 |
| Kauba mudeli number | ZlzuMUw6KjChKeiuzu5nOQ7vaG4X |
| Värv | Hõbedane |
| Toote mõõtmed (P x L x K) | 15.67" x 16.61" x 18.86" |
| Kauba kaal | 25.4 naela |
| Mahutavus | 2.8 liitrit (veepaak) |
| Pumba rõhk | 20 baar |
| Võimsus | 1450W |
| Erifunktsioon | Auto Clean Function, Built-in Grinder, Steam Wand |
| Kaasatud komponendid | Milk Frother (Stainless Steel Milk Jug) |
| UPC | 820567835323 |
| GTIN | 820567835323 |
8. Garantii ja tugi
Your Acekool Espresso Machine is built for reliable performance and comes with comprehensive support.
- Garantii: This product is covered by a 1-year limited warranty from the date of purchase.
- Tehniline tugi: Acekool provides lifetime technical support for this product.
- Sertifikaadid: The machine is ETL-certified, ensuring it meets recognized safety standards.
- Võtke ühendust tugiteenusega: For warranty claims, technical assistance, or any questions regarding your machine, please visit the official Acekool Store or contact their customer service directly. You can find more information at Acekool Store on Amazon.


