1. Sissejuhatus
The Minolta MN1232A 12x32 Digital Binoculars combine high-quality optical viewing with 4K UHD video and 48MP photo capture capabilities. This manual provides essential information for setting up, operating, and maintaining your device to ensure optimal performance and longevity.
Mis on karbis
- Minolta MN1232A 12x32 Digital Binoculars
- 32GB mälukaart
- Kaelarihm
- USB kaabel
- Kandekott
- Puhastuslapp
- Kasutusjuhend (see dokument)
- ProStaff Suspender Harness Binocular Strap
2. Toote lõppview
Familiarize yourself with the main components of your Minolta MN1232A Digital Binoculars.
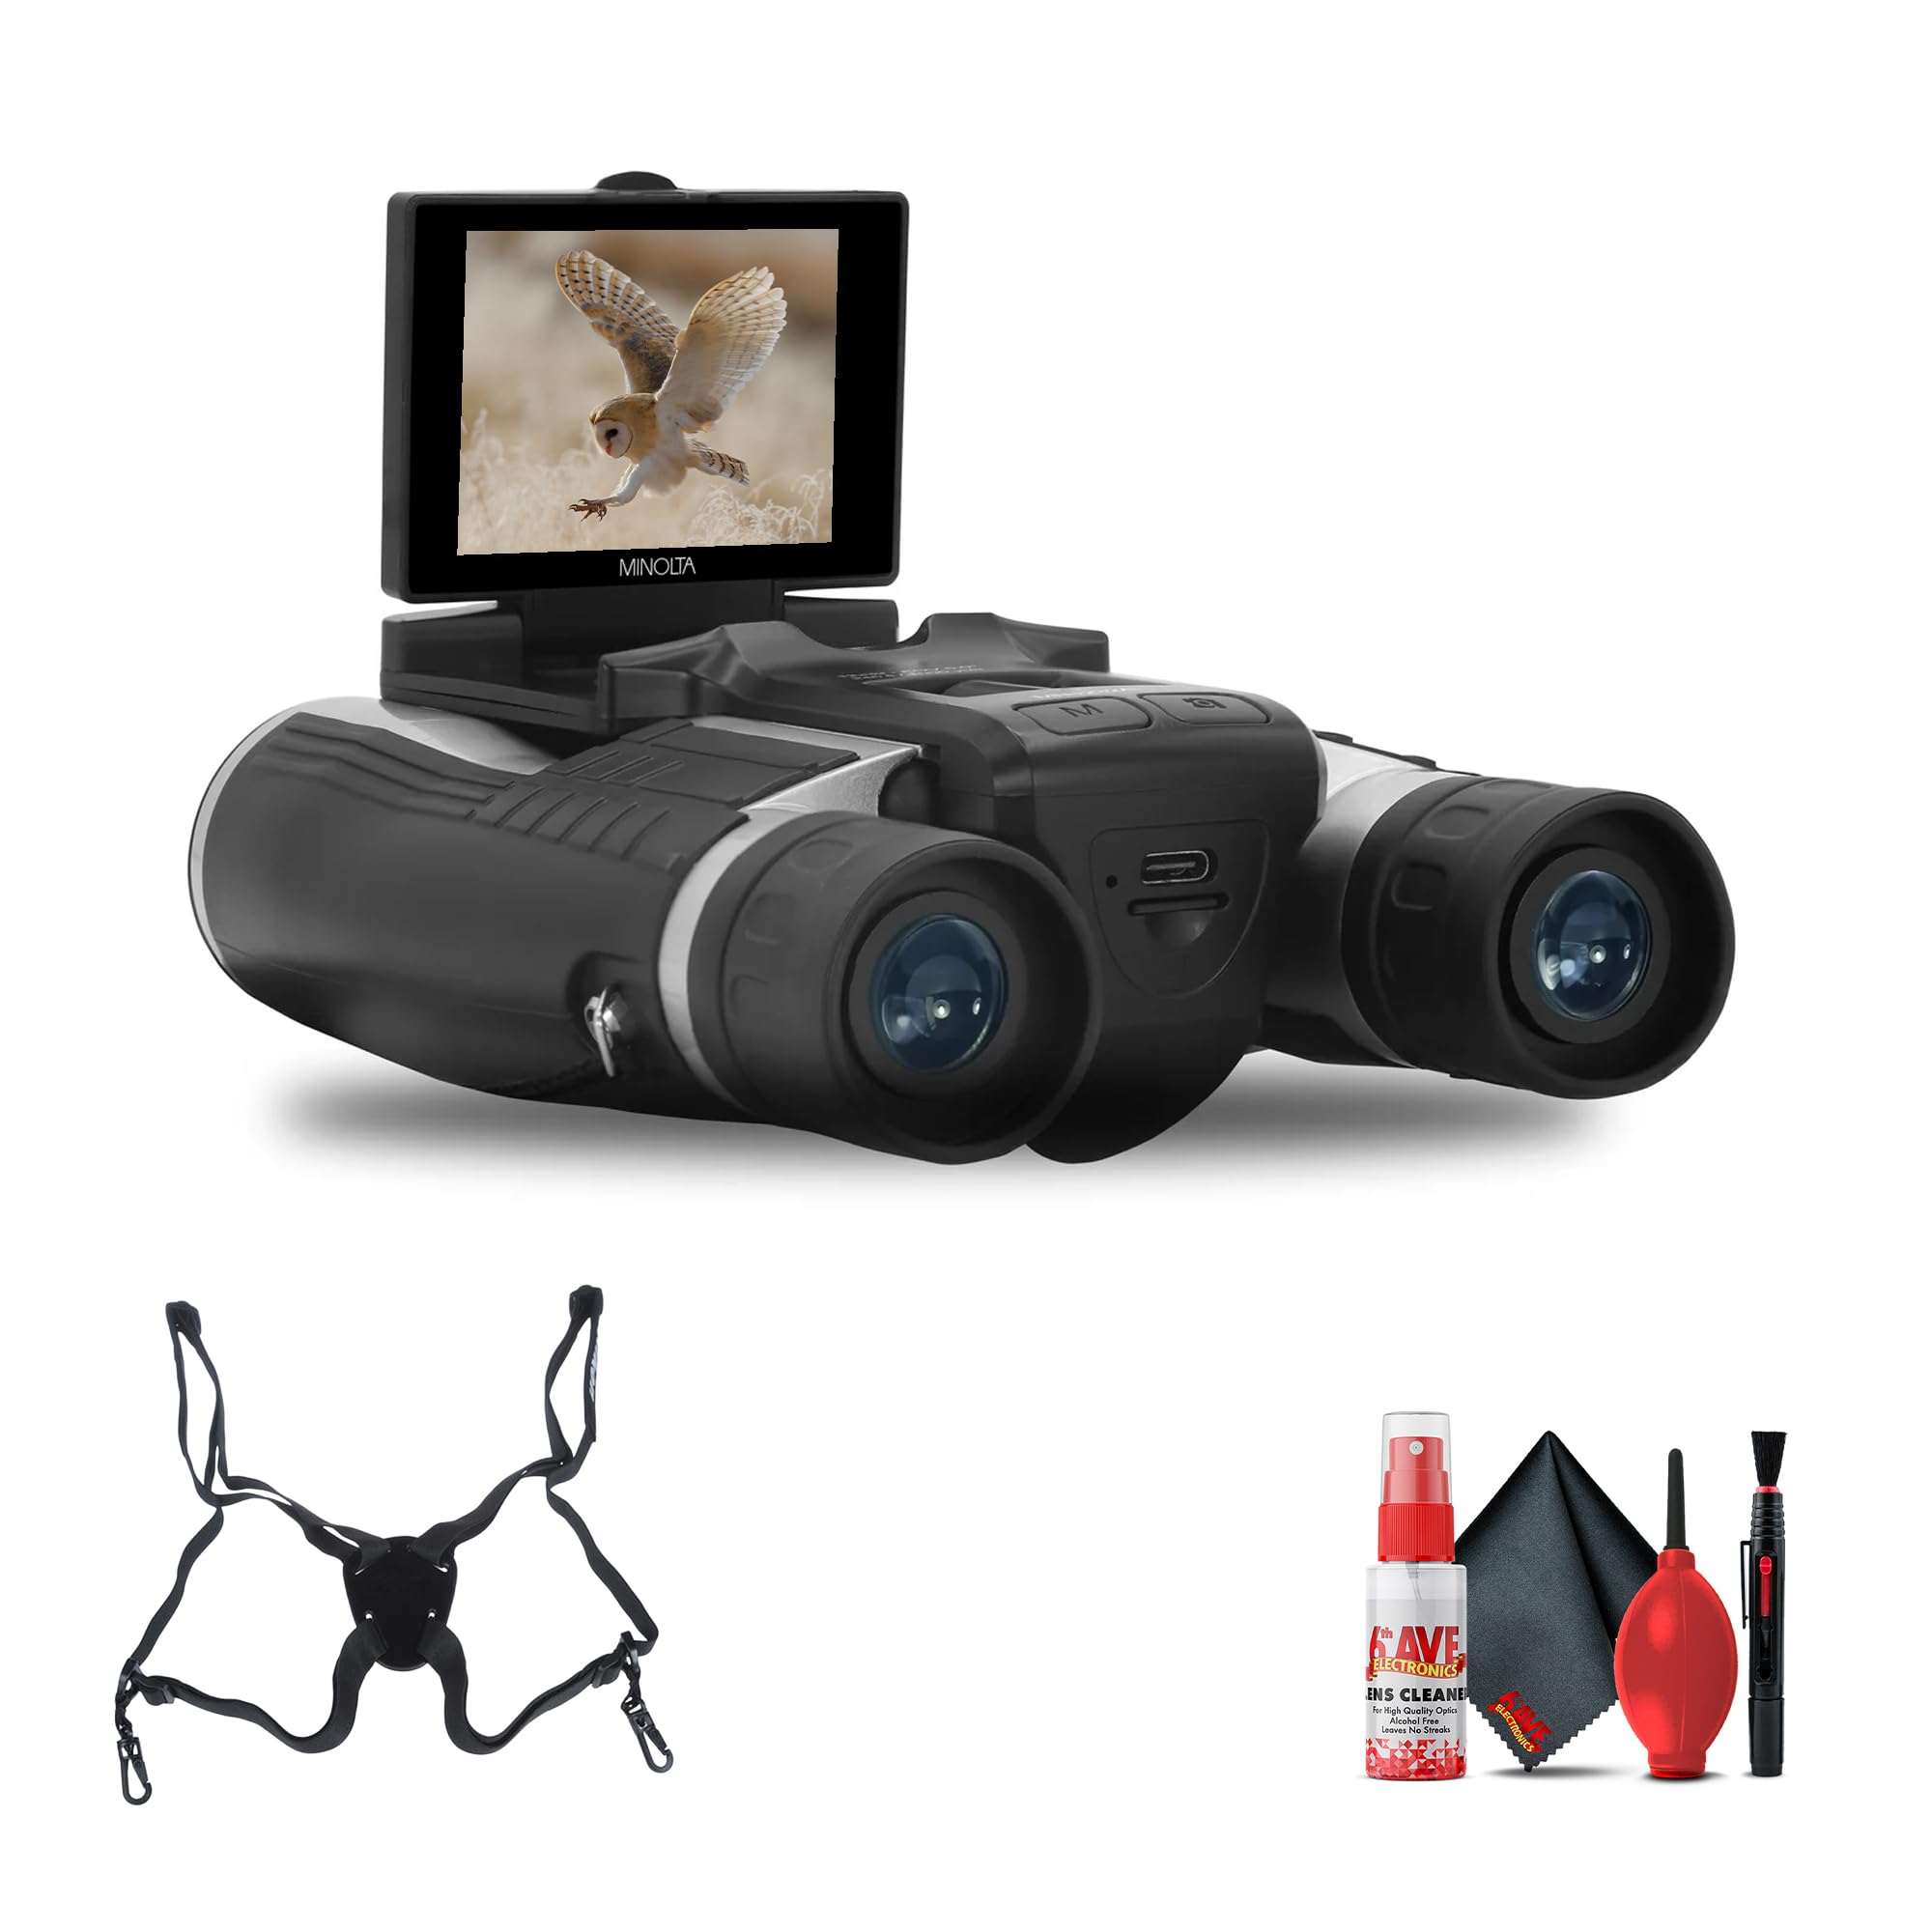
Joonis 2.1: Esiosa view of the Minolta MN1232A Digital Binoculars with the IPS display extended, showing a bird image.

Joonis 2.2: Ülemine view of the binoculars, highlighting the control panel with buttons for power, mode, menu, and navigation.
Põhikomponendid:
- Objektiivid: Front lenses (32mm diameter) for light gathering.
- Okulaarid: Kuhu sa läbi vaatad view suurendatud pilt.
- Fookuse ratas: Central wheel for adjusting optical focus.
- Dioptri reguleerimine: Ring on the right eyepiece for individual eye focus correction.
- IPS ekraan: 2.4-inch anti-glare screen for live view, menüü ja taasesitus.
- Juhtnupud: Power, Mode, Menu, Navigation (Up/Down/Left/Right), OK/Record/Shutter.
- USB-port: Laadimiseks ja andmeedastuseks.
- Mälukaardi pesa: For inserting the MicroSD card.
- Statiivi kinnitus: Threaded insert for tripod attachment (located on the underside).
3. Seadistamine
3.1 Aku laadimine
The MN1232A features a built-in rechargeable battery. Before first use, ensure the device is fully charged. Connect the binoculars to a USB power source (e.g., computer, wall adapter) using the provided USB cable. The charging indicator light will show the charging status (e.g., red for charging, green for fully charged). Charging time may vary.

Joonis 3.1: Külg view illustrating the location of the USB port for charging and data transfer.
3.2 Mälukaardi sisestamine
The binoculars require a MicroSD card for storing photos and videos. A 32GB memory card is included. Locate the memory card slot, typically found under a protective rubber cover on the side or bottom of the device. With the binoculars powered OFF, insert the MicroSD card with the metal contacts facing down until it clicks into place. To remove, gently press the card until it springs out.
3.3 Attaching the Neck Strap/Harness
For secure handling and to prevent accidental drops, attach the included neck strap or ProStaff Suspender Harness. Thread the strap ends through the designated attachment points on the sides of the binoculars and secure them according to the strap's instructions. Ensure the strap is firmly attached before use.
3.4 Esmane sisselülitamine
Press and hold the Power button (usually marked with a power symbol) for a few seconds until the IPS display illuminates. The device will boot up and enter the default operating mode (typically viewing or camera mode).
4. Kasutusjuhised
4.1 Põhiline Viewkeskendumine
- Pupillidevahelise kauguse reguleerimine: Hold the binoculars up to your eyes and adjust the distance between the two barrels until you see a single, circular field of view.
- Fookus: Use the central focus wheel to bring the image into sharp focus.
- Dioptri reguleerimine: If one eye requires different focus, close your right eye and focus with your left eye using the central focus wheel. Then, close your left eye and adjust the diopter ring on the right eyepiece until the image is sharp for your right eye.

Joonis 4.1: Tagumine view of the binoculars, showing the eyepieces and the central focus wheel.
4.2 Using the IPS Display
The 2.4-inch IPS anti-glare display can be folded up for viewing and menu navigation. It provides a live feed of what the camera sees, allows you to review captured media, and access device settings. Ensure the screen is clean for optimal visibility.
4.3 Photo Capture (48MP)
- Valige kaamerarežiim: Press the Mode button until the camera icon is displayed on the screen.
- Kadreerige oma võte: Use the binoculars to view your subject and the IPS display to frame the image.
- Jäädvusta foto: Press the Shutter button (often marked with a camera icon or integrated with the OK button) to take a 48-megapixel photo.
4.4 Video Recording (4K UHD)
- Valige videorežiim: Press the Mode button until the video camera icon is displayed.
- Alusta salvestamist: Press the Record button (often the same as the Shutter/OK button in video mode) to begin recording 4K UHD video. A recording indicator (e.g., red dot, timer) will appear on the screen.
- Peata salvestamine: Salvestamise peatamiseks vajutage uuesti nuppu Salvesta.
4.5 Digital Zoom (8x)
While in camera or video mode, use the zoom buttons (often marked with '+' and '-' or directional arrows) to activate and adjust the 8x digital zoom. Digital zoom magnifies the image electronically, which may result in a reduction of image quality compared to the optical magnification.
4.6 Menüüs navigeerimine
Press the Menu button to access the device settings. Use the directional buttons (Up/Down/Left/Right) to navigate through the menu options. Press the OK button to select an option or confirm a setting. Common settings include resolution, exposure compensation, date/time, and memory card formatting.
4.7 Taasesitus
Enter playback mode (usually via the Mode button) to review your captured photos and videos. Use the directional buttons to scroll through your media. Press the OK button to play videos. You can delete unwanted files sellest režiimist.
4.8 Ülekandmine Files arvutisse
To transfer your media files, ensure the binoculars are powered on. Connect the binoculars to your computer using the provided USB cable. The device should appear as a removable disk or mass storage device on your computer. You can then copy photos and videos from the memory card to your computer's hard drive.
5. Hooldus
5.1 Puhastamine
Use the provided cleaning cloth to gently wipe the objective lenses and eyepieces. For stubborn smudges, apply a small amount of lens cleaning solution specifically designed for optics onto the cloth, then gently wipe. Avoid using abrasive materials or harsh chemicals, as these can damage the lens coatings. Keep the body of the binoculars clean with a soft, dry cloth.
5.2 Fog-Resistant Optics
The lenses feature a fog-resistant coating. To maintain its effectiveness, avoid wiping the lenses excessively or with rough materials. If fogging occurs due to temperature changes, allow the device to acclimate to the environment and air dry naturally.
5.3 Aku hooldus
To prolong the life of the built-in rechargeable battery, avoid frequent full discharges. Recharge the battery when the low battery indicator appears. If storing the device for an extended period, ensure the battery is partially charged (around 50%) and recharge it every few months to prevent deep discharge.
5.4 Säilitamine
Store the binoculars in the included carrying pouch in a cool, dry, and dust-free environment. Avoid exposing the device to extreme temperatures, high humidity, or direct sunlight for prolonged periods, as these conditions can damage the optics and electronics.
6. Veaotsing
| Probleem | Võimalik põhjus | Lahendus |
|---|---|---|
| Seade ei lülitu sisse | Madal või tühi aku Toitenuppu ei vajutatud õigesti | Charge the battery fully. Ensure the USB cable is connected properly. Vajutage ja hoidke toitenuppu 3–5 sekundit all. |
| Blurry images/video | Vale fookus Dirty lenses Diopter not adjusted | Adjust the central focus wheel. Clean the objective lenses and eyepieces with the provided cloth. Adjust the diopter ring on the right eyepiece. |
| Mälukaardi viga | Kaart pole õigesti sisestatud Corrupted card Incompatible card | Sisestage mälukaart kindlalt uuesti. Format the card via the device's menu (this will erase all data). Proovige mõnda teist ühilduvat MicroSD-kaarti. |
| Kuval pole pilti | Display folded down Seade ei ole sisse lülitatud Kuva seaded | Ensure the IPS display is folded up and securely positioned. Veenduge, et seade on sisse lülitatud. Check display brightness settings in the menu. |
| Files not transferring to computer | Lahtine USB-ühendus Computer driver issue Vale režiim | Ensure the USB cable is securely connected to both devices. Try a different USB port or cable. Restart computer. Ensure binoculars are in mass storage mode (if applicable). |
7. Tehnilised andmed
| Funktsioon | Spetsifikatsioon |
|---|---|
| Mudeli number | MN1232A |
| Suurendus | 12x |
| Objektiivi läätse läbimõõt | 32 mm |
| Väli View | 5.0° (240 ft / 1000 yds) |
| Video eraldusvõime | 4K UHD |
| Foto eraldusvõime | Kuni 48 MP |
| Digitaalne suum | 8x |
| Ekraan | 2.4" IPS Anti-Glare LCD |
| Optika | HD Multi-coated lenses, Roof-prism design, Fog-resistant coating |
| Toiteallikas | Sisseehitatud laetav aku |
| Säilitamine | MicroSD-kaart (32 GB kaasas) |
| Toote mõõtmed | 7.95 x 5.91 x 3.7 tolli |
| Kauba kaal | 2.2 naela |
8. Ohutusalane teave
- Silmade ohutus: Never look directly at the sun or any intense light source through the binoculars, as this can cause severe and permanent eye damage.
- Kokkupuude veega: Keep the device away from water and moisture. These binoculars are not rated as waterproof.
- Lahtivõtmine: Do not attempt to disassemble, modify, or repair the device yourself. Unauthorized repairs will void the warranty and may cause damage or injury. Contact qualified service personnel for assistance.
- Lapsed: Keep the device and its accessories out of reach of small children to prevent choking hazards or misuse.
- Temperatuur: Avoid exposing the binoculars to extreme temperatures (hot or cold) or rapid temperature changes.
9. Garantii ja tugi
Minolta products are manufactured to high-quality standards. For detailed warranty information, including coverage period and terms, please refer to the warranty card included with your purchase or visit the official Minolta webPalun hoidke ostutõend alles garantiinõuete esitamiseks.
For technical support, troubleshooting assistance beyond this manual, or service inquiries, please contact Minolta customer service through the contact information provided in your product packaging or on the official Minolta support websaidile.


