Sissejuhatus
This manual provides comprehensive instructions for the safe and efficient operation, maintenance, and troubleshooting of your SENCOR SES 1721BK Espresso & Cappuccino Coffee Maker. Please read this manual thoroughly before first use and retain it for future reference.
Olulised ohutusjuhised
- Veenduge alati, et seade on ühendatud maandatud pistikupessa, millel on õige pingetage (230 volti).
- Ärge kastke seadet, toitejuhet ega pistikut vette või muusse vedelikku.
- Keep hands and cords away from hot surfaces, such as the steam wand and brewing head, during and after operation.
- Unplug the coffee maker from the power outlet before cleaning, maintenance, or when not in use.
- See seade on ette nähtud ainult majapidamiseks. Ärge kasutage õues.
- Ärge kasutage seadet kahjustatud juhtme või pistikuga või kui seade ei tööta korralikult või on mingil moel kahjustatud.
- Lapsi tuleb jälgida, et nad seadmega ei mängiks.
- Kasutage veepaagis ainult külma ja värsket vett.
Toode läbiview ja komponendid
Familiarize yourself with the parts of your SENCOR SES 1721BK coffee maker before operation.

Pilt: Esiosa view of the SENCOR SES 1721BK Espresso & Cappuccino Coffee Maker, showing the control panel, portafilter, and drip tray.
Põhikomponendid:
- Veepaak: Eemaldatav paak värske vee saamiseks.
- Juhtpaneel: Features power switch, temperature gauge, and function buttons/dial.
- Portafilter: Hoiab jahvatatud kohvi pruulimiseks.
- Filtri hoidik: Secures the portafilter to the brewing head.
- Auruvarras: Piima vahustamiseks cappuccino ja latte jaoks.
- Tilgutusalus: Kogub liigset vedelikku ja on eemaldatav hõlpsaks puhastamiseks.
- Mõõtmiskulp: Kohvipuru täpseks mõõtmiseks.
- Filtrid: Includes filters for single and double shots.

Pilt: A hand demonstrating the removal of the water tank from the back of the SENCOR SES 1721BK coffee maker.

Pilt: Lähivõte view of the removable drip tray and cup warming plate on the SENCOR SES 1721BK coffee maker.
Seadistamine ja esmakordne kasutamine
Lahtipakkimine ja paigutus:
- Eemaldage ettevaatlikult kõik pakkematerjalid ja veenduge, et kõik komponendid on olemas.
- Asetage kohvimasin stabiilsele, tasasele ja kuumakindlale pinnale, eemale veeallikatest ja kuumusallikatest.
- Ensure there is adequate space around the appliance for ventilation and operation.
Esmane puhastamine:
- Wash the water tank, portafilter, filters, and measuring scoop with warm soapy water. Rinse thoroughly and dry.
- Pühkige seadme välispinda reklaamigaamp riie.
First Use (Priming the System):
- Täitke veepaak värske külma veega kuni MAX tasemeni.
- Asetage tühi tass keedupea alla.
- Plug the appliance into a power outlet and turn it ON. The power indicator light will illuminate.
- Allow the machine to heat up until the temperature gauge indicates it's ready for brewing (usually in the optimal espresso range).
- Turn the function dial to the coffee brewing position and allow water to flow through the brewing head for approximately 30 seconds. This primes the pump and flushes the system.
- Turn the function dial back to the standby position.
- Repeat this process for the steam wand: place a cup under the steam wand, turn the dial to the steam position, and let steam release for a few seconds. Then turn it off.
- Masin on nüüd kasutamiseks valmis.
Kasutusjuhised
Espresso valmistamine:
- Veenduge, et veepaak oleks täidetud värske veega.
- Valige sobiv filter (ühekordne või kahekordne) ja asetage see portafiltrisse.
- Using the measuring scoop, add ground coffee to the filter. For a single shot, use one scoop (approx. 7g); for a double shot, use two scoops (approx. 14g).
- Kergelt tamp Jaota kohvipuru ühtlaselt. Ära jahvata üle.amp.
- Kinnitage portafilter pruulimispea külge, joondades seda ja keerates kindlalt paremale, kuni see on kindlalt paigas.
- Asetage üks või kaks espressotassi tilgakandikule portafiltri tilade alla.
- Turn the machine ON and wait for the temperature gauge to reach the optimal brewing range.
- Turn the function dial to the coffee brewing position. Espresso will begin to flow into the cups.
- Once the desired volume is reached (typically 25-30ml for a single shot, 50-60ml for a double shot), turn the function dial back to the standby position to stop brewing.
- Carefully remove the portafilter, discard the used coffee grounds, and rinse the portafilter and filter.
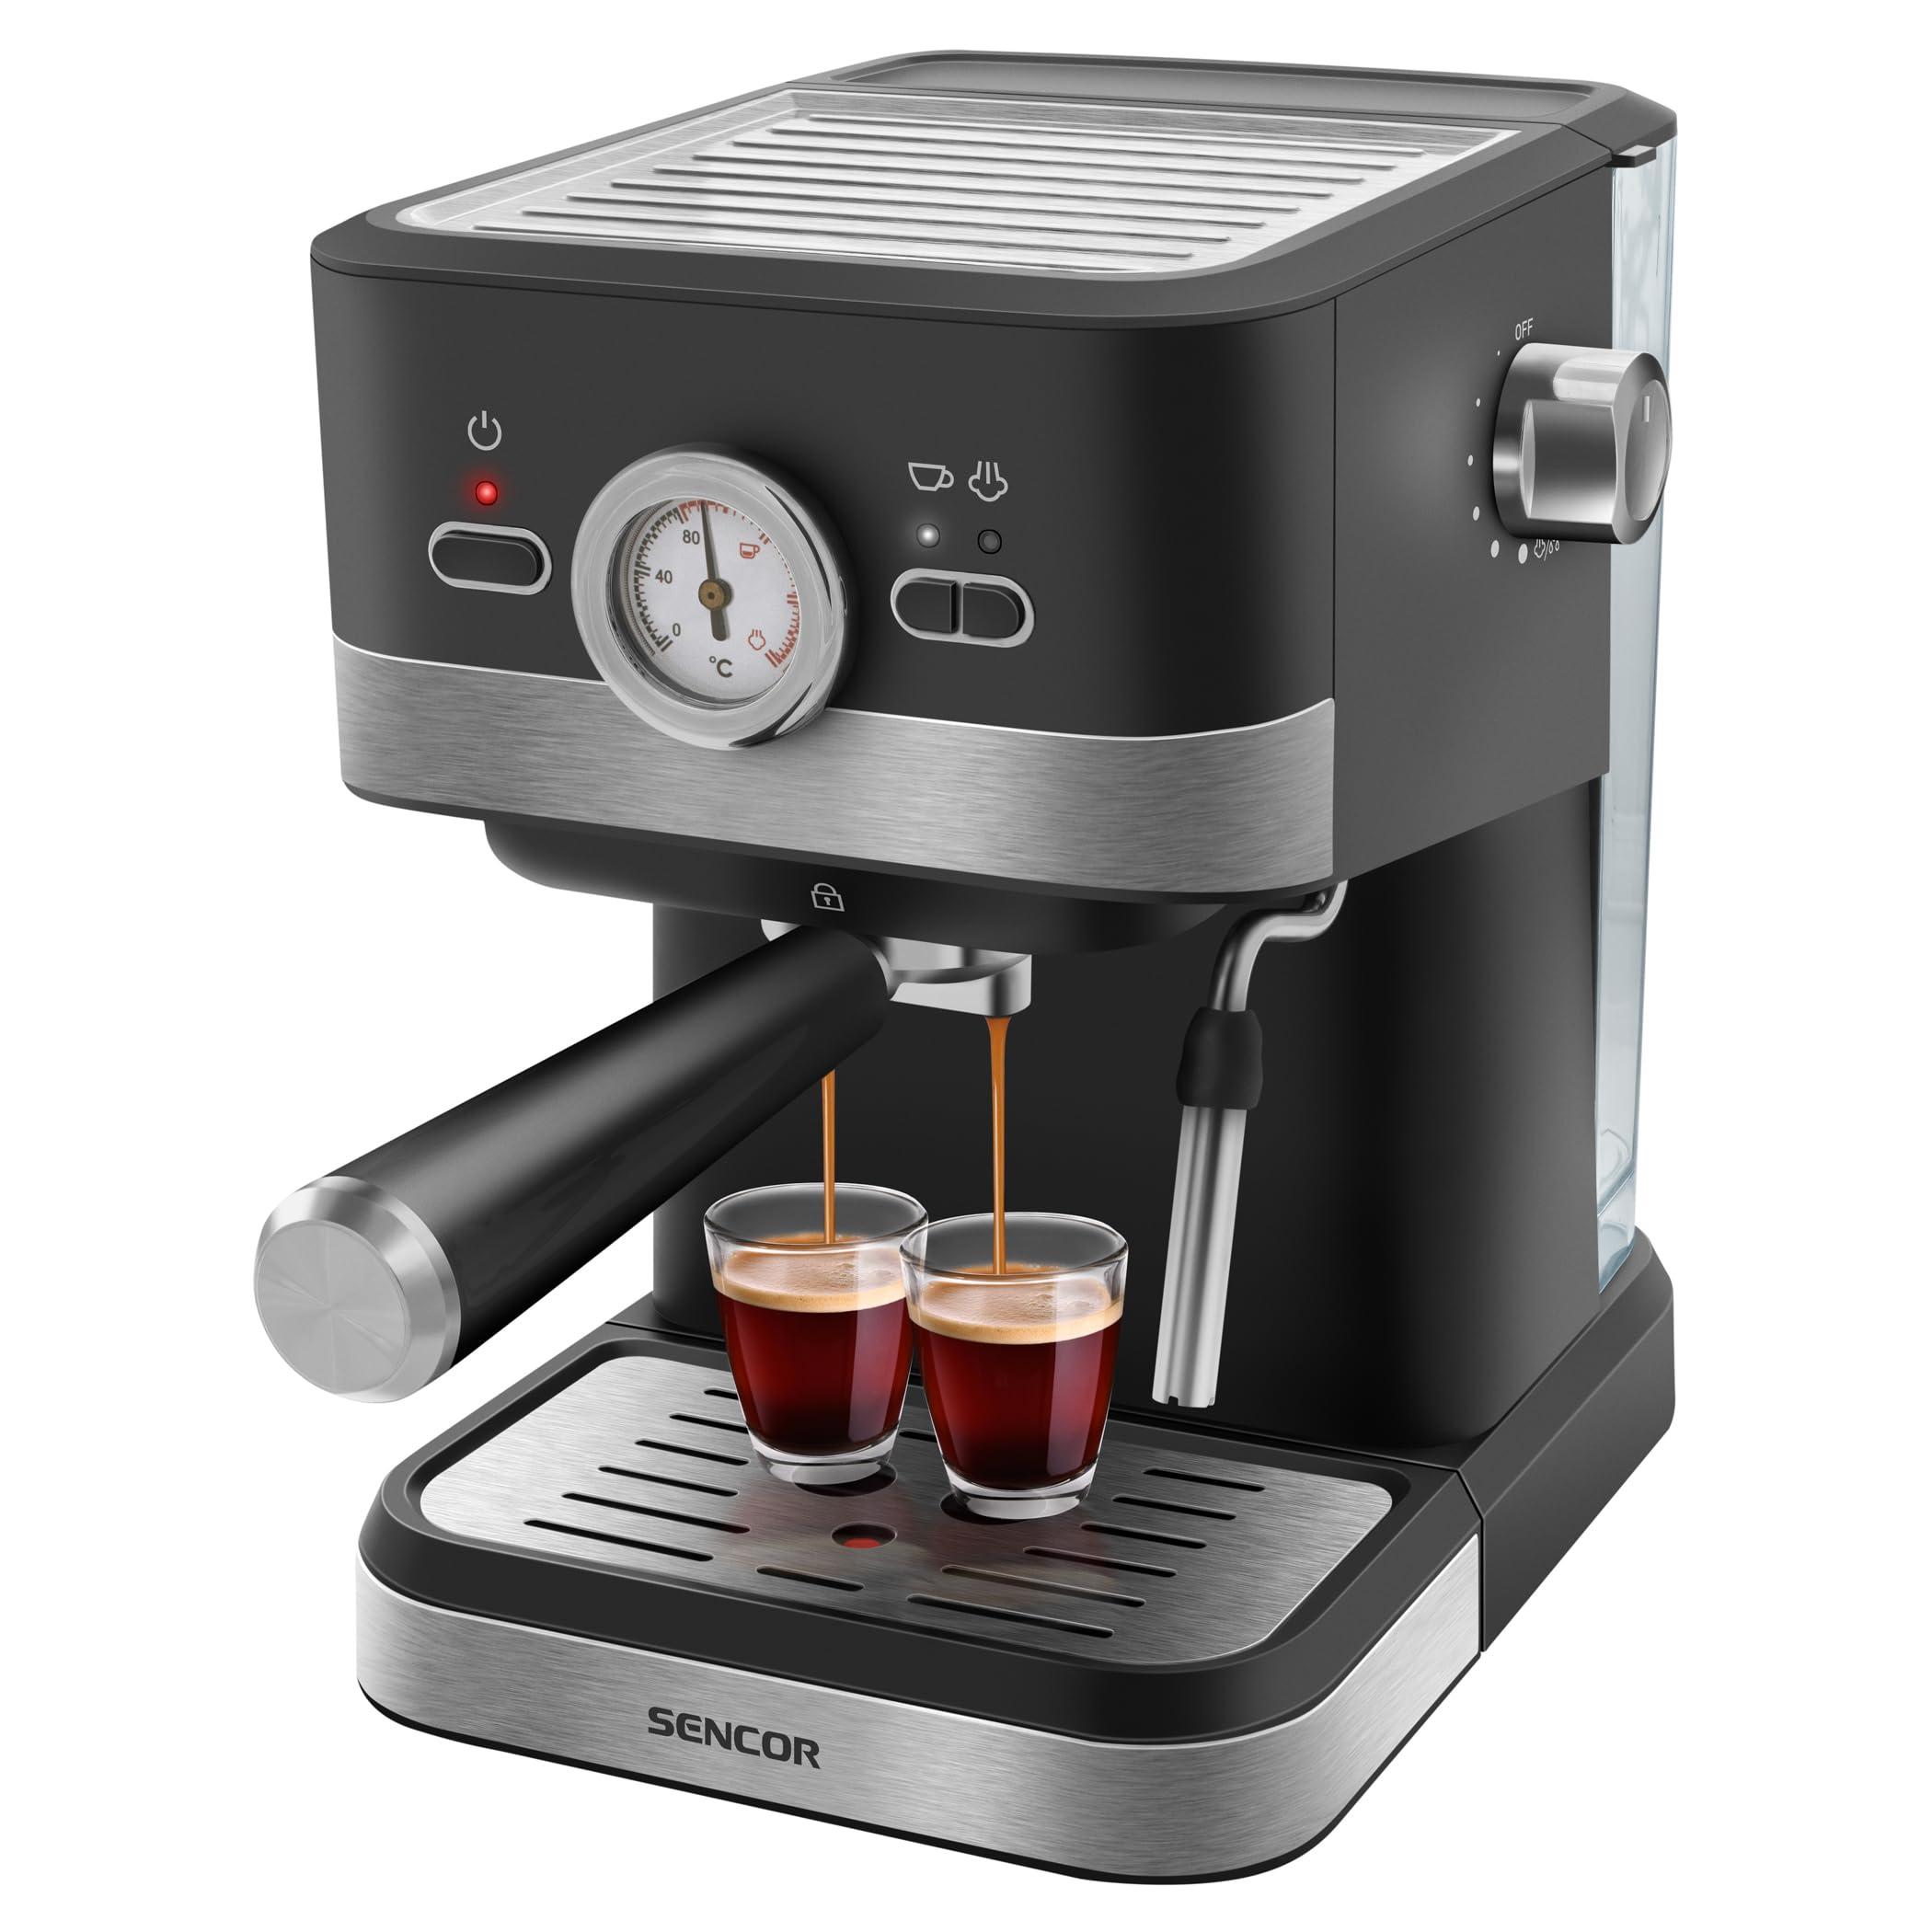
Pilt: The SENCOR SES 1721BK coffee maker actively brewing two shots of espresso into glass cups.
Piima vahustamine cappuccino/latte jaoks:
- After brewing espresso, ensure the machine is still ON and the temperature gauge is in the steam range.
- Täida roostevabast terasest vahustamiskann umbes kolmandikuni külma piimaga (piima- või taimepiimaga).
- Asetage auruotsik piima pinna alla.
- Turn the function dial to the steam position. Steam will begin to release.
- Lower the pitcher slightly to introduce air into the milk, creating foam. Move the pitcher up and down gently.
- Once the milk has doubled in volume and reached the desired temperature (around 60-70°C), turn the function dial back to the standby position.
- Pühkige auruotsik koheselt puhtaksamp lapiga, et vältida piimajääkide kuivamist.
- Pour the frothed milk over your freshly brewed espresso to create a cappuccino or latte.

Pilt: A hand holding a frothing pitcher under the steam wand of the SENCOR SES 1721BK coffee maker, demonstrating milk frothing.
Puhastamine ja hooldus
Regulaarne puhastamine tagab optimaalse jõudluse ja pikendab kohvimasina eluiga.
Igapäevane koristamine:
- Portafilter ja filtrid: After each use, remove the portafilter, discard coffee grounds, and rinse thoroughly under running water.
- Tilgutusalus: Tühjendage ja loputage tilgaalust iga päev. See on hõlpsaks puhastamiseks eemaldatav.
- Auruvarras: Kohe pärast piima vahustamist pühkige auruotsikut niiske lapiga.amp cloth. Briefly release steam to clear any internal milk residue.
- Veepaak: Empty and rinse the water tank daily, refilling with fresh water for each use.
- Välimus: Pühkige masina välispindu pehme lapiga.amp riie. Ärge kasutage abrasiivseid puhastusvahendeid ega lahusteid.
Katlakivi eemaldamine:
Over time, mineral deposits (limescale) can build up in the machine, affecting performance. Descale your coffee maker every 2-3 months, or more frequently if you have hard water.
- Valmista katlakivi eemaldamise lahus vastavalt katlakivi eemaldaja tootja juhistele (või kasuta valge äädika ja vee segu vahekorras 1:1).
- Täitke veepaak katlakivieemalduslahusega.
- Place a large container under the brewing head and steam wand.
- Lülitage masin sisse ja laske sel soojeneda.
- Run half of the solution through the brewing head by turning the function dial to the coffee brewing position.
- Turn the function dial to the steam position and release steam through the wand until half of the remaining solution is used.
- Lülitage masin välja ja laske sel 15-20 minutit seista.
- Repeat steps 5-7 with the remaining solution.
- Empty the water tank, rinse it thoroughly, and refill with fresh water.
- Run several tanks of fresh water through both the brewing head and steam wand to rinse out any descaling solution residue.
Veaotsing
| Probleem | Võimalik põhjus | Lahendus |
|---|---|---|
| Kohvi ei voola välja. | Veepaak tühi; kohv on liiga peeneks jahvatatud või liiga jahvatatudamped; machine not primed; clogged filter. | Fill water tank; use coarser grind or less pressure when tamping; prime the machine; clean the filter and portafilter. |
| Coffee flows too quickly/weak coffee. | Liiga jämedalt või alajahvatatud kohvamped; insufficient coffee grounds. | Use finer grind or tamp more firmly; use correct amount of coffee grounds. |
| Auruotsikust ei tule auru. | Auruotsak on ummistunud; masin pole aurutemperatuurini soojenenud. | Clean steam wand nozzle; wait for temperature gauge to reach steam range. |
| Masinast lekib vett. | Veepaak pole õigesti paigas; tilgaalus on täis; tihendid on kulunud. | Ensure water tank is properly seated; empty drip tray; contact customer support if seals are suspected. |
| Masin ei lülitu sisse. | Pole vooluvõrku ühendatud; toitelüliti välja lülitatud; toide välja lülitatudtage. | Check power connection; ensure power switch is ON; check household power supply. |
If you encounter problems not listed here, or if the suggested solutions do not resolve the issue, please contact SENCOR customer support.
Tehnilised andmed
| Kaubamärk | SENSOR |
| Mudeli nimi | SES 1721BK |
| Kauba mudeli number | SEC 2100BK |
| Tüüp | Espresso & Cappuccino Coffee Maker |
| Kohvi sisendi tüüp | Jahvatatud kohv |
| Töörežiim | Käsiraamat |
| Voltage | 230 volti |
| Materjal | Plastic (with Brushed Stainless Steel Accents) |
| Värv | Must |
| Toote mõõtmed (P x L x K) | 32.5S x 32.5L x 21.5K sentimeetrit |
| Kauba kaal | 3 kg 200 g |
| Erifunktsioon | Removable Tank, Temperature Gauge, Water Volume Indicator, Anti-Slip Base |
| Kaasatud komponendid | Filter Holder, Measuring Scoop, 1-2 Cup Filters |
Garantii ja tugi
Garantii teave:
Your SENCOR SES 1721BK Espresso & Cappuccino Coffee Maker is covered by a manufacturer's warranty. Please refer to the warranty card included with your product for specific terms, conditions, and duration. Retain your proof of purchase for warranty claims.
Klienditugi:
For technical assistance, service, or spare parts, please contact SENCOR customer support. Contact details can typically be found on the SENCOR official webveebilehel või toote pakendil.


