1. Sissejuhatus
The OSRAM Door LED is a versatile, battery-operated luminaire designed for both indoor and outdoor use. It features an integrated light and motion sensor for automatic illumination, providing targeted downward lighting. Its robust, weather-resistant design and easy installation make it suitable for various applications.
Peamised omadused:
- Valguse väljund: 40 lm, 4000K cool white light, downward emission.
- Paindlikkus: Cordless operation with 3 AA batteries (included).
- Vastupidavus: High-quality polycarbonate housing with IP54 protection rating, resistant to weather and impact.
- Andur: Integrated passive infrared (PIR) motion and light sensor for automatic activation in darkness upon motion detection.
- Paigaldamine: Easy and quick mounting with included accessories (screws or adhesive).
2. Ohutusalane teave
Enne toote kasutamist lugege hoolikalt kõiki ohutusjuhiseid. Hoidke see juhend alles edaspidiseks kasutamiseks.
- This product is not a toy. Do not leave it unattended with children or allow children to use it.
- Not designed to replace conventional lighting in a private household.
- Aku hoiatus: Keep batteries out of reach of children. Ingestion can lead to chemical burns, perforation of soft tissues, and death. Severe burns can occur within 2 hours of ingestion. Seek immediate medical attention.
- Kui patareipesa (kui see on olemas) ei sulgu kindlalt, lõpetage toote kasutamine ja hoidke seda lastele kättesaamatus kohas.
- If you suspect batteries may have been swallowed or placed inside any part of the body, seek immediate medical attention.
- Vältige:
- Maximum ambient temperature exceeding +35 °C.
- Replacing a battery with an incorrect type that may defeat a safeguard (e.g., in the case of some lithium battery types).
- Operating at altitudes above 2000 m.
- Disposing of a battery into fire or a hot oven, or mechanically crushing or cutting a battery, which can result in an explosion.
3. Pakendi sisu
Enne paigaldamist veenduge, et kõik komponendid on olemas:
- 1x OSRAM Door LED Down Sensor 4000K White Luminaire
- 3x AA patareid
- Mounting accessories (screws, adhesive)
4. Tehnilised andmed
| Funktsioon | Spetsifikatsioon |
|---|---|
| Mudeli number | 4099854531439 |
| Mõõdud (P x L x K) | 10.3 cm x 9.2 cm x 3.7 cm |
| Kaal | 154 grammi |
| Hele Värv | Cool White (4000K) |
| Valgusvoog | 40 lm |
| Energiatarve | 0.95W |
| Toiteallikas | 3x AA Batteries (DC) |
| Kaitse reiting | IP54 (veekindel) |
| Materjal | Polükarbonaat (PC) |
| Lüliti tüüp | Liikumisandur |
| Ühenduvusprotokoll | Infrapuna |
| Töötemperatuur | Max +35 °C |
| Töökõrgus | Maksimaalselt 2000 m |
| Rakendused | Indoor/Outdoor, Entrances, Hallways, Patios, Balconies |
For detailed technical information, please refer to the official product page or contact OSRAM support.
5. Seadistamine ja installimine
The OSRAM Door LED is designed for quick and flexible installation. It can be mounted using screws or adhesive.
5.1. Aku paigaldamine
- Locate the battery compartment on the back of the luminaire.
- Avage patareipesa kaas.
- Sisestage 3 AA patareid, tagades õige polaarsuse (+/-).
- Securely close the battery compartment cover. Ensure it clicks into place to maintain IP54 rating.

Figure 1: Technical diagram illustrating battery insertion and product dimensions.
5.2. Paigaldusvalikud
Choose a mounting location that provides optimal coverage for the motion sensor and desired illumination area. Consider entrances, hallways, patios, or balconies.
Variant A: Kruvidega kinnitamine
- Hold the luminaire against the desired mounting surface and mark the screw holes.
- Drill pilot holes if necessary, suitable for the provided screws.
- Secure the luminaire to the surface using the provided screws.
Option B: Adhesive Mounting
- Clean the mounting surface thoroughly to ensure it is free of dust, grease, and moisture.
- Apply the provided adhesive to the back of the luminaire.
- Press the luminaire firmly against the desired surface for the recommended duration (refer to adhesive instructions if separate).

Figure 2: Product dimensions for mounting reference.

Joonis 3: näitample of the Door LED installed above an entrance, providing downward illumination.

Figure 4: The Door LED installed on an outdoor ceiling, demonstrating its discreet profile.
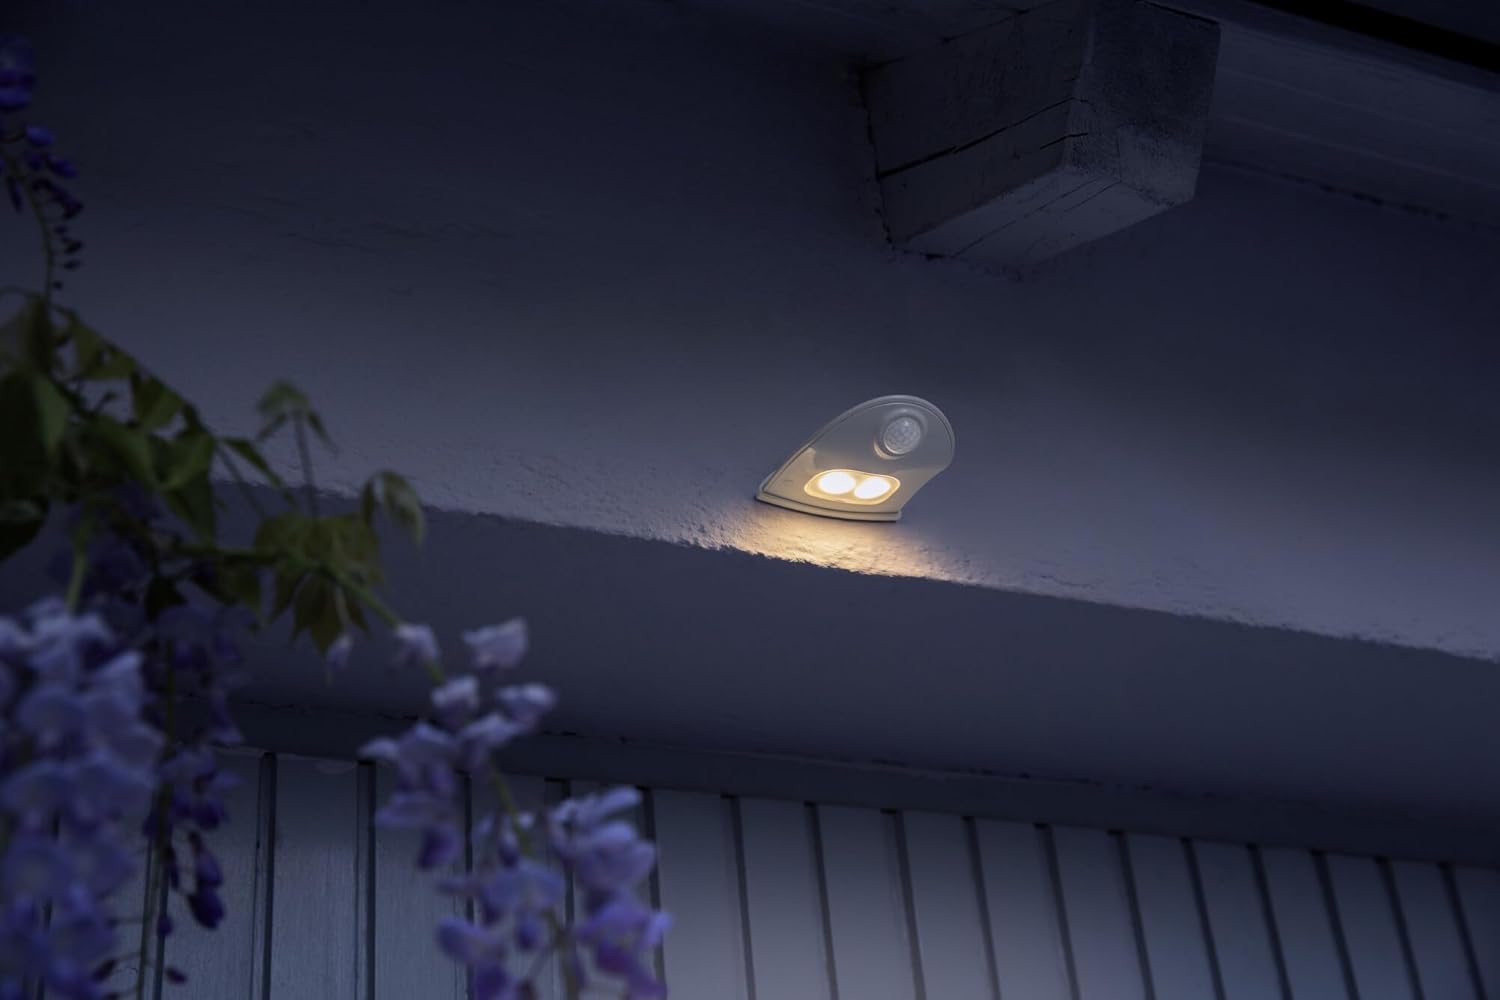
Figure 5: Close-up side view of the Door LED on a wall, highlighting the integrated motion sensor.
6. Kasutusjuhised
The OSRAM Door LED operates automatically using its integrated motion and light sensors.
- Automaatne aktiveerimine: The luminaire will automatically turn on when motion is detected in its sensing range and the ambient light level is low (darkness).
- Anduri vahemik: The passive infrared (PIR) sensor detects movement within its field of view. Ensure the sensor is not obstructed.
- Deaktiveerimine: The light will turn off automatically after a short delay once no motion is detected and sufficient ambient light is present, or after a preset duration if in darkness.

Figure 6: The Door LED providing illumination on a staircase upon detecting movement.

Figure 7: The Door LED used as a night light in a child's room, demonstrating its versatility.
7. Hooldus
7.1. Aku vahetamine
When the light output diminishes or the device stops responding, it is time to replace the batteries.
- Avage patareipesa, nagu on kirjeldatud punktis 5.1.
- Eemaldage vanad patareid ja utiliseerige need vastutustundlikult vastavalt kohalikele eeskirjadele.
- Sisestage 3 uut AA-patareid, jälgides õiget polaarsust.
- Sulgege akupesa kaas kindlalt.
Märkus. Always use high-quality AA batteries for optimal performance and longevity.
7.2. Puhastamine
To maintain the appearance and functionality of your luminaire:
- Pühkige välispinda pehme, damp riie.
- Do not use abrasive cleaners or solvents, as these can damage the polycarbonate housing.
- Ensure the motion sensor lens is clean and free of obstructions for proper operation.
8. Veaotsing
| Probleem | Võimalik põhjus | Lahendus |
|---|---|---|
| Valgus ei lülitu sisse. | Tühjad või valesti paigaldatud patareid. | Kontrollige patareide polaarsust ja vajadusel vahetage patareid välja. |
| Valgus süttib päevavalguse ajal. | Valgussensor on takistatud või vigane. | Ensure the light sensor is clean and not covered. Relocate if ambient light is insufficient. |
| Liikumisandur ei tuvasta liikumist. | Andur on takistatud või leviulatusest väljas. | Clear any obstructions from the sensor. Adjust mounting position for optimal coverage. |
| Valgus väreleb või on hämar. | Aku tühi. | Vahetage patareid välja. |
Kui probleem pärast nende lahenduste proovimist püsib, võtke ühendust klienditoega.
9. Garantii ja tugi
For warranty information and customer support, please refer to the official OSRAM websaidil või võtke ühendust oma edasimüüjaga.
Interneti-ressursid:
- OSRAM Official Websait: www.osram.com
- LEDVANCE Product Page (Manufacturer): ledvance.com/docs/4099854531439
Toega ühendust võttes palun hoidke käepärast oma toote mudelinumber (4099854531439) ja ostuandmed.