Sissejuhatus
This user manual provides comprehensive instructions for the installation, operation, and maintenance of your Kolink Unity Arena Mid-Tower PC Case. Please read this manual carefully before beginning assembly to ensure proper setup and to maximize the performance and longevity of your system. Keep this manual for future reference.
Toode läbiview
The Kolink Unity Arena is a mid-tower PC case designed for high-performance gaming systems. It features a borderless glass side panel for an unobstructed view of internal components and comes with four pre-installed Kolink Umbra X ARGB/PWM fans for efficient cooling and customizable lighting. The spacious interior supports E-ATX motherboards and large graphics cards up to 420mm, including NVIDIA RTX 40 series. It also accommodates up to three radiators for advanced liquid cooling solutions and includes a dedicated half PSU shroud for clean cable management.

Pilt: Ees-vasak view of the Kolink Unity Arena PC case, showcasing the borderless glass side panel and three pre-installed RGB fans on the front.
- Keskmise torni disain: Optimized for a balance of size and component compatibility.
- Borderless Glass Panels: Provides an uninterrupted view of your internal hardware.
- Extensive Hardware Support: Compatible with E-ATX motherboards and GPUs up to 420mm, including NVIDIA RTX 40 series.
- Täiustatud jahutus: Supports up to three radiators and includes four pre-installed Kolink Umbra X ARGB/PWM fans.
- Dedicated PSU Shroud: A half power supply shroud helps maintain a clean and organized interior.
Tehnilised andmed
| Kaubamärk | Kolink |
| Mudeli nimi | Unity Arena |
| Mudeli number | UNITYARENABLK |
| Värv | Must |
| Juhtumi tüüp | Mid Tower |
| Materjal | Legeerteras |
| Emaplaadi ühilduvus | Laiendatud ATX |
| Eriomadused | RGB Lighting, Pre-installed Fans |
| Ühilduvad seadmed | High-performance gaming components |
| Soovitatavad kasutusalad | Mängimine |
| Toiteallika kinnituse tüüp | Alumine kinnitus |
| Jahutusmeetod | Õhk |
| Ventilaatori suurus | 120 millimeetrit |
Seadistamine ja installimine
Follow these steps to properly set up and install your components into the Kolink Unity Arena PC case.
1. Lahtipakkimine ja ettevalmistamine
- Eemaldage arvuti korpus ettevaatlikult pakendist.
- Asetage ümbris stabiilsele ja tasasele pinnale.
- Identify the accessory box, which contains screws, zip ties, and other small parts.
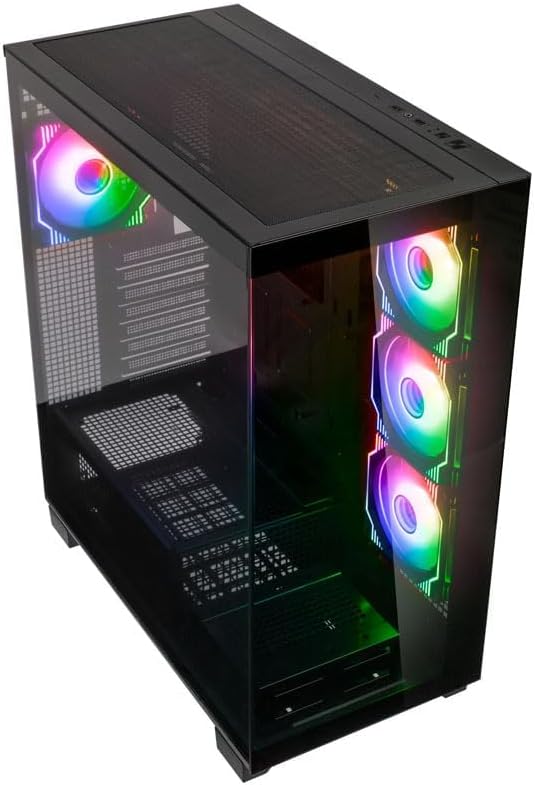
Pilt: Nurga all ülemine esiosa view of the Kolink Unity Arena PC case, highlighting the top ventilation and the illuminated RGB fans visible through the front glass panel.
2. Removing Panels
- Glass Side Panel: The borderless glass side panel is typically secured with thumbscrews at the rear. Unscrew these and carefully slide or lift the panel off. Place it on a soft, non-abrasive surface to prevent scratches.
- Solid Side Panel: The solid right-side panel (behind the motherboard tray) is also usually secured with thumbscrews. Remove these to access the cable management area.
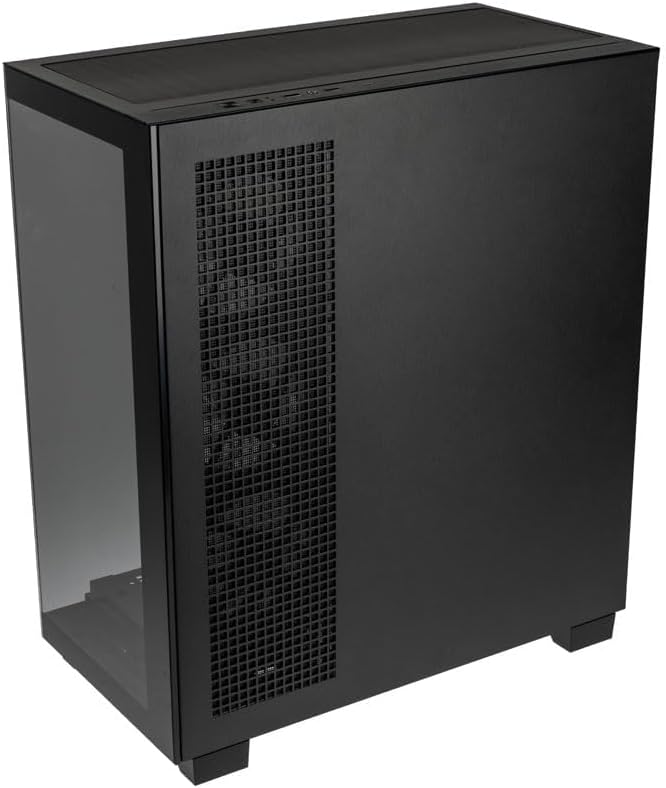
Pilt: Tagumine-parem view of the Kolink Unity Arena PC case, showing the solid right side panel and the rear exhaust fan area.
3. Emaplaadi paigaldamine
- Install the I/O shield (if not pre-attached to your motherboard).
- Align your E-ATX or smaller motherboard with the standoffs inside the case.
- Secure the motherboard with the appropriate screws from the accessory kit.

Pilt: Interjöör view of the Kolink Unity Arena PC case from the front, displaying the motherboard tray, the three front-mounted fans, and the PSU shroud at the bottom.
4. Graafikakaardi (GPU) paigaldamine
- Eemaldage korpuse tagaküljelt vajalikud PCIe pesa katted.
- Sisestage graafikakaart emaplaadi peamisse PCIe-pessa.
- Secure the GPU with screws. The case supports GPUs up to 420mm in length.
5. Storage Device Installation (HDDs/SSDs)
Refer to the case's internal layout for specific drive bay locations and mounting mechanisms. Typically, 2.5" SSDs mount on the back of the motherboard tray, and 3.5" HDDs are installed in a drive cage near the PSU shroud.
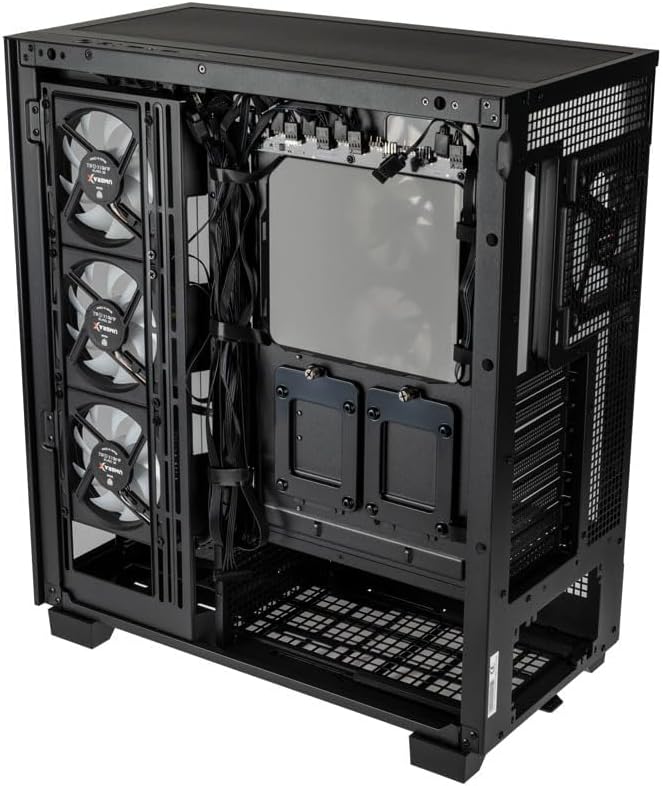
Pilt: Tagumine salong view of the Kolink Unity Arena PC case, focusing on the cable management area behind the motherboard tray and drive mounts.
6. Toiteploki (PSU) paigaldamine
- Mount your ATX power supply into the dedicated half PSU shroud at the bottom rear of the case.
- Kinnitage see korpuse tagaküljelt kruvidega.
7. Ventilaatori ja radiaatori paigaldamine
- The case comes with four pre-installed Kolink Umbra X ARGB/PWM fans.
- Additional fans or radiators can be installed at the top, front, or rear depending on your cooling needs. The case supports up to three radiators.

Pilt: Close-up of the three pre-installed Kolink Umbra X fans mounted at the front of the Kolink Unity Arena PC case, highlighting their design.
8. Connecting Front I/O
Connect the front panel cables (USB, audio, power switch, reset switch, LED indicators) to the corresponding headers on your motherboard. Refer to your motherboard manual for exact header locations.

Pilt: Close-up of the top I/O panel of the Kolink Unity Arena PC case, featuring USB ports, audio jacks, and power/reset buttons.
9. Kaablite haldamine
Kasutage kaablite korrastamiseks emaplaadi sahtli taga olevaid kaablikanalite väljalõikeid ja kinnituspunkte. See parandab õhuvoolu ja esteetikat.
Kasutusjuhised
Sisselülitamine
Once all components are installed and connected, ensure the power supply switch is in the 'ON' position. Press the power button on the front I/O panel to start your system.
RGB valgustuse juhtimine
The pre-installed Kolink Umbra X fans feature ARGB lighting. The case includes a built-in controller with a SATA power input. Connect this controller to your power supply. If your motherboard does not support ARGB control, you can typically manage the lighting effects using the reset button on the front I/O panel, which often doubles as an RGB mode switch when connected to the case's controller.
Hooldus
Regulaarne hooldus aitab tagada optimaalse jõudluse ja pikendab arvuti komponentide eluiga.
- Tolmufiltrid: The Kolink Unity Arena case is equipped with dust filters. Periodically remove and clean these filters (e.g., top, front, bottom) to prevent dust buildup inside the case. Use compressed air or wash them gently with water and allow them to dry completely before reinstallation.
- Salongi puhastamine: With the system powered off and unplugged, carefully open the side panels and use compressed air to remove dust from internal components, especially heatsinks and fan blades.
- Ventilaatori puhastamine: Gently clean the blades of the pre-installed fans with a soft brush or compressed air to maintain efficient airflow.
Veaotsing
Kui kokkupaneku ajal või pärast seda ilmneb probleeme, kaaluge järgmisi levinud tõrkeotsingu samme:
- Süsteem ei lülitu sisse:
- Veenduge, et toitekaabel oleks kindlalt ühendatud nii toiteploki kui ka seinakontaktiga.
- Veenduge, et toiteploki lüliti on asendis „ON”.
- Check all power connections to the motherboard (24-pin ATX, 8-pin CPU) and GPU.
- Confirm the front panel power switch cable is correctly connected to the motherboard header.
- Ventilaatorid ei pöörle / RGB ei tööta:
- Kontrollige ventilaatori toiteühendusi emaplaadi või ventilaatori kontrolleriga.
- Ensure ARGB cables are properly connected to the motherboard's ARGB header or the case's integrated controller.
- If using the case's controller, verify it is receiving SATA power.
- Ekraani väljund puudub:
- Ensure your monitor cable is connected to the graphics card, not the motherboard's integrated graphics port (unless you are using integrated graphics).
- Paigaldage graafikakaart uuesti PCIe-pessa.
- Check GPU power connections.
Garantii ja tugi
For warranty information, please refer to the documentation provided with your purchase or contact your retailer. Kolink's official website may also provide details regarding product support and warranty terms.
- Varuosade saadavus: Teave pole saadaval.
- Tarkvarauuendused on garanteeritud kuni: Teave pole saadaval.
For technical assistance or further inquiries, please visit the official Kolink support websaidil või võtke ühendust oma klienditeenindusega.