1. Sissejuhatus
Tänan ostu eestasing the Claiks Electric Standing Desk. This manual provides essential information for the safe assembly, operation, and maintenance of your new desk. Please read these instructions carefully before use and retain them for future reference.

Image 1.1: The Claiks Electric Standing Desk, illustrating its dimensions (120cm width, 60cm depth, 72-118cm height) and integrated features like storage hooks and cable clips.
2. Ohutusalane teave
Ohutu töö tagamiseks ja vigastuste või kahjustuste vältimiseks järgige järgmisi ohutusjuhiseid:
- Hoidke lapsed ja lemmikloomad laua kõrguse reguleerimise ajal lauast eemal.
- Veenduge, et laua liikumise teel (üles või alla) ei oleks takistusi.
- Do not overload the desk. The maximum load capacity is 80 kg (176.4 lbs).
- Ärge istuge ega seiske laual.
- Kasutage ainult kaasasolevat toiteadapterit ja kaablit.
- If the desk makes unusual noises or movements, discontinue use immediately and contact customer support.
- Vältige vedelike asetamist otse juhtpaneelile või elektriliste komponentide lähedusse.
3. Pakendi sisu
Before assembly, verify that all components are present and undamaged. If any parts are missing or damaged, please contact Claiks customer support.

Image 3.1: All components included in the Claiks Electric Standing Desk package, laid out for assembly. This includes the tabletop (in two sections), leg frames, motor, control panel, screws, and tools.
Komponentide loend:
- Tabletop (2 sections)
- Jalaraamid (2)
- Crossbar/Support Beam
- Motor and Control Box
- Juhtpaneel
- Toiteadapter ja kaabel
- Hoiukonksud (2)
- Kaabliklambrid
- Monteerimisdetailid (kruvid, seibid, kuuskantvõti)
4. Seadistamine ja kokkupanek
Assembly typically requires one person. An electric drill (not included) is recommended for faster and more secure screw fastening, especially for the tabletop.
- Pakkige komponendid lahti: Eemaldage kõik osad ettevaatlikult pakendist ja asetage need puhtale ja pehmele pinnale, et vältida kriimustusi.
- Jalaraamide kokkupanek: Attach the feet to the bottom of each leg column using the provided screws.
- Ühenda risttala: Secure the crossbar/support beam between the two leg columns. Ensure all screws are tightened.
- Attach Motor and Control Box: Mount the motor and control box to the designated positions on the frame, typically under the tabletop area. Connect the motor cables to the control box.
- Lauapealne positsioon: Place the tabletop sections upside down on a soft surface. Carefully align the assembled frame onto the tabletop.
- Turvaline lauaplaat: Fasten the tabletop to the frame using the provided screws. Ensure the tabletop sections are flush and securely joined.
- Juhtpaneeli installimine: Mount the control panel to the front edge of the tabletop, typically on the right side, and connect its cable to the control box.
- Lisatarvikud: Install the storage hooks and cable clips as desired.
- Ühendage toide: Ühendage toiteadapter juhtpaneeliga ja seejärel seinakontakti.
- Esialgne kalibreerimine (vajadusel): Refer to the operating instructions for initial setup or calibration steps if the desk does not respond immediately.
5. Kasutusjuhised
Your Claiks Electric Standing Desk features intuitive controls for height adjustment and memory functions.

Image 5.1: The multi-function control panel with LED display, memory buttons (1, 2, 3), and up/down adjustment buttons.
5.1 Kõrguse reguleerimine
- Üles/alla nupud: Kasutage Üles (▲) ja Alla (▼) arrow buttons to adjust the desk height. The desk will move smoothly at a speed of 20 mm/s.
- The adjustable height range is from 72 cm (28.3 inches) to 118 cm (46.5 inches).
- The current height is displayed on the LED screen.
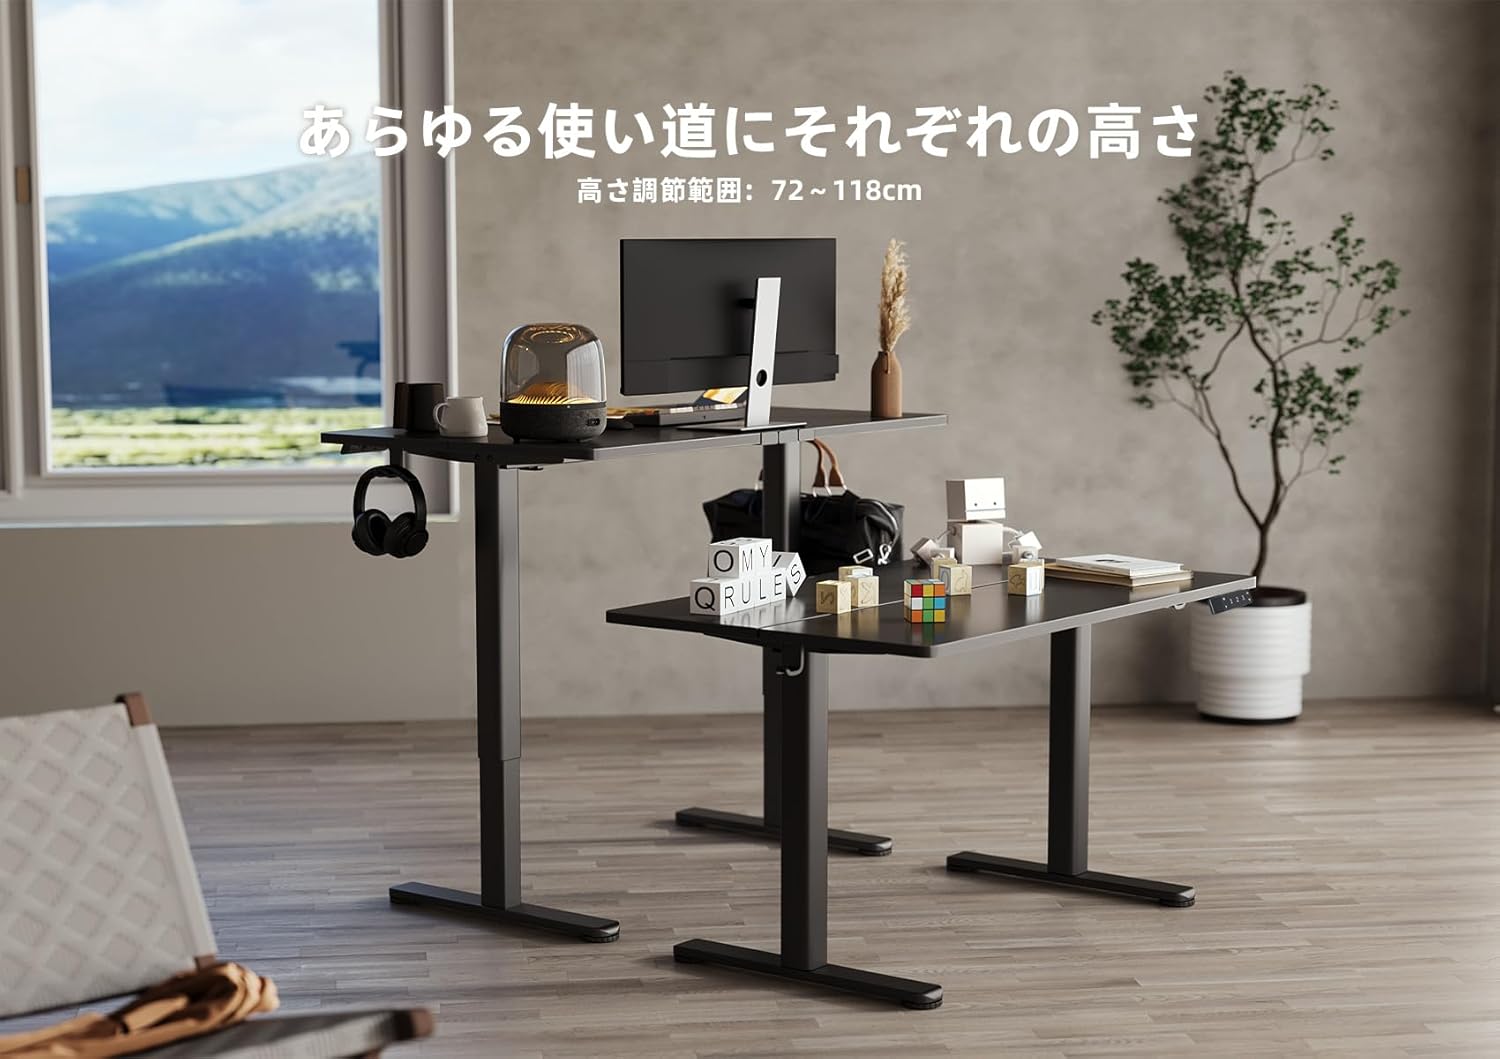
Image 5.2: Two Claiks Electric Standing Desks demonstrating the adjustable height range, suitable for various uses.
5.2 Mälufunktsioon
The desk can store up to three preferred height settings.
- Mälupositsiooni määramine: Reguleerige laua kõrgust üles/alla nuppude abil soovitud kõrgusele.
- Vajutage nuppu "M" button. The LED display will flash.
- 3 sekundi jooksul vajutage ühte numbrinuppudest ("1", "2", või "3") to save the current height to that position. The display will show "S-1", "S-2", or "S-3" to confirm.
- Mälupositsiooni meeldetuletamine: Lihtsalt vajutage vastavat numbrinuppu ("1", "2", või "3"). Laud liigub automaatselt salvestatud kõrgusele.
6. Hooldus
Proper maintenance ensures the longevity and optimal performance of your Claiks Electric Standing Desk.
- Puhastamine: The tabletop is made of melamine resin, which is resistant to water, heat, and dirt. Wipe the surface with a soft, damp lapiga ja õrna pesuvahendiga. Vältige abrasiivseid puhastusvahendeid või tugevatoimelisi kemikaale.
- Kaabli haldamine: Regularly check and organize cables to prevent tangling or damage, especially during height adjustments. Use the provided cable clips.
- Ülevaatus: Kontrollige regulaarselt kõiki kruvisid ja ühendusi, et need oleksid kindlalt kinni. Vajadusel pingutage uuesti.
- Mootori hooldus: The motor is designed for durability. Avoid obstructing its movement or attempting to disassemble it.
7. Veaotsing
Kui teil tekib lauaga probleeme, vaadake järgmisi levinud probleeme ja lahendusi.
| Probleem | Võimalik põhjus | Lahendus |
|---|---|---|
| Laud ei liigu. | Toitekaabel lahti ühendatud; ülekoormus; mootori viga. | Check power connections. Reduce weight on desk. Unplug for 10 seconds, then plug back in to reset. |
| Laud liigub ebaühtlaselt või teeb ebatavalist häält. | Lahtised ühendused; Takistus; Ebaühtlane kaalujaotus. | Check all assembly screws. Ensure no objects are interfering with leg movement. Redistribute weight evenly. |
| Juhtpaneelil kuvatakse veakood. | Spetsiifiline süsteemiviga. | Refer to the specific error code in a more detailed troubleshooting guide (if available) or contact customer support. Often, a power cycle (unplug and replug) can resolve temporary errors. |
If the problem persists after attempting these solutions, please contact Claiks customer support for assistance.
8. Tehnilised andmed
- Kaubamärk: Claiks
- Mudeli number: P1.01.001.0004.JP
- Toote mõõtmed: 120 cm (Width) x 60 cm (Depth) x 70 cm (Height, minimum static)
- Reguleeritav kõrgusvahemik: 72 cm - 118 cm (28.3 inches - 46.5 inches)
- Tõstekiirus: 20 mm/s (0.8 inches/s)
- Maksimaalne kandevõime: 80 kg (176.4 naela)
- Kauba kaal: 20.8 kg
- Laua materjal: Melamine Resin
- Alusmaterjal: Süsinikteras
- Värv: Must
- Eriomadused: Height Adjustment, Memory Function (3 presets), Compact, Scratch Resistant
- Ruumi tüüp: Study Room, Home Office

Image 8.1: The Claiks Electric Standing Desk demonstrating its robust 80kg load capacity.

Image 8.2: Illustration of the desk's quiet operation, comparing its 45dB noise level to common sounds.
9. Garantii ja tugi
Claiks provides a 3-aastane tootjagarantii for this product. This warranty covers repairs or exchanges for manufacturing defects during the warranty period.
For customer support, repairs, or exchanges, please contact Claiks directly. Our customer support team is available in multiple languages, including English and Japanese, to assist you with any inquiries or issues.
Garantiinõuete esitamiseks säilitage ostutõend.


