1. Sissejuhatus
Thank you for choosing the Faber Drip Coffee Machine Model 131.0695.374. This manual provides essential information for the safe and effective use, maintenance, and troubleshooting of your new coffee machine. Please read these instructions carefully before first use and retain them for future reference.
2. Olulised ohutusjuhised
Elektriseadmete kasutamisel tuleb alati järgida põhilisi ohutusnõudeid, et vähendada tulekahju, elektrilöögi ja kehavigastuste ohtu. Nende hulka kuuluvad:
- Enne seadme kasutamist lugege läbi kõik juhised.
- Ärge puudutage kuumi pindu. Kasutage käepidemeid või nuppe.
- Tulekahju, elektrilöögi ja kehavigastuste vältimiseks ärge kastke juhet, pistikut ega seadet vette ega muusse vedelikku.
- Hoolikas järelevalve on vajalik, kui seadet kasutavad lapsed või nende läheduses.
- Eemaldage pistik pistikupesast, kui seda ei kasutata ja enne puhastamist. Laske jahtuda enne osade peale panemist või eemaldamist ning enne seadme puhastamist.
- Ärge kasutage ühtegi seadet kahjustatud juhtme või pistikuga või pärast seda, kui seade on tõrgeteta või on mingil viisil kahjustatud.
- Seadme tootja poolt soovitamata tarvikute kasutamine võib põhjustada tulekahju, elektrilöögi või inimeste vigastusi.
- Ärge kasutage õues.
- Ärge laske juhtmel üle laua või leti serva rippuda ega kuumade pindadega kokku puutuda.
- Ärge asetage kuuma gaasi- või elektripliidi peale ega lähedusse ega kuumutatud ahju.
- Ühendage pistik alati esmalt seadme külge ja seejärel ühendage juhe seinakontakti. Ühenduse katkestamiseks keerake mis tahes juhtnupp asendisse "väljas", seejärel eemaldage pistik seinakontaktist.
- Ärge kasutage seadet muul kui ettenähtud otstarbel.
- Kuuma auru äraviskamisel tuleb olla äärmiselt ettevaatlik.
- The appliance features dry heat protection for safe usage during accidental dry operation.
3. Toote lõppview
Familiarize yourself with the components of your Faber Drip Coffee Machine.

- Ülemine kaas: Protects the water reservoir and filter area.
- Veemõõtur: Indicates the water level in the reservoir.
- Soojendusplaat: Hoiab keedetud kohvi soojana kuni 30 minutit.
- Coffee Filter Basket: Holds the ground coffee during brewing. This component is removable for cleaning.
- Käepide: Ergonomically designed for safe handling of the carafe.
- Klaaskarahvin: Collects the brewed coffee. Capacity is 0.6 liters (approximately 4 big cups).
- Toitelüliti: Masina sisse- ja väljalülitamiseks.
4. Seadistamine ja esmakordne kasutamine
4.1 Lahtipakkimine
Carefully remove all packaging materials and check that all parts are present and undamaged. Dispose of packaging responsibly.
4.2 Esmane puhastamine
Before first use, clean all removable parts (carafe, filter basket) with warm, soapy water. Wipe the exterior of the machine with a damp riie. Ärge kastke põhiseadet vette.
4.3 Esimene pruulimistsükkel (puhastamine)
Sisemiste komponentide puhastamiseks tehke üks keedutsükkel ainult veega:
- Fill the water reservoir with clean water up to the maximum level indicated by the water gauge.
- Place the empty filter basket into its position. Do not add coffee.
- Asetage tühi klaaskann soojendusplaadile.
- Plug the machine into a power outlet and press the power switch to start the brewing cycle.
- Allow the cycle to complete. Discard the hot water from the carafe.
- Repeat this process once or twice to ensure thorough cleaning.

5. Kasutusjuhised
5.1 Kohvi keetmine
Kohvi valmistamiseks järgige neid samme:
- Ensure the machine is unplugged and cooled if previously used.
- Open the top cover and fill the water reservoir with fresh, cold water using the glass carafe. Refer to the water gauge for desired cup markings. Do not exceed the maximum fill line.
- Place the removable filter basket into its designated slot.
- Add ground coffee into the filter basket. Use approximately one level scoop (provided) per cup, adjusting to your taste.
- Sulgege ülemine kaas kindlalt.
- Place the empty glass carafe onto the warming plate. Ensure it is correctly positioned to activate the drip-stop mechanism.
- Ühendage toitejuhe sobivasse pistikupessa.
- Press the power switch to begin brewing. The indicator light will illuminate.
- Brewing typically takes less than 6 minutes. Once brewing is complete, the machine will automatically switch to the warming function.
- The warming plate will keep the coffee warm for approximately 30 minutes. After this period, the machine will automatically shut off.


6. Hooldus ja puhastamine
Regulaarne puhastamine tagab optimaalse jõudluse ja pikendab kohvimasina eluiga.
6.1 Igapäevane koristamine
- Kann ja filtrikorv: After each use, remove the glass carafe and filter basket. Wash them in warm, soapy water. Rinse thoroughly and dry. These parts are not dishwasher safe.
- Välimus: Pühkige kohvimasina välispindu pehme lapiga.amp riie. Ärge kasutage abrasiivseid puhastusvahendeid ega küürimislappe.
- Soojendusplaat: Pühkige soojendusplaat reklaamigaamp riie. Ärge kasutage abrasiivseid materjale.

6.2 Katlakivi eemaldamine
Mineral deposits from water can build up in your coffee machine over time, affecting performance. Descale your machine every 2-3 months, or more frequently if you have hard water.
- Valmista katlakivi eemaldamise lahus vastavalt tootja juhistele (nt valge äädikas ja vesi või kaubanduslik katlakivi eemaldamise vahend).
- Valage lahus veemahutisse.
- Place the empty filter basket and carafe.
- Käivita pruulimistsükkel.
- Pärast tsüklit laske masinal 15–30 minutit seista.
- Run several cycles with clean water to rinse out any remaining descaling solution.
7. Veaotsing
Levinud probleemide ja nende lahenduste kohta vaadake allolevat tabelit.
| Probleem | Võimalik põhjus | Lahendus |
|---|---|---|
| Kohv ei tule valmis. | Machine not plugged in; Power switch off; No water in reservoir. | Ensure power cord is securely plugged in; Turn power switch on; Fill water reservoir. |
| Kohv on liiga nõrk. | Insufficient coffee grounds; Coarse grind; Too much water. | Add more coffee grounds; Use a finer grind; Use less water. |
| Kohv voolab filtrikorvist üle. | Too much coffee grounds; Filter basket not seated correctly; Clogged filter. | Reduce coffee grounds; Ensure filter basket is properly seated; Clean or replace filter. |
| Masina lekib. | Carafe not positioned correctly; Water reservoir overfilled. | Ensure carafe is centered on warming plate; Do not exceed max fill line in water reservoir. |
| Kohv ei ole piisavalt kuum. | Warming plate not active; Descaling needed. | Ensure machine is on and warming plate is active; Descale the machine. |
8. Tehnilised andmed
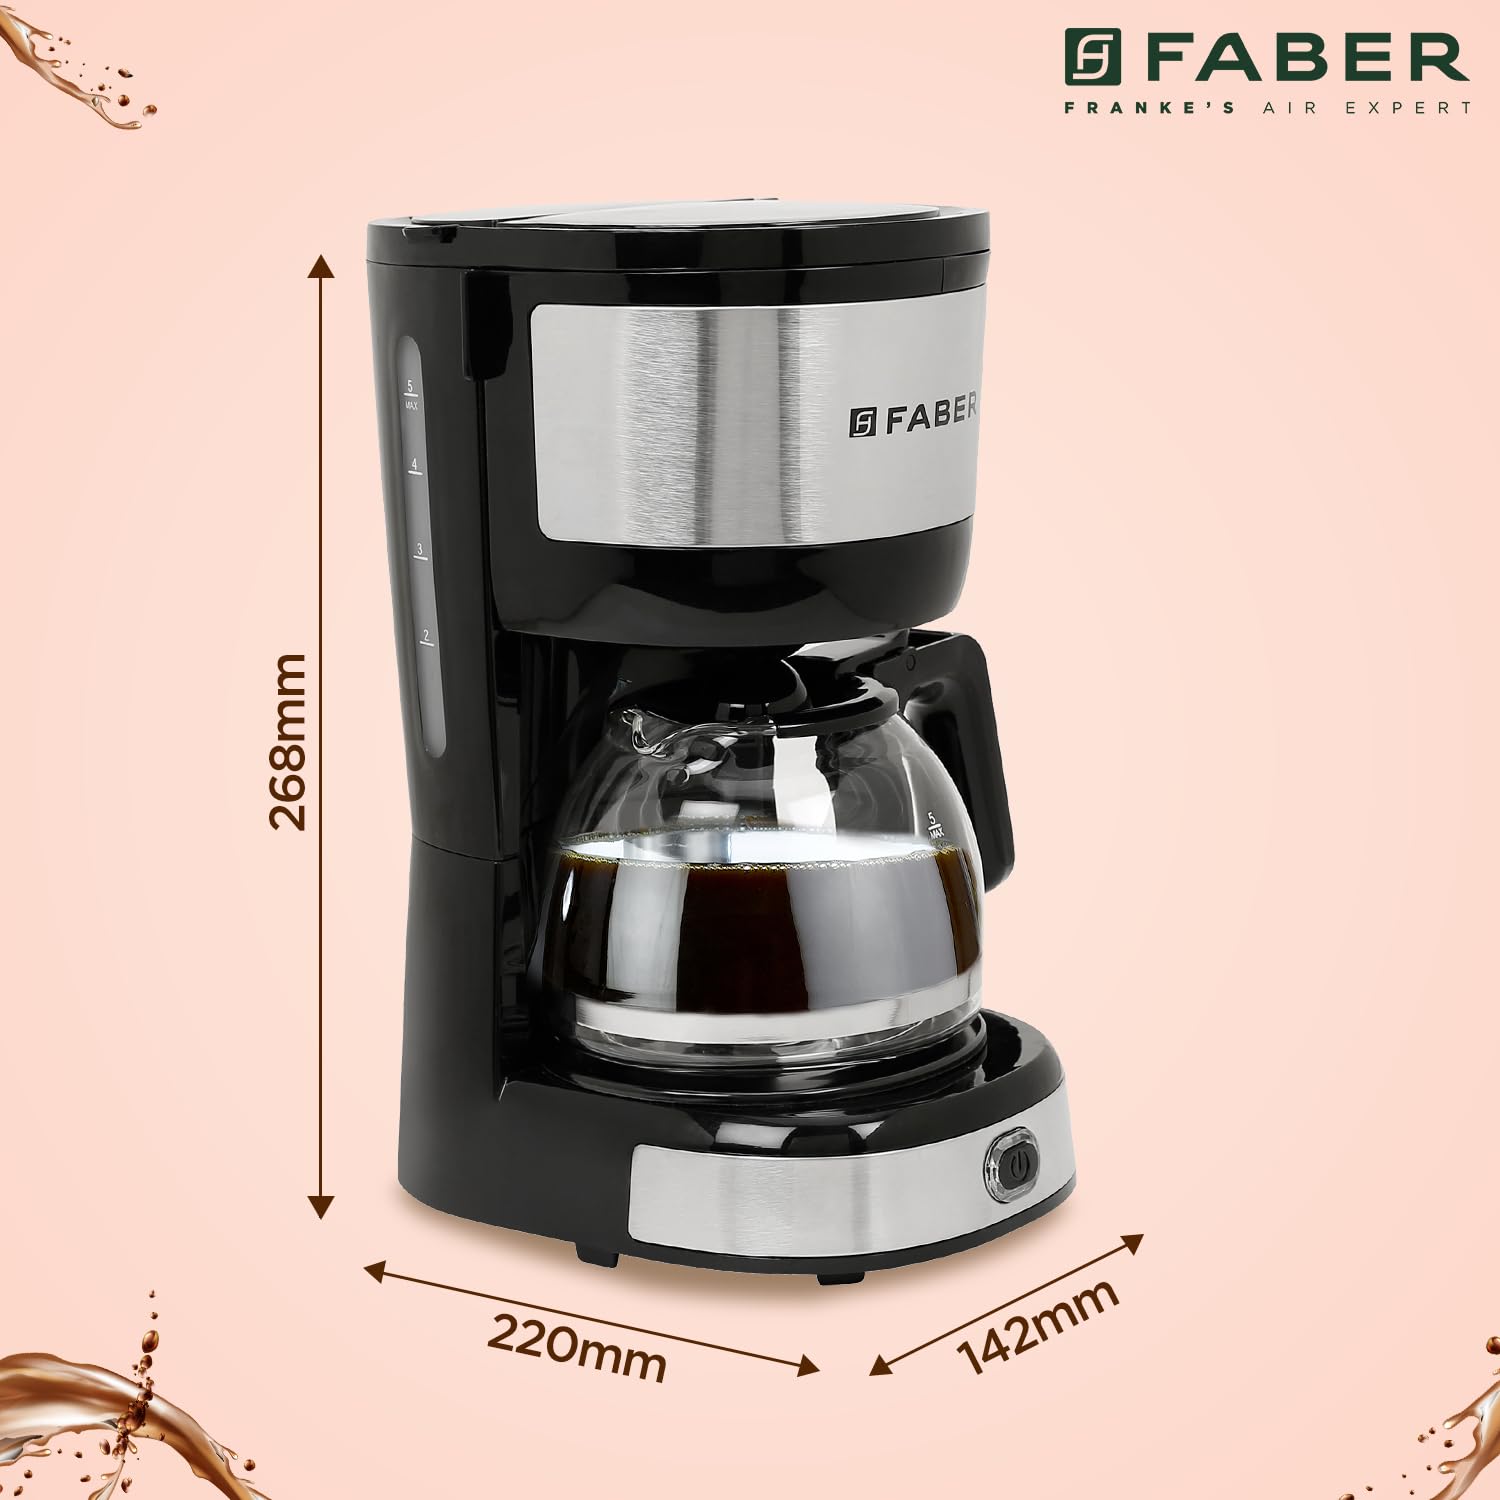
Key technical specifications for the Faber Drip Coffee Machine Model 131.0695.374:
| Funktsioon | Spetsifikatsioon |
|---|---|
| Kaubamärk | Faber |
| Mudeli number | 131.0695.374 |
| Mahutavus | 0.6 Liters (approx. 4 big cups) |
| Võimsus | 800 vatti |
| Värv | Must |
| Kohvimasina tüüp | Tilguti kohvimasin |
| Materjal | Plastik, roostevaba teras |
| Töörežiim | Täisautomaatne |
| Inimliidese sisend | Nupud |
| Kauba kaal | 1.27 kilogrammi |
| Kauba mõõtmed (PxLxK) | 22 x 14.2 x 26.8 sentimeetrit |
| Nõudepesumasinas ohutu | Ei |
| Eriomadused | Warming Plate, Removable Filter, Water Level Indicator, Dry Heat Protection |
9. Garantii ja tugi
9.1 Garantii teave
This Faber Drip Coffee Machine comes with a 1-aastane garantii from the date of purchase, covering manufacturing defects. Please retain your purchase receipt as proof of purchase for warranty claims. The warranty does not cover damage caused by misuse, accident, unauthorized modifications, or normal wear and tear.
9.2 Klienditugi
For technical assistance, warranty claims, or any questions regarding your product, please contact Faber customer service. Refer to the contact information provided with your product packaging or visit the official Faber webtoe üksikasjade jaoks.
10. Toote lõppview Video
Vaadake seda videot visuaalse ülevaate saamiseksview of the Faber Drip Coffee Machine's features and benefits.
See video annab kokkuvõtliku ülevaateview of the Faber Drip Coffee Machine, highlighting its key features such as the 800W power, 0.6L capacity, warming plate, removable filter, water level indicator, and dry heat protection. It demonstrates the product's design and functionality.


