1. Sissejuhatus
Thank you for choosing the Vacmaster VK1638SWC Industrial Wet and Dry Vacuum Cleaner. This manual provides essential information for the safe assembly, operation, maintenance, and troubleshooting of your new appliance. Please read these instructions thoroughly before use and retain them for future reference.

Image: The Vacmaster VK1638SWC vacuum cleaner actively cleaning a workshop floor, demonstrating its industrial application.
2. Ohutusalane teave
Selle seadme kasutamisel järgige alati põhilisi ohutusnõudeid, et vähendada tulekahju, elektrilöögi või vigastuste ohtu.
- Enne tolmuimeja kasutamist lugege kõik juhised läbi.
- Ärge jätke seadet vooluvõrku ühendatud järelvalveta. Ühendage pistik pistikupesast välja, kui seda ei kasutata ja enne hooldust.
- Do not pick up hot ashes, coals, or flammable/combustible liquids.
- Ärge kasutage plahvatusohtlike vedelike või aurude läheduses.
- Ensure all filters are correctly installed for the intended operation (wet or dry).
- Hoidke juuksed, lahtised riided, sõrmed ja kõik kehaosad avadest ja liikuvatest osadest eemal.
- Kasutage ainult selles kasutusjuhendis kirjeldatud viisil. Kasutage ainult tootja soovitatud lisatarvikuid.
- Ärge kasutage kahjustatud juhtme või pistikuga. Kui seade ei tööta nii nagu peaks, on maha kukkunud, kahjustatud, õue jäetud või vette kukkunud, tagastage see teeninduskeskusesse.
- Ärge tõmmake ega kandke juhtmest, kasutage juhet käepidemena, sulgege ust juhtme külge ega tõmmake juhet ümber teravate servade või nurkade. Ärge ajage seadet üle juhtme. Hoidke juhet kuumenenud pindadest eemal.
- Ärge eemaldage vooluvõrgust juhtmest tõmmates. Pistiku eemaldamiseks haarake pistikust, mitte juhtmest.
- Ärge käsitsege pistikut ega seadet märgade kätega.
- Enne vooluvõrgust lahti ühendamist lülitage kõik juhtnupud välja.
- Olge treppidel puhastamisel eriti ettevaatlik.
- Ärge kasutage tuleohtlike või põlevate vedelike, näiteks bensiini, kogumiseks ega kasutage neid kohtades, kus neid võib esineda.
- Ärge korjake üles midagi, mis põleb või suitseb, näiteks sigarette, tikke või kuuma tuhka.
- Ärge kasutage ilma filtriteta.
- See seade ei ole mõeldud kasutamiseks isikutele (kaasa arvatud lapsed), kellel on füüsilised, sensoorsed või vaimsed võimed või kogemuste ja teadmiste puudumine, välja arvatud juhul, kui nende ohutuse eest vastutav isik on neid jälginud või seadme kasutamist juhendanud.
- Lapsi tuleb jälgida, et nad seadmega ei mängiks.
3. Pakendi sisu
Carefully unpack the box and ensure all items are present and undamaged. If any parts are missing or damaged, contact Vacmaster customer support.
- 1 x Dust Extractor Unit
- 1 x HEPA 13 Cartridge Filter
- 1 x HEPA Exhaust Filter
- 1 x Pre-filter (washable)
- 1 x vahtfilter
- 2 x pikendustorud
- 1 x Handle with Air Flow Control
- 1 x Universal Floor Head
- 1 x Dual Mode Floor Head
- 1 x Anti-crush Hose
- 1 x Round Dusting Tool
- 1 x Extra-large Crevice Tool
- 1 x Universal Power Tool Adaptor
- 1 x Accessory Pouch
- 1 x 38L Hygiene Seal Dust Bag

Image: The Vacmaster VK1638SWC unit displayed with its full range of included accessories.
4. Seadistamine
4.1 Tolmuimeja kokkupanek
- Kinnitage rattad: Insert the casters into the designated slots on the base of the vacuum until they click securely into place.
- Kinnitage käepide: Secure the handle to the top of the unit using the provided hardware.
- Ühendage voolik: Insert the anti-crush hose into the suction inlet on the front of the tank. Ensure it is firmly seated.
- Installige filtrid: Refer to section 4.2 for specific filter installation based on your intended use (wet or dry).

Pilt: Lähivõte view of the yellow latch, indicating how to secure or release the motor head from the tank.
4.2 Filtri paigaldamine
The VK1638SWC uses different filters for wet and dry applications. Always ensure the correct filter is installed before operation.
- Kuivtolmuimemiseks: Install the HEPA 13 Cartridge Filter and the washable Pre-filter. Ensure the HEPA Exhaust Filter is also in place. The 38L hygiene seal dust bag can be used for improved dust collection and disposal.
- Märgtolmuimemiseks: Remove the HEPA 13 Cartridge Filter and Pre-filter. Install the Foam Filter over the filter cage. Do NOT use the dust bag for wet vacuuming.

Image: A person demonstrating the process of accessing and handling the filter inside the vacuum cleaner's tank.
5. Kasutusjuhised
5.1 Kuivtolmuimemine
- Ensure the HEPA 13 Cartridge Filter and Pre-filter are correctly installed.
- Connect the desired extension tubes and floor head (universal or dual mode) or other accessory to the hose.
- Ühendage toitejuhe sobivasse pistikupessa (240 volti).
- Lülitage tolmuimeja toitelüliti abil sisse.
- Alustage kuiva prahi tolmuimejaga puhastamist.
- Kui olete lõpetanud, lülitage tolmuimeja VÄLJA ja eemaldage pistik vooluvõrgust.
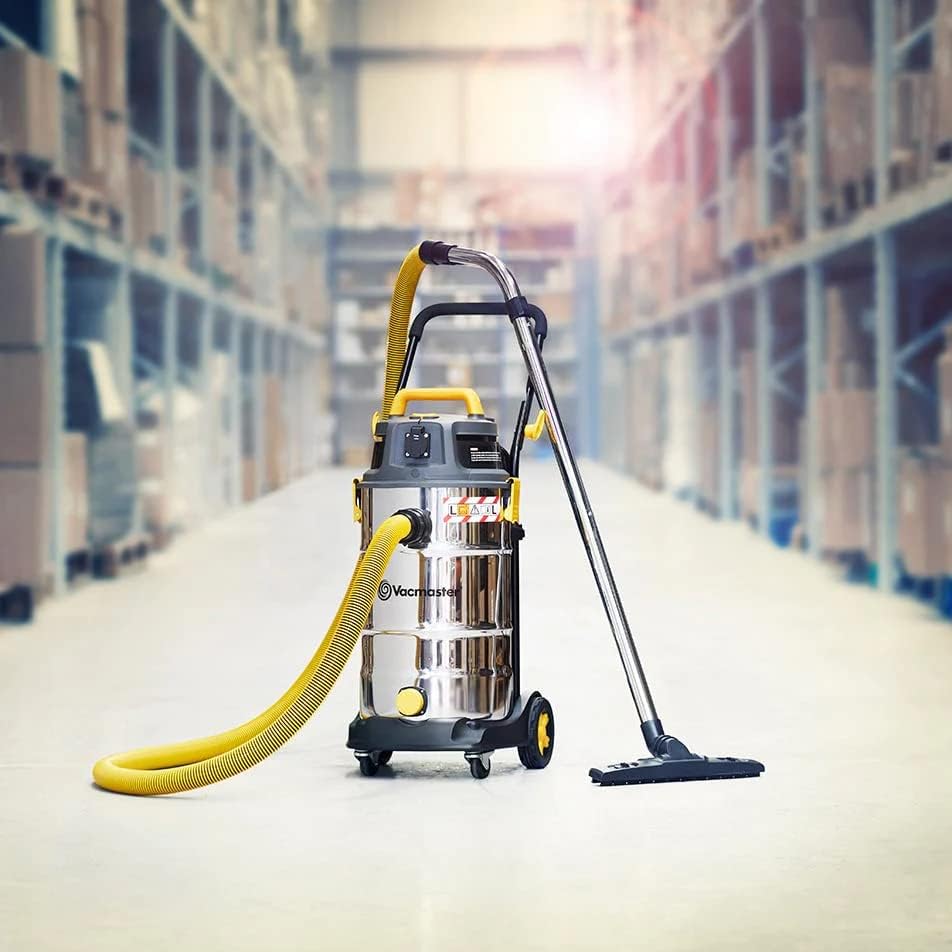
Image: The Vacmaster VK1638SWC vacuum cleaner fully assembled with its hose, extension tubes, and floor head.
5.2 Märgtolmuimemine
- Ensure the Foam Filter is correctly installed and the HEPA 13 Cartridge Filter and Pre-filter are removed.
- Connect the desired floor head or accessory suitable for wet pickup to the hose.
- Ühendage toitejuhe sobivasse pistikupessa.
- Turn the vacuum cleaner ON.
- Begin vacuuming liquids. The vacuum has an automatic shut-off feature that will stop suction when the tank is full.
- When finished or when the tank is full, turn the vacuum OFF and unplug it. Empty the tank as described in the Maintenance section.

Image: The Vacmaster VK1638SWC vacuum cleaner demonstrating its liquid draining capability from the tank's outlet.
5.3 Ventilaatori funktsioon
The VK1638SWC can also function as a powerful blower.
- Ensure the tank is empty and clean, and the appropriate filter is installed (HEPA for dry blowing, no filter or foam filter for wet blowing).
- Remove the hose from the suction inlet.
- Insert the hose into the blower port located on the motor head.
- Plug in and turn ON the vacuum to use the blower function.
5.4 Power Tool Connection
The included universal power tool adaptor allows for direct dust extraction when working with power tools.
- Ensure the vacuum is set up for dry vacuuming with the HEPA 13 filter.
- Connect the universal power tool adaptor to the end of the vacuum hose.
- Attach the other end of the adaptor to the dust extraction port on your power tool.
- Plug the power tool into the integrated power socket on the vacuum cleaner (if available and compatible). This allows the vacuum to start automatically when the power tool is activated.
- Turn on the vacuum cleaner and then your power tool to begin dust extraction.

Image: The Vacmaster VK1638SWC vacuum cleaner connected to a sanding machine, demonstrating its dust extraction capability.
5.5 Using the Wheel Brake
To secure the vacuum cleaner in place, engage the wheel brake by pressing down on the lever located on one of the casters. To release, lift the lever.

Image: A person's foot pressing down on the yellow lever to engage the wheel brake on the vacuum cleaner.
6. Hooldus
Regulaarne hooldus tagab optimaalse jõudluse ja pikendab tolmuimeja eluiga. Enne hooldustööde tegemist eemaldage seade alati vooluvõrgust.
6.1 Filtri puhastamine ja vahetamine
- HEPA 13 Cartridge Filter & Pre-filter: For dry use, these filters should be cleaned regularly by tapping them gently to dislodge dust or by using a soft brush. The pre-filter is washable; rinse with water and allow to air dry completely before reinstallation. Replace the HEPA cartridge filter when suction power significantly decreases or if it becomes damaged.
- Vahufilter: For wet use, the foam filter should be rinsed with water after each use and allowed to air dry completely before storage or next use.
- HEPA väljalaskefilter: Check periodically and replace if visibly dirty or if air quality issues are noted.
6.2 Tank Cleaning and Emptying
- Kuiv praht: Unlatch the motor head and carefully lift it off. Remove the dust bag (if used) and dispose of contents. Empty any remaining debris from the stainless steel tank.
- Vedelikud: For liquid disposal, the tank can be emptied by tilting the unit or by using the drain plug located at the bottom of the tank. After emptying, rinse the tank with water and wipe dry to prevent odors and corrosion.
6.3 Lisatarvikute hoiustamine
The VK1638SWC features integrated storage for its accessories, keeping them organized and readily accessible.

Image: The Vacmaster VK1638SWC vacuum cleaner showcasing its onboard storage for hose, power cord, and various attachments.
7. Veaotsing
Enne klienditoega ühenduse võtmist vaadake järgmist tabelit levinud probleemide ja nende lahenduste kohta.
| Probleem | Võimalik põhjus | Lahendus |
|---|---|---|
| Tolmuimeja ei lülitu sisse. | Puudub toide; kahjustatud juhe/pistik; vigane lüliti. | Check power outlet and plug. Inspect cord for damage. Contact service if switch is faulty. |
| Imemise kaotus. | Clogged hose/attachments; Full tank; Dirty/incorrect filter; Air leak. | Clear obstructions. Empty tank. Clean/replace filters. Check all connections for leaks. |
| Mootor kuumeneb üle/lülitub välja. | Blocked airflow; Full tank (wet use); Prolonged heavy use. | Check for blockages. Empty tank. Allow motor to cool down before restarting. |
| Seadmest lekib vett. | Foam filter not installed correctly for wet use; Tank overfilled; Damaged tank seal. | Ensure foam filter is properly seated. Do not overfill tank. Inspect tank seal for damage. |
8. Tehnilised andmed
| Funktsioon | Detail |
|---|---|
| Mudeli number | VK1638SWC |
| Võimsus | 1600W mootor |
| Õhu vatid | 260 õhuvatti |
| Õhuvool | 52 L/s (max) |
| Vaakumrõhk | 27 kpa |
| Paagi maht | 38 liitrit |
| Filtreerimine | Dual HEPA 13 (Cartridge & Exhaust), Washable Pre-filter, Foam Filter |
| Materjal | Roostevabast terasest paak |
| Mõõdud (P x L x K) | 49 x 41 x 79 cm |
| Kaal | 17 kilogrammi |
| Voltage | 240 volti |
| Erifunktsioon | Märg/kuiv funktsioon |
9. Garantii ja tugi
9.1 Garantii teave
The Vacmaster VK1638SWC Industrial Wet and Dry Vacuum Cleaner comes with a 2-aastane garantii from the date of purchase. This warranty covers defects in materials and workmanship under normal use. It does not cover damage resulting from misuse, abuse, accident, unauthorized repairs, or lack of maintenance.
9.2 Klienditugi
For technical assistance, warranty claims, or to order replacement parts, please contact Vacmaster customer support. Refer to the contact information provided with your purchase documentation or visit the official Vacmaster websaidile.