1. Sissejuhatus
Tänan ostu eestasing the DOOMAY Digital Alarm Clock. This compact and versatile alarm clock is designed for convenience and readability, featuring an adjustable LCD display, snooze function, weekend mode, and temperature display. This manual will guide you through the setup, operation, and maintenance of your new alarm clock to ensure optimal performance.
2. Ohutusalane teave
- Hoidke seadet vee ja kõrge õhuniiskusega keskkondade eest.
- Vältige kella jätmist otsese päikesevalguse või äärmuslike temperatuuride kätte.
- Ärge proovige seadet ise lahti võtta ega parandada. Teeninduseks pöörduge kvalifitseeritud spetsialisti poole.
- Kasutage ainult ettenähtud tüüpi patareisid (2 x AAA patareid).
- Kui seadet pikemat aega ei kasutata, eemaldage patareid, et vältida lekkeid.
- Hoidke patareid lastele kättesaamatus kohas.
3. Pakendi sisu
- DOOMAY Digital Alarm Clock (1 unit)
- AAA patareid (2 tk)
- Kasutusjuhend (see dokument)
4. Toote lõppview
Familiarize yourself with the components and controls of your DOOMAY Digital Alarm Clock.
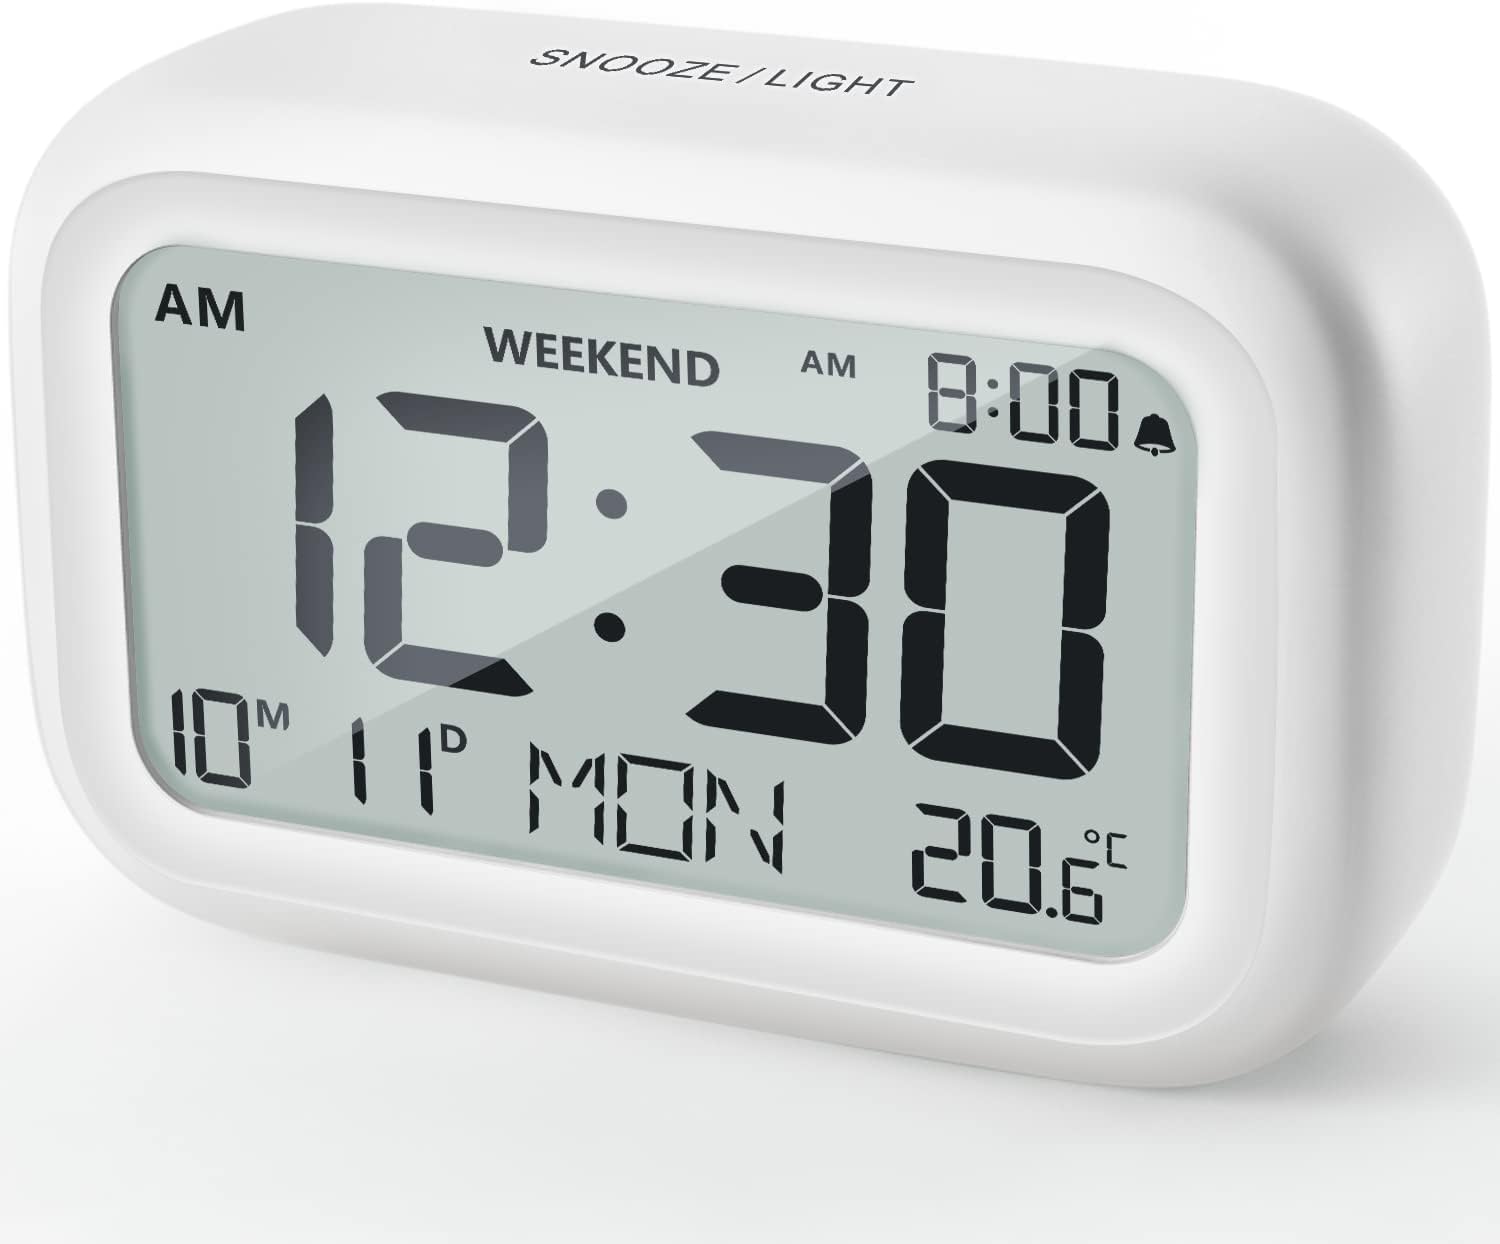
Joonis 4.1: Esiosa View äratuskella
This image displays the front of the DOOMAY Digital Alarm Clock, highlighting its large, clear LCD screen. The screen shows the current time (12:30), AM indicator, day of the week (MON), date (10th month, 11th day), and indoor temperature (20.6°C). The top of the clock has a "SNOOZE/LIGHT" button.

Joonis 4.2: Peamised omadused üleview
This diagram illustrates the main functionalities of the alarm clock: 12/24H time display, calendar, alarm setting, adjustable volume, snooze function, backlight, weekend mode, and temperature display. The clock itself is shown on a wooden table, displaying 7:00 AM, Friday, and 28.8 degrees.

Figure 4.3: Back Panel Controls
This image shows the rear of the alarm clock, detailing the various control buttons and the battery compartment. Buttons are clearly labeled for: 12/24H time format, Alarm setting, Weekend mode, Date setting, Minus (-) for decreasing values, Plus (+) for increasing values, and °C/°F for temperature unit selection. The battery compartment is visible, designed for two AAA batteries.
Juhtnupud ja ekraan:
- LCD ekraan: Shows time, date, day of week, AM/PM indicator, alarm status, and temperature.
- SNOOZE/LIGHT Button (Top): Activates snooze function during alarm; illuminates backlight for 5 seconds.
- 12/24H Button (Back): Lülitab 12-tunnise ja 24-tunnise ajavormingu vahel.
- ALARM Button (Back): Siseneb äratuse seadistamise režiimi.
- WEEKEND Button (Back): Activates/deactivates weekend mode.
- DATE Button (Back): Enters date setting mode.
- MINUS (-) Button (Back): Decreases values during setting; adjusts alarm volume.
- PLUS (+) Button (Back): Increases values during setting; adjusts alarm volume.
- °C/°F Button (Back): Lülitab Celsiuse ja Fahrenheiti temperatuuriühikute vahel.
5. Seadistamine
5.1 Aku paigaldamine
- Avage kella tagaküljel asuv patareipesa kaas.
- Sisestage kaks (2) AAA-patareid, jälgides õiget polaarsust (+ ja -).
- Sulgege akupesa kaas kindlalt.
- The display will light up, and the clock will be ready for initial setup. A low battery symbol will appear when batteries need replacement. If the display shows "8888" flashing, it's also an indication to change batteries.
5.2 Kellaaja ja kuupäeva algseadistus
- Määra aeg:
- Vajutage nuppu 12/24H button to switch between 12-hour (with AM/PM) and 24-hour formats.
- Vajutage ja hoidke all nuppu 12/24H Aja seadistamise režiimi sisenemiseks hoidke nuppu 3 sekundit all. Tunninumbrid vilguvad.
- Kasutage + or - nupud kellaaja reguleerimiseks.
- Vajutage nuppu 12/24H Tunni kinnitamiseks ja minutite seadistamisele liikumiseks vajutage uuesti nuppu. Minutite numbrid vilguvad.
- Kasutage + or - nupud minuti reguleerimiseks.
- Vajutage nuppu 12/24H button one more time to exit time setting.
- Määra kuupäev:
- Vajutage ja hoidke all nuppu KUUPÄEV button for 3 seconds to enter date setting mode. The year digits will flash.
- Kasutage + or - nupud aasta reguleerimiseks.
- Vajutage nuppu KUUPÄEV button again to confirm the year and move to month setting.
- Adjust the month using + or -.
- Vajutage KUUPÄEV again to move to day setting.
- Adjust the day using + or -.
- Vajutage KUUPÄEV one more time to exit date setting. The day of the week will automatically adjust.
6. Kasutusjuhised
6.1 Alarmi seadistamine
- Vajutage ja hoidke all nuppu ALARM nuppu 3 sekundit all. Äratuse tunninumbrid hakkavad vilkuma.
- Kasutage + or - nuppe, et määrata soovitud äratuse tund.
- Vajutage nuppu ALARM button again to confirm the hour and move to minute setting. The alarm minute digits will flash.
- Kasutage + or - nuppe, et määrata soovitud äratuse minut.
- Vajutage nuppu ALARM button one more time to exit alarm setting. The alarm icon (bell symbol) will appear on the display, indicating the alarm is active.
- To turn the alarm ON/OFF, simply press the ALARM button once. The bell icon will appear/disappear.
6.2 Edasilükkamise funktsioon
Kui äratussignaal kõlab, koputage õrnalt suurt SNOOZE / VALGUS button on the top of the clock. The alarm will pause for 9 minutes and then sound again. This can be repeated multiple times.

Figure 6.1: Activating Snooze
This image demonstrates how to activate the snooze function by touching the top of the alarm clock. The text highlights that this action provides an additional 9 minutes of sleep after the alarm sounds.
To completely turn off the alarm after it sounds (without snoozing), press any button on the back of the clock.
6.3 Weekend Mode
The weekend mode allows the alarm to sound only from Monday to Friday, preventing it from ringing on Saturday and Sunday.

Figure 6.2: Weekend Mode Activated
This image shows the alarm clock display with the "WEEKEND" indicator prominently displayed, signifying that the weekend mode is active. The accompanying text clarifies that in this mode, the alarm will only sound from Monday to Friday, ensuring undisturbed weekends.
- To activate Weekend Mode, press the NÄDALAVAHETUS button once. The "WEEKEND" indicator will appear on the display.
- To deactivate Weekend Mode, press the NÄDALAVAHETUS button again. The "WEEKEND" indicator will disappear.
6.4 Reguleeritav alarmi helitugevus
The alarm clock offers two volume levels: Low (70 dB) and High (85 dB).

Figure 6.3: Alarm Volume Levels
This image visually represents the two available alarm volume settings: L01 (85 dB) for a louder alarm and L02 (70 dB) for a softer alarm. The alarm clock is shown in a bedroom setting, emphasizing its use as a bedside device.
- Tavapärases aja kuvamise režiimis vajutage nuppu + or - buttons to cycle between the two alarm volume levels. The current volume level will be briefly displayed.
6.5 Taustvalgustuse funktsioon
To illuminate the display in low light conditions, simply tap the SNOOZE / VALGUS button on the top of the clock. The backlight will activate for approximately 5 seconds, providing clear visibility of the time and other information.
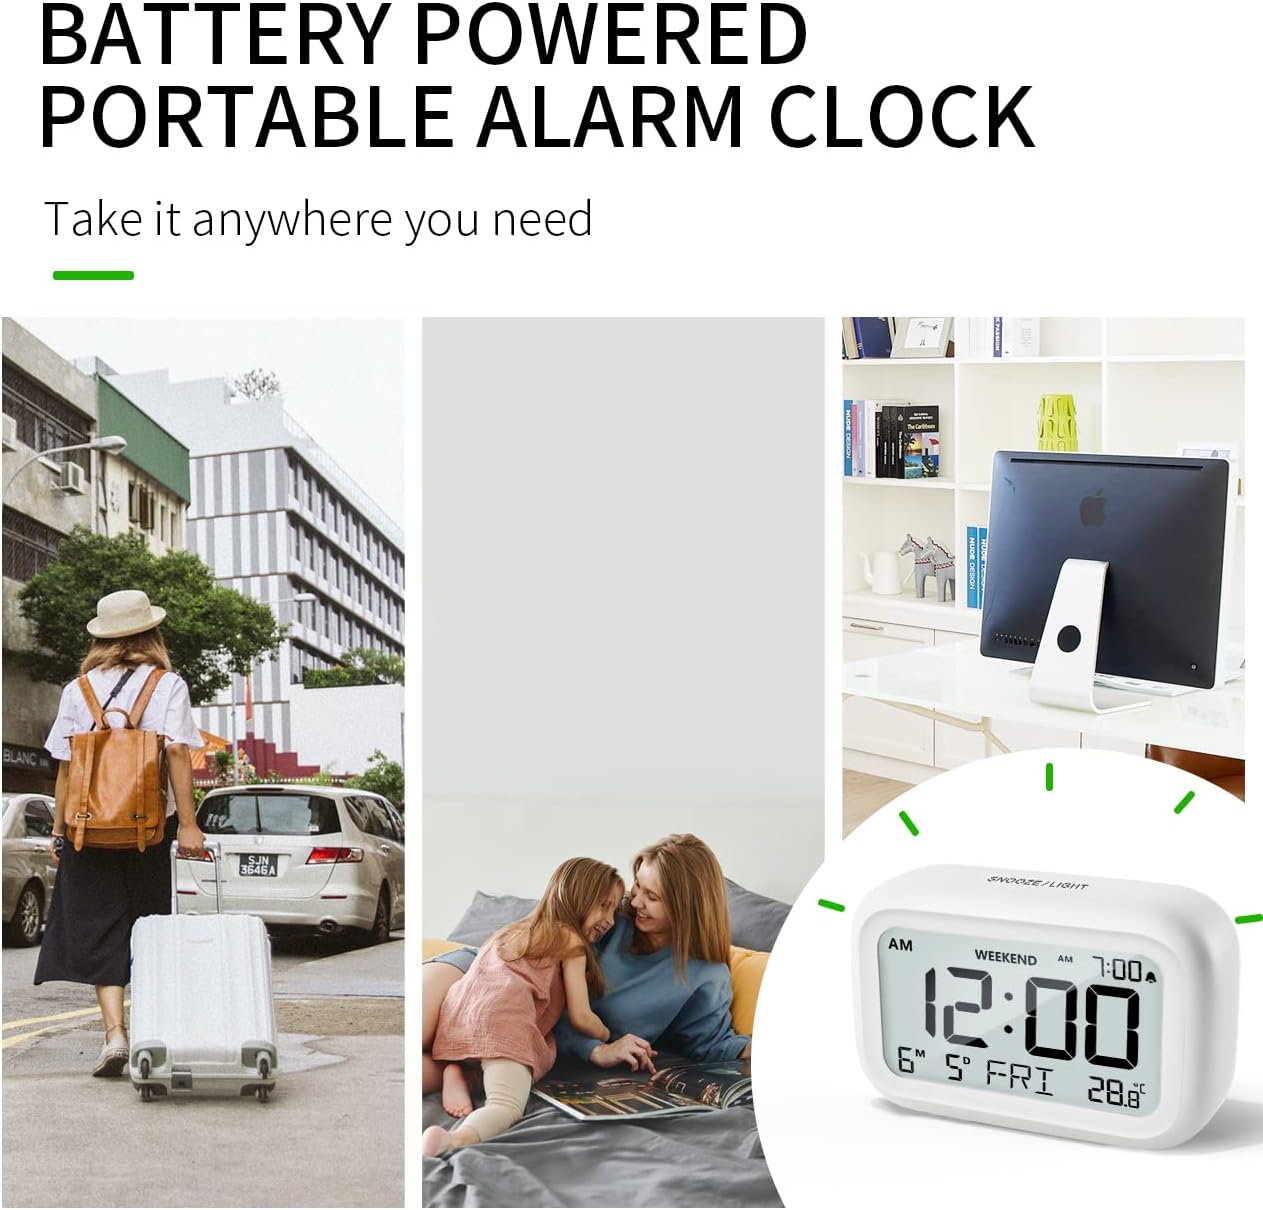
Figure 6.4: Backlight in Action
This image provides a side-by-side comparison of the alarm clock's display. On the left, the clock is shown in a well-lit environment. On the right, the same clock is shown in a dark setting with its 5-second backlight activated, demonstrating how the display becomes clearly visible at night.
6.6 Temperatuuri näit
The clock displays the indoor temperature. You can switch between Celsius (°C) and Fahrenheit (°F) units.
- To change the temperature unit, press the ° C / ° F nuppu kella tagaküljel.
7. Hooldus
7.1 Puhastamine
Pühkige kella pehme ja kuiva lapiga. Ärge kasutage abrasiivseid puhastusvahendeid ega lahusteid, kuna need võivad pinda kahjustada.
7.2 Aku vahetamine
When the low battery indicator appears on the display, or if the display shows "8888" flashing, it is time to replace the batteries. Follow the steps in Section 5.1 Battery Installation to replace the two AAA batteries.
8. Veaotsing
| Probleem | Võimalik põhjus | Lahendus |
|---|---|---|
| Ekraan on tühi või tuhm. | Patareid on tühjad või valesti paigaldatud. | Vahetage patareid uute AAA patareide vastu, jälgides õiget polaarsust. |
| Äratus ei helise. | Alarm is not activated, or Weekend Mode is ON. | Ensure the alarm icon is displayed. Check if Weekend Mode is active and deactivate if necessary. |
| Snooze function not working. | Not tapping the SNOOZE/LIGHT button correctly. | Ensure a firm, brief tap on the top SNOOZE/LIGHT button when the alarm is sounding. |
| Kellaaeg/kuupäev on vale. | Pole õigesti seadistatud või on patareid eemaldatud. | Refer to Section 5.2 Initial Time and Date Setting to re-set. |
9. Tehnilised andmed
| Funktsioon | Detail |
|---|---|
| Mudeli number | 5293UK |
| Kaubamärk | DOOMAY |
| Mõõdud (P x L x K) | 10.9 x 3.81 x 6.9 cm (4.29 x 1.5 x 2.72 tolli) |
| Kaal | 127.01 grammi (0.28 naela) |
| Materjal | Akrüülnitriilbutadieenstüreen (ABS) |
| Toiteallikas | 2 x AAA patareid (kaasas) |
| Kuva tüüp | Digitaalne LCD |
| Alarmi helitugevuse tasemed | Low (70 dB), High (85 dB) |
| Edasilükkamise kestus | 9 minuti |
| Taustvalgustuse kestus | 5 sekundit |
| Temperatuuri ühikud | Celsiuse järgi (°C) / Fahrenheiti (°F) |
10. Garantii ja tugi
DOOMAY products are designed for reliability and performance. For any questions, technical support, or warranty claims, please contact your retailer or visit the official DOOMAY website for assistance. Please retain your proof of purchase for warranty purposes.
For further information, you may visit the brand's Amazon store page: DOOMAY Store on Amazon


