1. Sissejuhatus
The Cherry MW 8C Ergo is an ergonomic, right-handed wireless mouse designed for comfort and precision. It offers flexible connectivity options via Bluetooth or a 2.4 GHz wireless USB dongle, ensuring a stable and secure connection with AES-128 encryption. This rechargeable mouse features a high-precision sensor for accurate tracking and is built for durability and extended use. This manual provides detailed instructions for setting up, operating, maintaining, and troubleshooting your MW 8C Ergo mouse.
2. Pakendi sisu
Palun kontrollige pakendilt järgmisi esemeid:
- Cherry MW 8C Ergo juhtmeta hiir
- USB-A–USB-C laadimiskaabel
- 2.4 GHz Wireless USB Receiver (dongle)
- Storage Pouch (fabric carry pouch)
- Kasutusjuhend (see dokument)
3. Toote omadused
- Ergonoomiline disain: Shaped for comfortable right-handed use, reducing strain during long periods.
- Kahekordne traadita ühenduvus: Seamlessly switch between Bluetooth and 2.4 GHz wireless modes.
- Laetav aku: Integrated battery provides long-lasting power and can be charged via USB-C.
- Ülitäpne optiline andur: Ensures accurate and smooth cursor control.
- AES-128 krüptimine: Secure wireless transmission for data protection.
- Reguleeritav DPI: Customize cursor speed to suit your preferences.
- Vastupidav konstruktsioon: High-quality materials for reliability and longevity.
4. Seadistamine
4.1. Hiire laadimine
Before first use, it is recommended to fully charge the mouse. Connect the supplied USB-A to USB-C charging cable to the USB-C port on the front of the mouse and to a USB-A port on your computer or a USB power adapter.
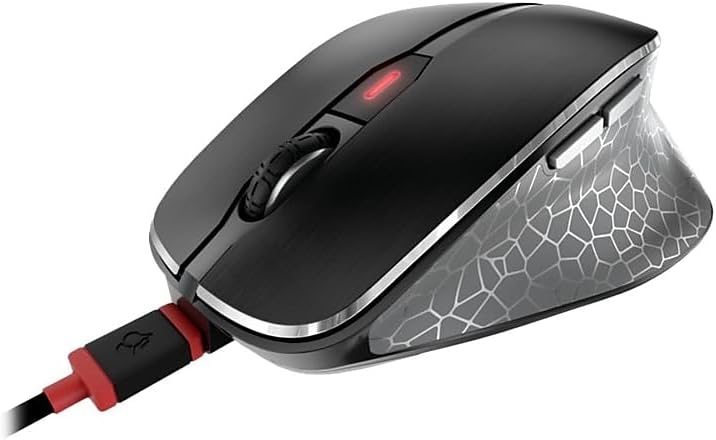
Image: The Cherry MW 8C Ergo mouse connected to its USB-C charging cable, showing the charging port and the mouse's top view.
The LED indicator on the mouse will show charging status. Once fully charged, the LED will change or turn off depending on the model's specific indicator behavior.
4.2. Connecting via 2.4 GHz Wireless (USB Receiver)
- Locate the 2.4 GHz USB receiver (dongle), usually stored magnetically in a compartment on the bottom of the mouse.
- Ühendage USB-vastuvõtja arvuti vabasse USB-A-porti.
- On the bottom of the mouse, slide the 3-position switch to the "2.4 GHz" position (often indicated by a small wireless icon).
- Your computer should automatically detect and install the necessary drivers. The mouse will be ready for use.
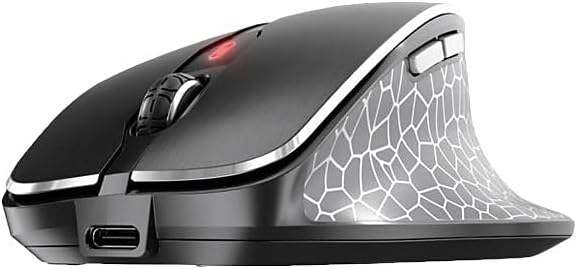
Pilt: Esikülg view of the Cherry MW 8C Ergo mouse, highlighting the USB-C charging port and the scroll wheel.
4.3. Ühenduse loomine Bluetoothi kaudu
- On the bottom of the mouse, slide the 3-position switch to the "Bluetooth" position (often indicated by a Bluetooth icon).
- Press and hold the Bluetooth detection button on the bottom of the mouse for a few seconds until the LED indicator starts blinking, indicating pairing mode.
- Avage arvutis Bluetoothi seaded:
- Windows: Mine menüüsse Seaded > Seadmed > Bluetooth ja muud seadmed. Klõpsa valikul „Lisa Bluetooth või muu seade” ja vali „Bluetooth”.
- MacOS: Mine Süsteemieelistused > Bluetooth.
- Select "Cherry MW 8C Ergo" from the list of available devices.
- Follow any on-screen prompts to complete the pairing process. The LED indicator on the mouse will stop blinking once successfully paired.
5. Hiire kasutamine
5.1. Nuppude funktsioonid
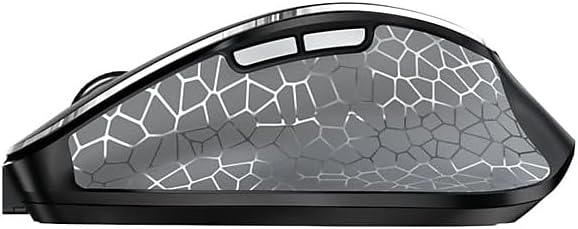
Pilt: Külg view of the Cherry MW 8C Ergo mouse, highlighting the two programmable side buttons.
- Vasakklõpsu nupp: Peamine klõpsamise funktsioon.
- Paremklõpsu nupp: Teisese klõpsu funktsioon, avab tavaliselt kontekstimenüüd.
- Kerimisratas: Kerige dokumente üles/alla ja web lehekülgi. Vajutada saab ka keskmise hiireklõpsu funktsiooni jaoks.
- DPI nupp: Located behind the scroll wheel, this button allows you to cycle through different DPI (Dots Per Inch) sensitivity settings.
- Külgmised nupud: Two buttons located on the thumb side of the mouse. By default, these often function as "Forward" and "Back" in web brauserid ja file explorers. Their functions may be customizable via software (if available).
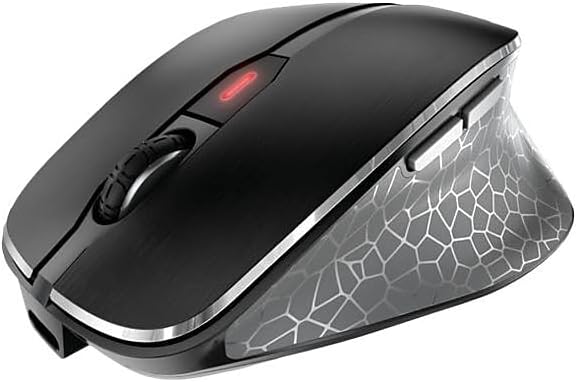
Pilt: Ülalt-alla vaade view of the Cherry MW 8C Ergo mouse, clearly showing the scroll wheel and the DPI adjustment button.
5.2. DPI-tundlikkuse reguleerimine
Press the DPI button (located behind the scroll wheel) to cycle through the available sensitivity settings. Each press will change the cursor speed, allowing you to find the optimal setting for your tasks. The mouse typically has multiple preset DPI levels.
5.3. Ühenduvusrežiimide vahetamine
To switch between 2.4 GHz wireless and Bluetooth modes, use the 3-position switch on the bottom of the mouse. Ensure the correct mode is selected for your desired connection type.
6. Hooldus
6.1. Hiire puhastamine
- Disconnect the mouse from any charging cables and turn it off using the switch on the bottom.
- Kasutage kergelt pehmet ebemevaba lappi dampHiire pinna pühkimiseks loputage veega või õrna puhastuslahusega.
- Vältige karmide kemikaalide, abrasiivsete puhastusvahendite kasutamist ega vedelike pihustamist otse hiirele.
- Optilise anduri puhul kasutage tolmu ja prahi õrnalt puhastamiseks kuiva vatitupsu.
6.2. Aku hooldus
- Aku tööea pikendamiseks vältige hiire sagedast täielikku tühjenemist.
- Charge the mouse regularly, especially when the low battery indicator appears.
- Kui hiirt pikemat aega hoiustate, laadige see umbes 50% ulatuses ja lülitage see välja. Laadige akut iga paari kuu tagant, et vältida sügavat tühjenemist.
7. Veaotsing
7.1. Hiir ei reageeri
- Kontrollige võimsust: Veenduge, et hiir on sisse lülitatud ja selle aku on piisavalt laetud.
- Kontrollige ühenduvusrežiimi: Verify the switch on the bottom of the mouse is set to the correct mode (2.4 GHz or Bluetooth) for your connection type.
- 2.4 GHz ühendus:
- Veenduge, et USB-vastuvõtja oleks kindlalt töötavasse USB-porti ühendatud.
- Proovige vastuvõtja ühendada teise USB-porti.
- Ensure the receiver is within range of the mouse (typically up to 10 meters).
- Bluetooth-ühendus:
- Veenduge, et Bluetooth oleks teie arvutis lubatud.
- Try re-pairing the mouse with your computer (refer to Section 4.3).
- Ensure the mouse is within range of your computer's Bluetooth receiver.
- Taaskäivita: Lülitage hiir välja ja seejärel uuesti sisse. Vajadusel taaskäivitage arvuti.
7.2. Kursori liikumine on ebakorrapärane või ebatäpne
- Puhas andur: Clean the optical sensor on the bottom of the mouse (refer to Section 6.1).
- Pind: Kasutage hiirt puhtal, mittepeegeldaval ja ühtlasel pinnal. Vältige klaasi või väga peegeldavaid pindu.
- DPI seadistus: Adjust the DPI sensitivity using the DPI button to see if a different setting improves performance.
7.3. Mouse Not Charging
- Kaabliühendus: Veenduge, et USB-C-kaabel oleks kindlalt ühendatud nii hiire kui ka toiteallikaga.
- Toiteallikas: Try a different USB port on your computer or a different USB power adapter.
- Kaabli terviklikkus: Inspect the charging cable for any damage. Try using a different USB-C charging cable if available.
8. Tehnilised andmed
| Funktsioon | Detail |
|---|---|
| Mudeli nimi | MW 8C Ergo |
| Kauba mudeli number | JW-8600US |
| Kaubamärk | Kirss |
| Ühenduvustehnoloogia | Bluetooth, 2.4 GHz Wireless |
| Liikumise tuvastamine | Optiline |
| Toiteallikas | Akutoitel (taaslaetav) |
| Operatsioonisüsteemi ühilduvus | Windows 7, Windows 8, Windows 10, Windows 11 |
| Kauba kaal | 8 untsi (umbes 227 grammi) |
| Toote mõõtmed (PxLxK) | 4.72 x 3.11 x 1.75 tolli (umbes 120 x 79 x 44 mm) |
| Värv | Must |
| Krüpteerimine | AES-128 (for 2.4 GHz wireless) |
9. Garantii ja tugi
9.1. Garantii teave
Cherry products are manufactured to high-quality standards. This product is covered by a limited warranty against defects in materials and workmanship. Please refer to the official Cherry website or your purchase documentation for specific warranty terms and conditions applicable to your region. Keep your proof of purchase for warranty claims.
9.2. Tehniline tugi
If you encounter any issues not covered in the troubleshooting section or require further assistance, please contact Cherry customer support. You can find contact information, FAQs, and additional resources on the official Cherry websait:
Ametlik kirss Websait: www.cherry.de/en/
Please have your product model number (JW-8600US) and proof of purchase ready when contacting support.


