Sissejuhatus
Thank you for choosing the Optex 990047 Indoor/Outdoor Wireless Digital Thermometer. This device provides accurate temperature readings for both your indoor environment and an outdoor location via a wireless sensor. Please read this manual carefully before use to ensure proper operation and to maximize the lifespan of your thermometer.
Pakendi sisu
- 1 x Optex 990047 Main Display Unit
- 1 x juhtmevaba välisandur
- 1 x kasutusjuhend
- (Batteries not included, typically requires AAA or AA batteries for both units)
Toode läbiview
Familiarize yourself with the components of your Optex thermometer.
Main Display Unit (Front)

Pilt: Esiosa view of the Optex 990047 main display unit. The digital screen shows indoor and outdoor temperatures, along with high/low records and trend indicators. Below the screen are three buttons: 'CH', '°C/°F', and 'CLEAR'.
- Digitaalne kuva: Shows indoor temperature (top) and outdoor temperature (bottom), along with HI/LO records and temperature trend arrows.
- CH nupp: Selects the wireless channel (if multiple sensors are used) or initiates sensor search.
- °C/°F nupp: Lülitab Celsiuse ja Fahrenheiti temperatuuriühikute vahel.
- CLEAR nupp: Clears the recorded HI/LO temperatures.
Main Display Unit (Back)

Pilt: Tagasi view of the Optex 990047 main display unit. It features a battery compartment cover and an integrated kickstand for tabletop placement, as well as a hanging hole.
- Akupesa: Houses the batteries for the main unit.
- Tugijalg: Allows the unit to stand upright on a flat surface.
- Seinale kinnitamise auk: For hanging the unit on a wall.
Juhtmeta välisandur
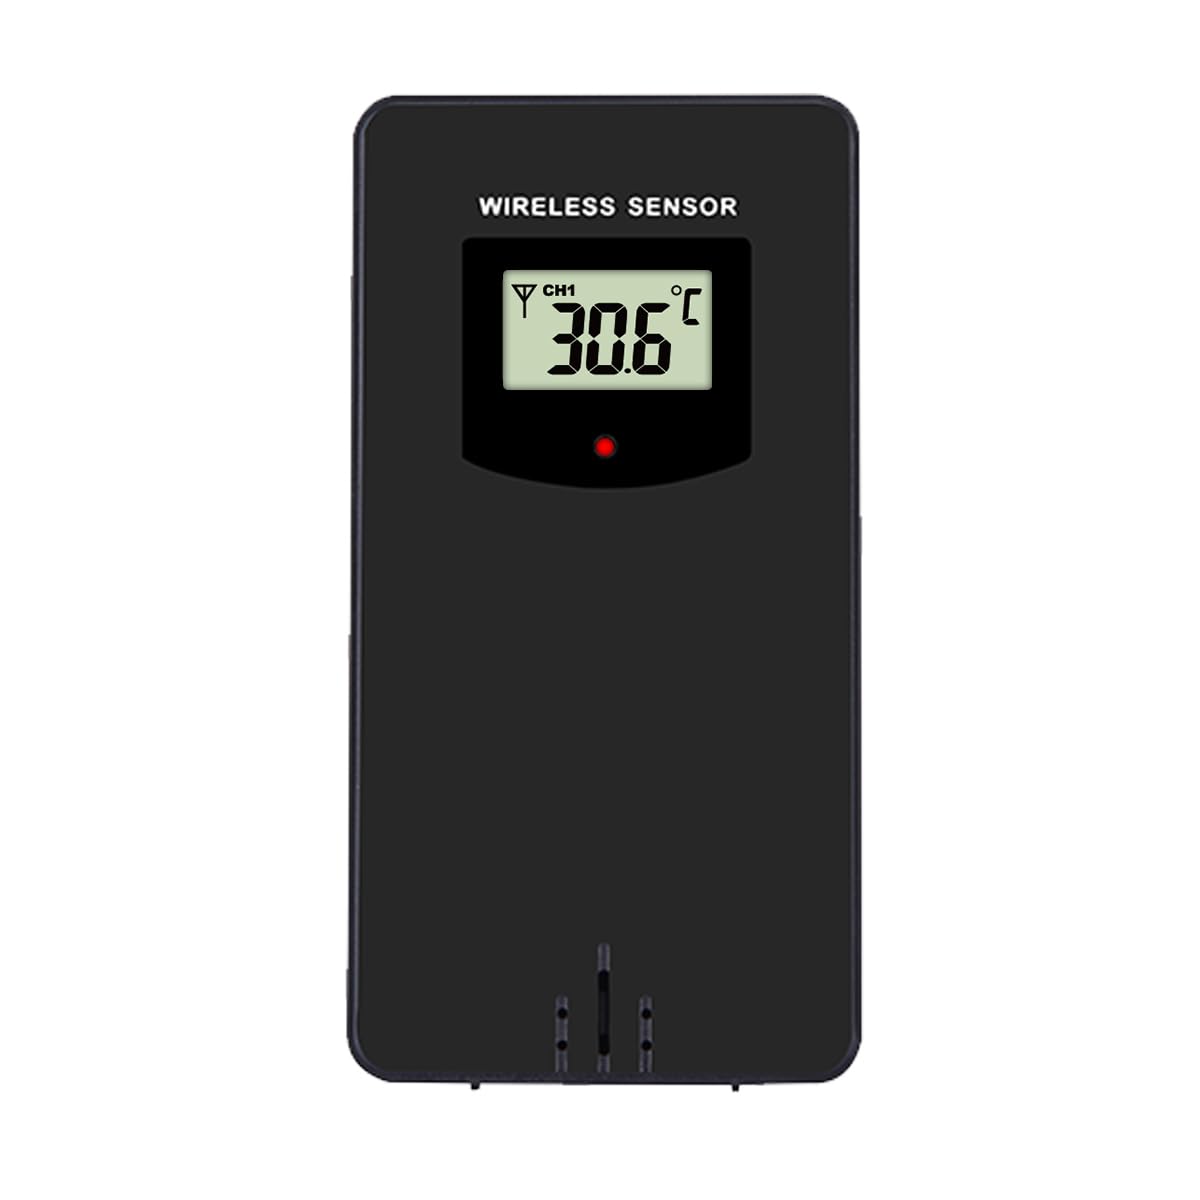
Pilt: Esiosa view of the Optex wireless outdoor temperature sensor. It has a small digital display showing the current temperature and channel, along with a red indicator light and a battery compartment on the back.
- Temperatuuri andur: Measures the outdoor temperature.
- Edastamise indikaator: A small LED light that flashes when data is transmitted.
- Akupesa: Houses the batteries for the outdoor sensor.
- Kanali lüliti: (Typically inside the battery compartment) Allows selection of a specific channel (1, 2, or 3) if using multiple sensors.
Seadistamine
- Paigaldage patareid välisandurisse:
- Avage juhtmevaba anduri tagaküljel olev patareipesa.
- Sisestage 2 x AAA patareid (ei kuulu komplekti) vastavalt polaarsuse märgistustele (+/-).
- Sulgege patareipesa.
- Note: If there is a channel switch inside the compartment, ensure it is set to Channel 1 for initial setup.
- Install Batteries in the Main Display Unit:
- Avage põhiekraani tagaküljel asuv patareipesa.
- Sisestage 2 x AAA patareid (ei kuulu komplekti) vastavalt polaarsuse märgistustele (+/-).
- Sulgege patareipesa.
- The display will light up and begin searching for the outdoor sensor.
- Anduri sidumine:
- Place the outdoor sensor and the main display unit close to each other during the initial setup.
- The main unit should automatically detect and connect to the outdoor sensor within a few minutes. The outdoor temperature will appear on the display.
- If the outdoor temperature does not appear, press and hold the "CH" button on the main unit for 3 seconds to initiate a manual search for the sensor.
- Välisanduri paigutus:
- Choose a shaded location for the outdoor sensor, away from direct sunlight and rain, to ensure accurate readings.
- Avoid placing it near heat sources (e.g., vents, appliances) or metal objects that could interfere with the wireless signal.
- The maximum wireless range is approximately 30 meters (100 feet) in open air. Walls and obstacles will reduce this range.
Operatsioon
Reading Temperatures
The main display unit shows the indoor temperature at the top and the outdoor temperature (from the wireless sensor) at the bottom. Both displays show the current temperature, along with the recorded high (HI) and low (LO) temperatures for the day, and a trend indicator.
Switching Temperature Units (°C/°F)
Vajutage nuppu ° C / ° F button once to switch between Celsius and Fahrenheit temperature units.
Clearing HI/LO Records
The thermometer automatically records the highest and lowest temperatures since the last reset. To clear these records and start new ones, press the SELGE button once. The HI/LO values will reset to the current temperature.
Kanali valik (mitme anduri puhul)
If you are using multiple outdoor sensors (sold separately), you can switch between their readings by pressing the CH button. Each press will cycle through the available channels (e.g., CH1, CH2, CH3). Ensure each sensor is set to a unique channel via its internal switch.
Hooldus
- Puhastamine: Pühkige seadmeid pehme lapigaamp riie. Ärge kasutage abrasiivseid puhastusvahendeid ega lahusteid.
- Patarei vahetus: Replace batteries in both the main unit and the outdoor sensor when the low battery indicator appears on the display. Always replace all batteries at the same time with new ones of the same type.
- Hoiustamine: If storing the thermometer for an extended period, remove all batteries to prevent leakage. Store in a cool, dry place.
Veaotsing
| Probleem | Lahendus |
|---|---|
| No outdoor temperature reading / "---" displayed. |
|
| Ebatäpsed temperatuurinäidud. |
|
| Ekraan on tuhm või tühi. |
|
Tehnilised andmed
- Mudel: Optex 990047
- Kuva tüüp: Digitaalne LCD
- Sisetemperatuuri vahemik: -10 °C kuni 50 °C (14 °F kuni 122 °F) (Estimated, based on typical indoor thermometers)
- Välistemperatuuri vahemik: -40 °C kuni 60 °C (-40 °F kuni 140 °F) (Estimated, based on typical outdoor sensors)
- Temperatuuri täpsus: +/- 1 °C (+/- 2 °F) (Hinnanguline)
- Juhtmevaba vahemik: Kuni 30 meetrit (100 jalga) vabas õhus (Hinnanguline)
- Toiteallikas (põhiseade): 2 x AAA 1.5 V patareid (ei kuulu komplekti)
- Toiteallikas (välisandur): 2 x AAA 1.5 V patareid (ei kuulu komplekti)
- Materjal: Plastikust
- Värv: Must
Ohutusteave
- Do not expose the main unit or sensor to extreme temperatures, direct sunlight, or excessive moisture.
- Do not immerse the units in water. The outdoor sensor is weather-resistant but not waterproof.
- Do not attempt to disassemble or repair the units. This will void the warranty.
- Kõrvaldage vanad patareid vastutustundlikult vastavalt kohalikele eeskirjadele.
- Hoidke patareid lastele kättesaamatus kohas.
Garantii ja tugi
Optex products are designed for reliability and performance. For warranty information or technical support, please refer to the contact details provided with your purchase or visit the official Optex webveebisait. Palun hoidke oma mudelinumber (990047) klienditoega ühenduse võtmisel käepärast.


