1. Sissejuhatus
This manual provides essential information for the safe and efficient operation of your Reloop RP-7000 MK2 Direct Drive High Torque Turntable. Please read these instructions thoroughly before using the product to ensure proper setup, optimal performance, and longevity of your equipment. Keep this manual for future reference.
2. Ohutusjuhised
- Toiteallikas: Ühendage seade ainult ettenähtud voolutugevusega vahelduvvoolu pistikupessa.tage. Veenduge, et toitejuhe pole kahjustatud ega kinni kiilunud.
- Niiskus: Do not expose the unit to rain, moisture, or excessive humidity. Avoid placing liquid-filled objects on the turntable.
- Ventilatsioon: Tagage seadme ümber piisav ventilatsioon. Ärge blokeerige ventilatsiooniavasid.
- Paigutus: Place the turntable on a stable, level surface away from direct sunlight, heat sources, and strong magnetic fields.
- Puhastamine: Enne puhastamist ühendage seade vooluvõrgust lahti. Kasutage pehmet ja kuiva lappi. Vältige vedelaid puhastusvahendeid ega lahusteid.
- Teenindus: Ärge proovige seadet ise hooldada. Jätke kogu hooldus kvalifitseeritud töötajatele.
3. Pakendi sisu
Veenduge, et pakendis on kõik allpool loetletud esemed. Kui mõni ese puudub või on kahjustatud, võtke viivitamatult ühendust edasimüüjaga.
- Reloop RP-7000 MK2 Direct Drive High Torque Turntable (x2)
- Tolmukate (x2)
- Digital Turntable Stylus Scale
- Record Care Solution
- Toitekaabel
- RCA kaabel
- Maandusjuhe
- Slipmat
- Vastukaal
- Headshell with Cartridge (pre-mounted or separate, depending on region/bundle)

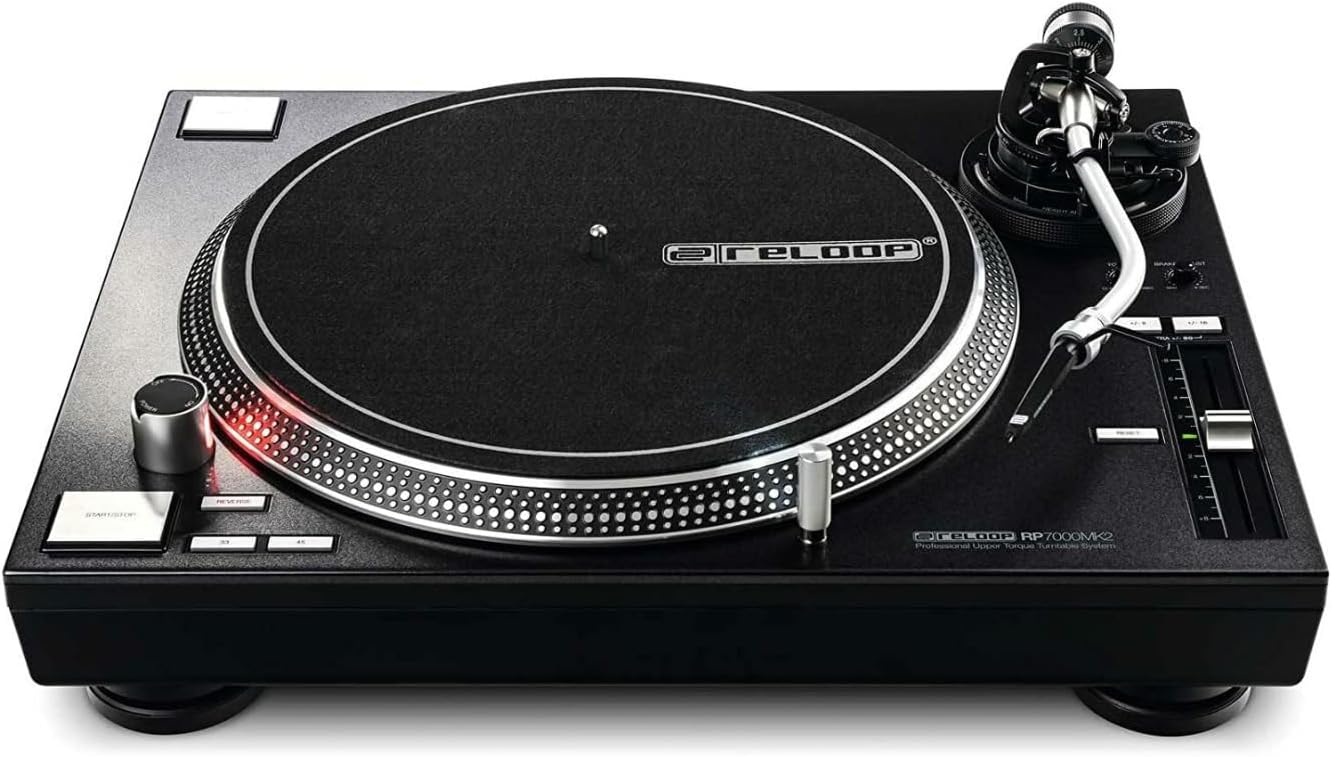
Joonis 1: Läbiview of the Reloop RP-7000 MK2 turntable bundle components.
4. Seadistamine
4.1 Lahtipakkimine ja paigutamine
- Carefully remove all components from the packaging. Retain packaging for future transport.
- Place the turntable on a flat, stable, and vibration-free surface. Ensure there is enough space for the dust cover to open fully.
- Attach the dust cover by aligning its hinges with the slots on the turntable's rear.

Joonis 2: Turntable with the dust cover in place.
4.2 Vaagna ja alusaluse paigaldamine
- Asetage vaagen ettevaatlikult keskmisele spindlile. Veenduge, et see oleks tasapinnaliselt.
- Asetage libisemismatt vaagna peale.
4.3 Tonearm and Cartridge Setup
- If not pre-mounted, attach the headshell with the cartridge to the tonearm. Secure it by turning the locking ring.
- Kruvige vastukaal toonarmi tagaküljele.
- Toonarmide tasakaalustamine: Vabastage toonivarre klahvamp. Adjust the counterweight until the tonearm is perfectly balanced and floats horizontally.
- Jälgimisjõu määramine: Return the tonearm to its rest and clamp it. Rotate the numbered ring on the counterweight to '0' without moving the counterweight itself. Then, rotate the entire counterweight to the recommended tracking force for your cartridge (typically 2-4 grams for DJ cartridges).
- Määra uisutõke: Adjust the anti-skate dial to match the tracking force setting.
4.4 Using the Digital Stylus Scale
The included digital stylus scale allows for precise measurement of your cartridge's tracking force, ensuring optimal sound quality and minimizing record wear.
- Place the stylus scale on the platter.
- Lülitage kaal toitenupu abil sisse.
- Carefully lower the stylus onto the designated measuring point on the scale.
- Read the tracking force displayed. Adjust the tonearm's counterweight as needed until the desired force is achieved.

Joonis 3: Digital Stylus Scale for precise tracking force measurement.
4.5 Ühendused
- Heliväljund: Connect the RCA cables from the turntable's audio output to the PHONO input of your mixer or amplifier. If your mixer/amplifier does not have a PHONO input, you will need an external phono preampelujõulisem.
- Maandusjuhe: Connect the ground wire from the turntable to the ground terminal on your mixer or amplifier to reduce hum.
- Võimsus: Connect the power cable to the turntable and then to a suitable AC power outlet.
5. Kasutusjuhised
5.1 Põhiline taasesitus
- Aseta plaat libisemismati peale.
- Select the appropriate speed (33, 45, or 78 RPM) using the speed selector buttons.
- Vajutage nuppu START/STOP nuppu plaadi pöörlemise alustamiseks.
- Tõsta toonarm ettevaatlikult toonarmi kangi abil üles ja aseta pliiats plaadil soovitud soonele.
- Langetage pliiatsi hoob, et see õrnalt plaadile asetada.
- To stop playback, lift the tonearm using the cueing lever, return it to the tonearm rest, and press the START/STOP nuppu.
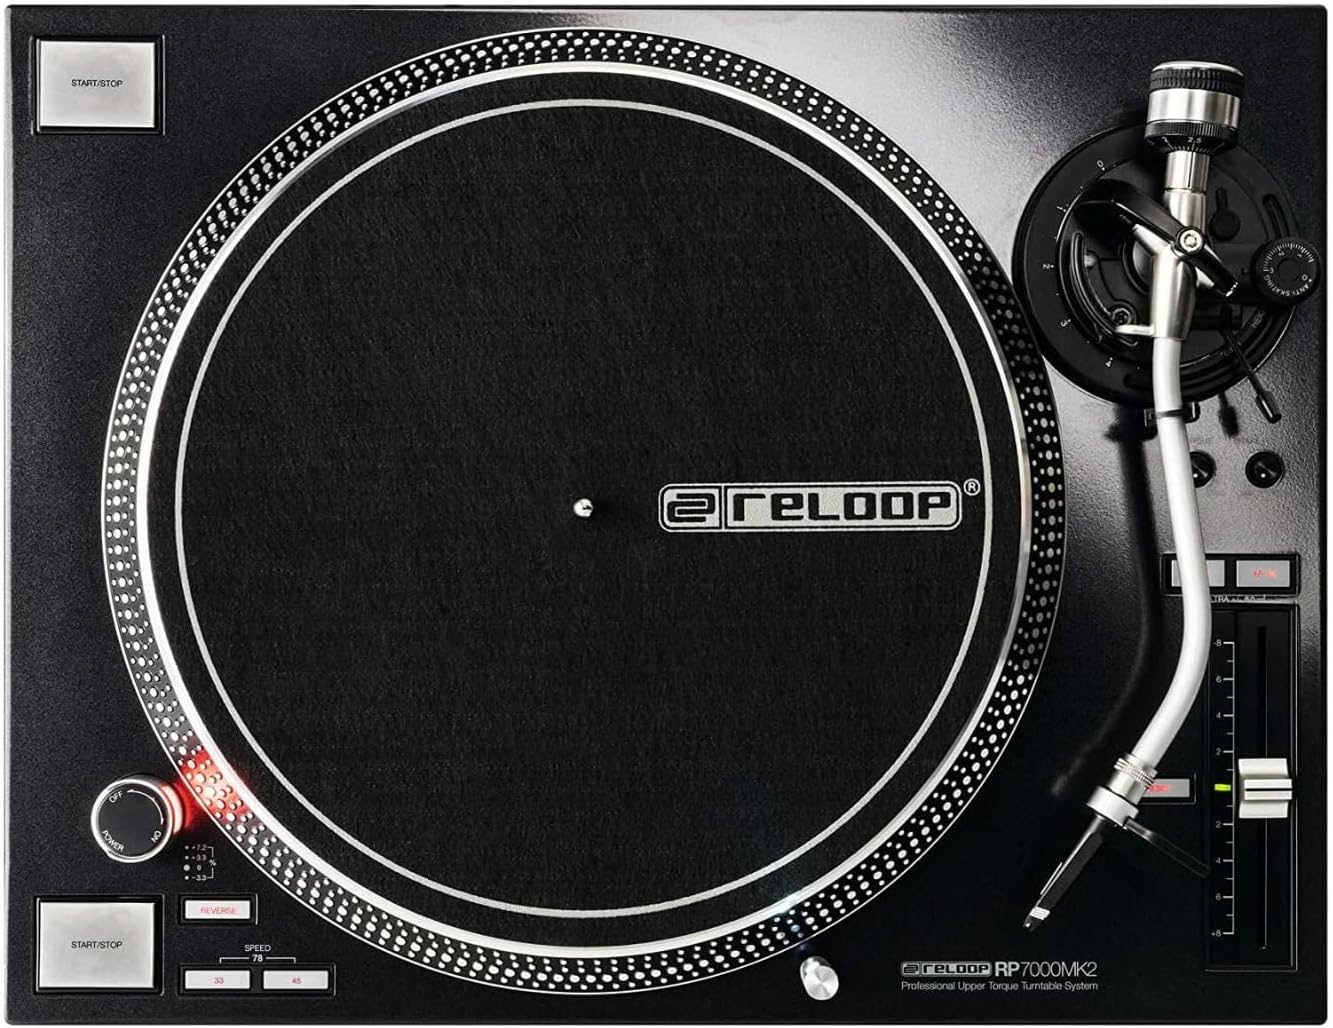
Joonis 4: Turntable platter and control layout.
5.2 Helitugevuse kontroll
The pitch fader allows you to adjust the playback speed (BPM) of the record. Move the fader up or down to increase or decrease the pitch. The pitch range can be selected using the range buttons (e.g., +/- 8%, 16%, 50%).
5.3 Pöördfunktsioon
The RP-7000 MK2 features a reverse playback function. Press the PÖÖRD button to change the direction of platter rotation. Press it again to return to normal playback.
6. Hooldus
6.1 Pöördlaua puhastamine
- Enne puhastamist ühendage alati toide lahti.
- Use a soft, dry, lint-free cloth to wipe the surface of the turntable and dust cover.
- Vältige abrasiivsete puhastusvahendite, lahustite või keemiliste pihustite kasutamist, kuna need võivad viimistlust kahjustada.
6.2 Pliiatsi hooldus
- Gently brush the stylus from back to front using a soft stylus brush to remove dust and debris.
- Vältige pliiatsi puudutamist sõrmedega.
6.3 Dokumentide hooldus
The included record care solution helps maintain the quality of your vinyl records and prolong their lifespan.
- Apply a small amount of record care solution to a clean, soft, lint-free cloth or a dedicated record cleaning brush.
- Gently wipe the record surface in a circular motion, following the grooves.
- Allow the record to dry completely before playing.
Joonis 5: Record Care Solution for maintaining vinyl quality.
7. Veaotsing
| Probleem | Võimalik põhjus | Lahendus |
|---|---|---|
| Pole jõudu | Toitekaabel pole ühendatud; pistikupesa ei ole aktiivne | Check power cable connection; test outlet with another device |
| Heli pole või helitugevus on madal | RCA cables incorrect; no PHONO input; amplifier/mixer settings | Ensure RCA cables are connected to PHONO input; check amplifier/mixer input selection and volume |
| Sumisev müra | Ground wire not connected; interference | Connect ground wire; move turntable away from other electronic devices |
| Hüppav või moonutatud heli | Incorrect tracking force; dirty stylus/record; damaged stylus | Adjust tracking force using stylus scale; clean stylus and record; replace stylus if damaged |
| Vaagen ei pöörle | START/STOP button not pressed; motor issue | Press START/STOP; if problem persists, contact support |
8. Tehnilised andmed
| Funktsioon | Detail |
|---|---|
| Mudeli nimi | RP-7000 MK2 |
| Kaubamärk | Reloop |
| Mootori tüüp | Direct Drive DC Motor |
| Erifunktsioon | Kõrge pöördemoment |
| Toote mõõtmed | 27.9 x 20 x 18.6 tolli |
| Materjal | Metallist |
| Värv | Must |
| Ühilduvad seadmed | Speaker, Headphone, Personal Computer, MP3 Player, Laptop |
| Signaali formaat | Digitaalne |
9. Garantii ja tugi
Reloop products are designed for reliability and performance. For warranty information, please refer to the warranty card included with your product or visit the official Reloop website. For technical support or service inquiries, please contact your authorized Reloop dealer or distributor.
Tootja: Reloop
Esmakordse saadavaloleku kuupäev: 8. juuli 2022


