1. Sissejuhatus
This manual provides essential information for the safe and efficient operation of your iProda 2 in 1 Laptop, Model M1169YM. Please read this manual thoroughly before using the device and retain it for future reference. This convertible laptop features an 11.6-inch touchscreen, powered by an Intel N4100 processor, and runs on Windows 10 Pro.

Image: The iProda 2 in 1 Laptop can be used in multiple configurations, including traditional laptop, tent, stand, and tablet modes, showcasing selle mitmekülgsus.
2. Ohutusalane teave
Seadme kahjustamise või enda vigastamise vältimiseks järgige järgmisi ohutusnõudeid:
- Ärge jätke seadet äärmuslike temperatuuride, otsese päikesevalguse ega kõrge õhuniiskuse kätte.
- Vältige seadme maha kukkumist või tugevate löökide saamist.
- Use only the provided or approved power adapter for charging.
- Hoidke seadet veest ja muudest vedelikest eemal.
- Ärge proovige seadet ise lahti võtta ega parandada. Pöörduge kvalifitseeritud hooldustöötaja poole.
3. Pakendi sisu
Veenduge, et pakis on kõik esemed olemas:
- iProda 2 in 1 Laptop (Model M1169YM)
- Toiteadapter
- Kasutusjuhend (see dokument)
4. Toote lõppview
The iProda 2 in 1 Laptop is designed for versatility, offering multiple usage modes and essential connectivity options.
4.1. Põhiomadused
- 11.6-tolline IPS-puuteekraan: A responsive 10-point precision touchscreen with 1920x1080 resolution for interactive use.
- Kabrioleti disain: 360-degree hinge allows seamless transition between laptop, tablet, tent, and stand modes.
- Intel N4100 protsessor: Provides efficient performance for daily tasks.
- Windows 10 Pro: Pre-installed operating system for productivity and security.
- Laiendatav salvestusruum: Supports M.2 2242 SSD for additional storage capacity.

Image: Key features of the iProda laptop, including its touchscreen, operating system, display specifications, and camera resolution.

Image: The laptop's 360-degree hinge allows it to convert into a tablet, enabling direct interaction via its precision touchscreen.
4.2. Pordid ja nupud
Familiarize yourself with the various ports and buttons on your laptop:
- C-tüüpi tüüp: Used for power supply and data transfer.
- Mikro-HDMI: Väliste kuvaritega ühendamiseks.
- Mikro-USB: USB-seadmete ühendamiseks.
- TF-kaardi pesa: For expanding storage with a TF (MicroSD) card.
- Toitenupp: Seadme sisse-/väljalülitamiseks või unerežiimile panemiseks.
- Helitugevuse nupud: To adjust audio output.
- Kõrvaklubi pistik: Kõrvaklappide või väliste kõlarite ühendamiseks.

Pilt: detailne view of the laptop's side panels, indicating the location and function of each port and button for easy identification.
5. Seadistamine
5.1. Aku laadimine
Before first use, fully charge the laptop's battery. Connect the provided power adapter to the Type-C port on the laptop and plug it into a power outlet. The charging indicator light will illuminate.
5.2. Esimene käivitamine ja Windowsi seadistamine
- Press and hold the Power Button until the screen turns on.
- Windows 10 Pro esmase seadistamise (sh keele valik, võrguühendus ja kasutajakonto loomine) lõpuleviimiseks järgige ekraanil kuvatavaid juhiseid.
6. Sülearvuti kasutamine
6.1. Puuteekraani kasutamine
The 10-point precision touchscreen allows for intuitive interaction with Windows 10 Pro. Use gestures such as tapping, swiping, pinching, and stretching to navigate, zoom, and interact with applications.
6.2. Klaviatuur ja puuteplaat
The integrated keyboard and touchpad provide traditional input methods. The touchpad supports multi-touch gestures for scrolling, zooming, and switching applications.

Image: The laptop's full-size American keyboard and responsive touchpad, designed for comfortable typing and navigation.
6.3. Teisendatavad režiimid
The 360-degree hinge allows you to switch between various modes:
- Sülearvuti režiim: Standard configuration for typing and productivity.
- Tahvelarvuti režiim: Fold the screen back completely for a tablet experience, ideal for browsing or drawing.
- Telgirežiim: Position the laptop like a tent for media consumption or presentations.
- Ooterežiim: Flip the keyboard face down to use the screen as a display, suitable for watching videos.

Image: The laptop configured in tent mode, demonstrating its flexibility for viewsisu loomine ilma klaviatuuri segamata.
7. Salvestusruumi laiendamine
The laptop comes with 64GB eMMC storage. You can expand the storage capacity by installing an M.2 2242 SSD (128GB/256GB/512GB, not included).
7.1. Installing an M.2 2242 SSD
To install an M.2 2242 SSD:
- Power off the laptop and disconnect the power adapter.
- Carefully open the back cover of the laptop.
- Locate the M.2 slot.
- Insert the M.2 2242 SSD into the slot and secure it with the appropriate screw (if provided).
- Pange tagakaas tagasi.
- Upon booting, you may need to initialize and format the new SSD through Windows Disk Management.
Note: If you are unsure about this procedure, it is recommended to seek professional assistance.

Image: Visual representation of the M.2 SSD slot, illustrating how additional storage can be integrated into the laptop.
8. Ühenduvus
8.1. WiFi-ühendus
The laptop supports dual-frequency 2.4GHz/5GHz Wi-Fi. To connect to a wireless network:
- Klõpsake süsteemisalves WiFi ikooni.
- Valige loendist soovitud võrk.
- Sisestage võrguparool, kui seda küsitakse, ja klõpsake nuppu „Ühenda”.
8.2. External Display (Micro HDMI)
Connect an external monitor or TV using a Micro HDMI to HDMI cable. Once connected, you can configure display settings (duplicate, extend, second screen only) through Windows display settings.
8.3. USB-seadmed
Use the Micro USB port or the Type-C port (with an appropriate adapter) to connect peripherals such as a mouse, keyboard, or external storage devices.
9. Hooldus
9.1. Puhastamine
To clean the laptop, power it off and disconnect the power adapter. Use a soft, lint-free cloth slightly dampPuhastage ekraani veega või ekraanipuhastusvahendiga. Vältige karme kemikaale või abrasiivseid materjale.
9.2. Aku hooldus
Aku tööea pikendamiseks:
- Vältige aku sagedast täielikku tühjenemist.
- Ärge jätke sülearvutit kõrge temperatuuri kätte.
- Kui sülearvutit pikemat aega hoiule ei panda, veenduge, et aku oleks laetud umbes 50–70% ulatuses.
10. Veaotsing
Siin on lahendused levinud probleemidele, millega võite kokku puutuda:
| Probleem | Lahendus |
|---|---|
| Sülearvuti ei lülitu sisse. | Ensure the battery is charged. Connect the power adapter and try again. If still unresponsive, perform a hard reset by holding the power button for 10-15 seconds. |
| Ekraan on tühi või virvendab. | Restart the laptop. Check if an external display is connected and interfering. Update display drivers if possible. |
| WiFi-ühenduse probleemid. | Veenduge, et WiFi oleks lubatud. Taaskäivitage ruuter ja sülearvuti. Kontrollige Windowsi võrguseadeid. |
| Puuteekraan ei reageeri. | Restart the laptop. Ensure the screen is clean. Check for any pending Windows updates or driver updates for the touchscreen. |
11. Tehnilised andmed
Technical specifications for the iProda 2 in 1 Laptop (Model M1169YM):
| Funktsioon | Detail |
|---|---|
| Kaubamärk | iProda |
| Mudeli number | M1169YM |
| Operatsioonisüsteem | Windows 10 Pro |
| Ekraani suurus | 11.6 tolli |
| Ekraani eraldusvõime | 1920 x 1080 pikslit (1080p) |
| Protsessor | Intel N4100 (up to 2.4 GHz Burst Frequency) |
| RAM | 4 GB DDR4 |
| Kõvaketas | 64 GB eMMC |
| Graafikakaart | Integrated (UHD 600 Graphics) |
| Traadita tüüp | 2.4 GHz / 5 GHz Dual-frequency Wi-Fi |
| Keskmine aku tööiga | 8 Hours (3500mAh, 27Wh) |
| Kauba kaal | 3.63 naela |
| Toote mõõtmed | 11.99 x 11.6 x 0.5 tolli |
| Ühenduvustehnoloogia | HDMI, USB Type-C, Micro USB |
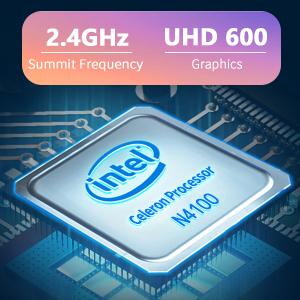
Image: The Intel Celeron N4100 processor, central to the laptop's performance, highlighting its clock speed and integrated graphics capabilities.

Image: The laptop's battery specifications, indicating its power capacity for extended use.
12. Garantii ja tugi
For warranty information and technical support, please refer to the documentation included with your purchase or visit the official iProda website. Contact information for customer service can typically be found on the manufacturer's support page.


