1. Olulised ohutusjuhised
Elektriliste tööriistade kasutamisel järgige alati põhilisi ohutusnõudeid, et vähendada tulekahju, elektrilöögi ja kehavigastuste ohtu. Enne kasutamist lugege hoolikalt kõiki juhiseid.
- Tööpiirkonna ohutus: Hoidke oma tööala puhas ja hästi valgustatud. Segaduses või pimedas kohas võivad toimuda õnnetused. Ärge kasutage elektritööriistu plahvatusohtlikus keskkonnas, näiteks tuleohtlike vedelike, gaaside või tolmu läheduses.
- Elektriohutus: Elektritööriistade pistikud peavad sobima pistikupessa. Ärge kunagi muutke pistikut mingil moel. Vältige kehalist kokkupuudet maandatud pindadega, näiteks torude, radiaatorite, pliitide ja külmikutega.
- Isiklik ohutus: Kandke alati silmakaitset. Pikemate tööperioodide ajal kasutage kuulmiskaitset. Riietuge korralikult; ärge kandke laiu riideid ega ehteid. Hoidke juuksed, riided ja kindad liikuvatest osadest eemal.
- Tööriista kasutamine ja hooldus: Ärge kasutage elektritööriista jõuga. Kasutage oma töö jaoks õiget elektritööriista. Enne mis tahes reguleerimist, tarvikute vahetamist või elektritööriistade hoiulepanekut eemaldage pistik vooluvõrgust.
- Hooldus: Hooldage elektrilisi tööriistu. Kontrollige, kas liikuvad osad ei ole kohakuti või seotud, osade purunemine ega muud tingimused, mis võivad mõjutada elektritööriista tööd. Kui see on kahjustatud, laske enne kasutamist elektritööriista parandada.
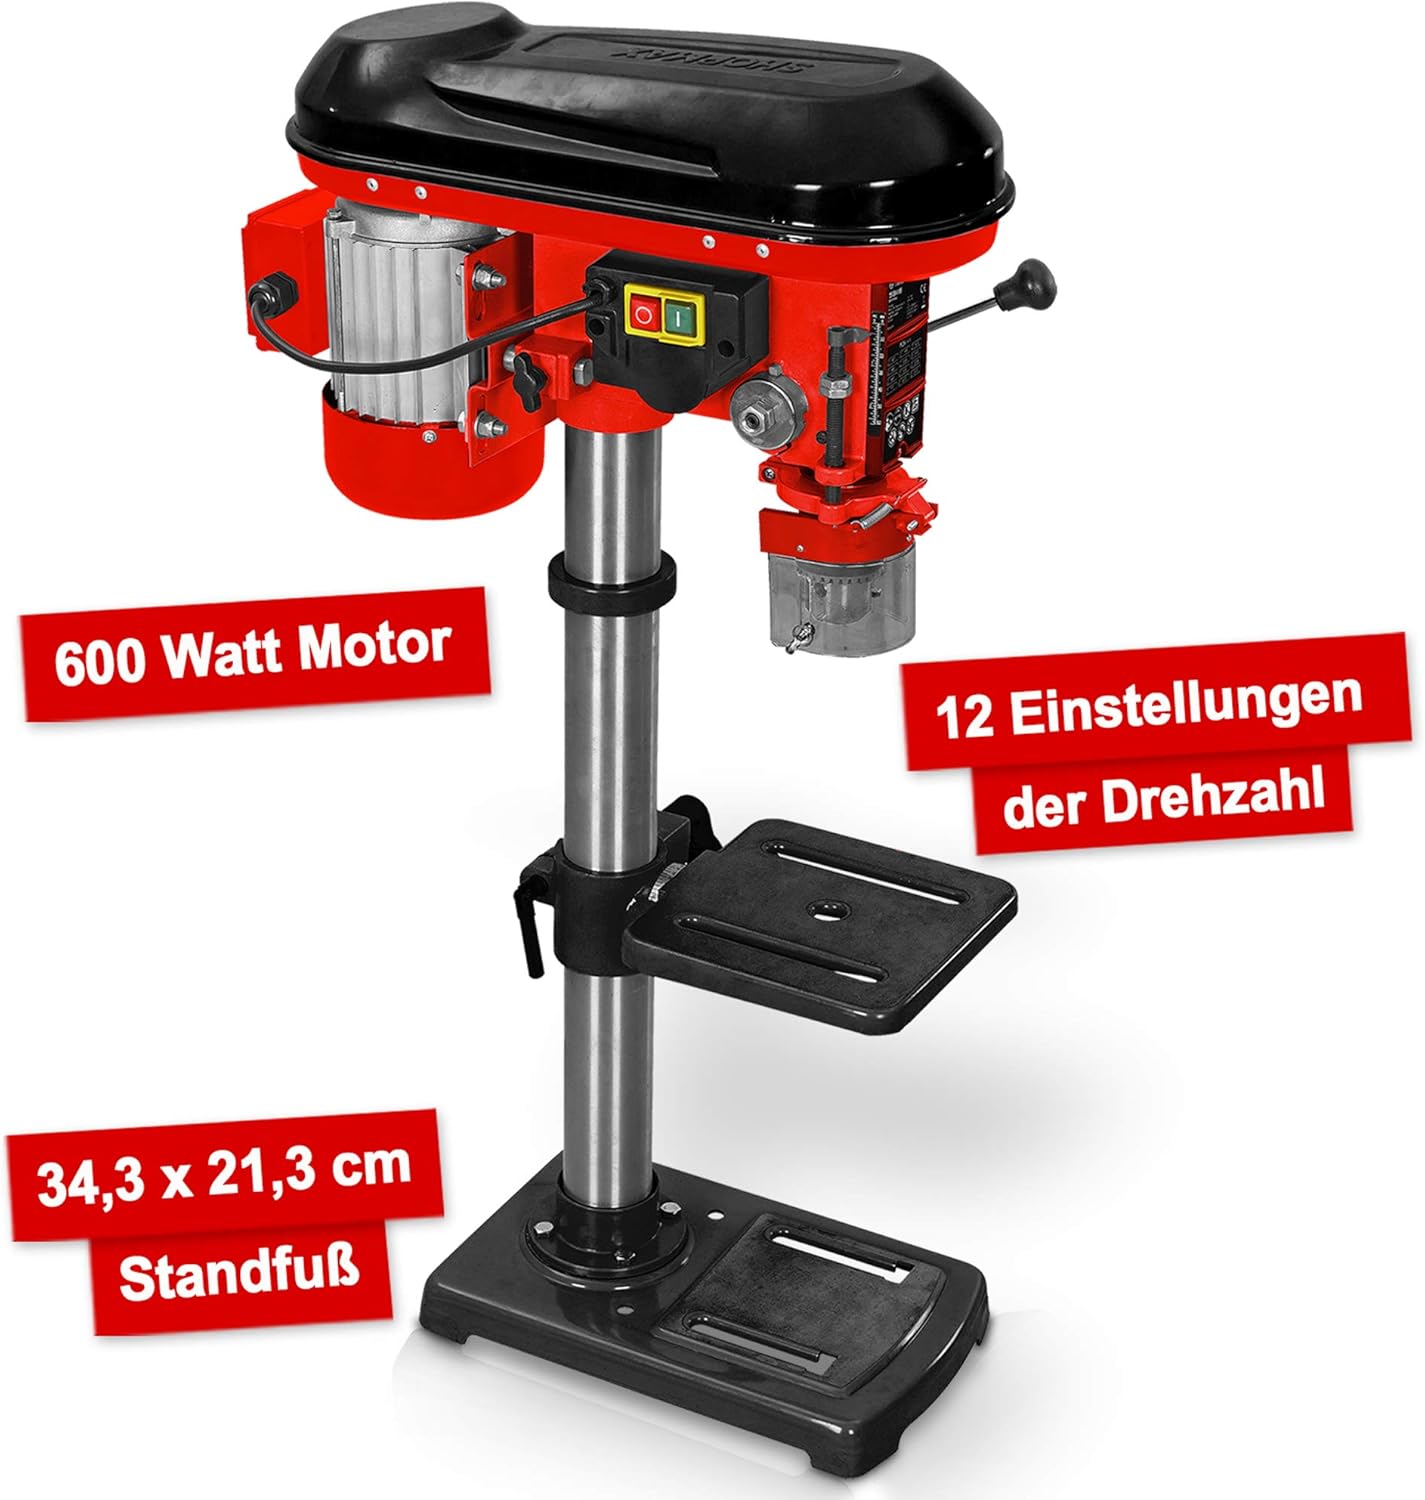
2. Toote lõppview ja komponendid
The Hecht Professional Pillar Drill is designed for precise drilling operations. Familiarize yourself with its main components for safe and effective use.

- Mootorikorpus: Contains the 600W motor and belt drive system.
- Peakomplekt: Includes the chuck, spindle, and depth stop.
- Veerg: The main support structure for the head assembly and drilling table.
- Drilling Table: Adjustable in height and angle for versatile drilling.
- Alusplaat: Provides stability and features mounting slots for securing to a workbench.
- chuck: Holds the drill bits securely (3-16 mm capacity).
- Speed Adjustment Lever: Used to change the drilling speed.
- Sööda käepidemed: Used to lower the chuck and drill bit into the workpiece.
- Sisse/välja lüliti: Power control for the drill.
- Chip Protection Guard: Transparent guard for safety during operation.
3. Seadistamine ja kokkupanek
Follow these steps to assemble and set up your pillar drill before initial use.
- Lahtipakkimine: Eemaldage pakendist ettevaatlikult kõik komponendid. Kontrollige, kas on kahjustusi või puuduvaid osi.
- Alusplaadi paigaldamine: Place the base plate on a stable, level workbench. Secure it using appropriate bolts through the elongated slots on the base.
- Kolonni kokkupanek: Mount the column securely onto the base plate according to the provided hardware.
- Drilling Table Attachment: Slide the drilling table assembly onto the column. Adjust its height and secure it with the locking handle.
- Head Assembly Mounting: Carefully place the head assembly onto the top of the column and secure it.
- Padruni paigaldamine: Insert the chuck onto the spindle taper. Use a rubber mallet to gently tap it into place, ensuring a firm fit.
- Chip Guard: Attach the transparent chip protection guard around the chuck area.

4. Kasutusjuhised
Understand how to properly operate your pillar drill for optimal performance and safety.
4.1 Selecting Drill Bits
Choose the appropriate drill bit for the material and desired hole size. The chuck accommodates bits from 3 mm to 16 mm. Ensure the drill bit is sharp and free from damage.
4.2 Puuride paigaldamine
- Veenduge, et puur on vooluvõrgust lahti ühendatud.
- Open the chuck jaws using the chuck key.
- Insert the drill bit into the chuck, ensuring it is centered and seated firmly.
- Tighten the chuck jaws securely with the chuck key. Remove the chuck key immediately after tightening.
4.3 Kiiruse reguleerimine
The drill features 12 speed settings, adjustable via a belt drive system. Select the speed appropriate for your material and drill bit size. Lower speeds are generally for larger bits and harder materials, while higher speeds are for smaller bits and softer materials.


4.4 Adjusting Drilling Table
The drilling table can be adjusted in height and tilted up to +/- 45 degrees. Loosen the locking handle, position the table as required, and then securely tighten the handle.

4.5 Puurimissügavuse seadistamine
Use the depth stop mechanism to set the desired drilling depth. This ensures consistent hole depths for repetitive tasks.
4.6 Puurimisprotseduur
- Secure the workpiece firmly to the drilling table using clamps or a vise. Never hold the workpiece by hand.
- Adjust the table height and angle, and set the drilling depth.
- Valige sobiv kiirus.
- Turn on the drill using the On/Off switch.
- Langetage puuritera aeglaselt toorikusse, kasutades etteande käepidemeid ja avaldades ühtlast ja ühtlast survet.
- Kui soovitud sügavus on saavutatud, tõmmake puuritera töödeldavast detailist välja.
- Lülitage puur välja.
5. Hooldus
Regulaarne hooldus tagab teie sammaspuuri pikaealisuse ja ohutu töö.
- Puhastamine: After each use, clean the drill of dust and chips. Use a brush or compressed air. Do not use solvents that may damage plastic parts.
- Määrimine: Periodically lubricate moving parts such as the column, spindle, and depth stop mechanism with light machine oil.
- Rihma pinge: Check the tension of the drive belt regularly. Adjust if necessary to prevent slippage and ensure proper power transmission. Refer to the belt diagram inside the motor housing cover.
- Padruni hooldus: Keep the chuck jaws clean and free of debris. If the chuck becomes stiff, clean and lightly lubricate it.
- Elektrijuhe: Kontrollige toitejuhet kahjustuste suhtes. Vahetage välja, kui see on narmendanud või läbi lõigatud.
6. Veaotsing
Selles jaotises käsitletakse tavalisi probleeme, mis võivad sammaspuuriga kokku puutuda.
| Probleem | Võimalik põhjus | Lahendus |
|---|---|---|
| Puur ei käivitu | Puudub toide; Vigane lüliti; Mootori probleem | Check power connection and circuit breaker; Inspect switch for damage; Consult qualified service personnel. |
| Liigne vibratsioon | Loose mounting; Unbalanced drill bit; Worn bearings | Tighten mounting bolts; Replace or re-center drill bit; Consult service personnel for bearing replacement. |
| Puur libiseb padrunis | Chuck not tightened sufficiently; Oily chuck jaws; Damaged chuck jaws | Tighten chuck firmly with key; Clean chuck jaws; Replace chuck if damaged. |
| Mootor kuumeneb üle | Overloading; Insufficient ventilation; Prolonged use | Reduce load; Ensure clear ventilation; Allow motor to cool down. |
| Ebatäpne puurimine | Loose workpiece; Worn drill bit; Misaligned table | Secure workpiece firmly; Replace drill bit; Check and adjust table alignment. |
7. Tehnilised andmed
Technical data for the Hecht Professional Pillar Drill.
| Funktsioon | Spetsifikatsioon |
|---|---|
| Tootja | Hecht |
| Kauba mudeli number | Standbohrmaschine Hecht |
| Toiteallikas | Juhtmega elekter |
| Voltage | 230 volti |
| Maksimaalne võimsus | 600 vatti |
| Maksimaalne pöörlemiskiirus | 2700 pööret minutis |
| Kiiruste arv | 12 |
| Max Chucki suurus | 16 mm |
| Materjal | Metallist |
| Värv | Red Pillar Drill |
| Pakendi mõõtmed | 71 x 45 x 27 cm |
| Kaal | 23 kilograms (approx.) |
| Kasutuskeskkond | Siseruumides |
| Viitenumber | 8595614925655 |
8. Garantii ja tugi
For warranty information, please refer to the documentation provided with your purchase or contact the retailer. For technical support or spare parts inquiries, please contact Hecht customer service or your authorized dealer.
Please have your model number (Standbohrmaschine Hecht) and reference number (8595614925655) available when contacting support.


