Sissejuhatus
Thank you for choosing the Peakeep S8 Digital Alarm Clock. This manual provides detailed instructions for setting up, operating, and maintaining your new alarm clock. Please read this manual thoroughly before use to ensure proper function and to maximize your product experience.
Toote omadused
- Suur LCD ekraan: Features a clear, boldface number display for easy readability.
- Nutikas valgusandur: Built-in sensor automatically activates a soft backlight in dark environments, ensuring visibility without disturbing sleep.
- Gradually Strengthening Alarm: The alarm sound increases in volume gradually to gently wake you up.
- Korduse funktsioon: Annab pärast äratuskella veel 5 minutit und.
- Adjustable Time and Date Format: Customize time display (12/24 hour) and date format.
- Temperatuuri jälgimine: Displays ambient temperature in Celsius or Fahrenheit.
- Akutoitel: Operates on 3 x AAA batteries (not included).
Pakendi sisu
- 1 x Peakeep S8 Digital Alarm Clock
- 1 x kasutusjuhend
Juhtnupud ja ekraan
Esikuvar
The large LCD screen displays time, date, day of the week, alarm status, and temperature. The backlight activates automatically in low light conditions when the sensor is enabled.
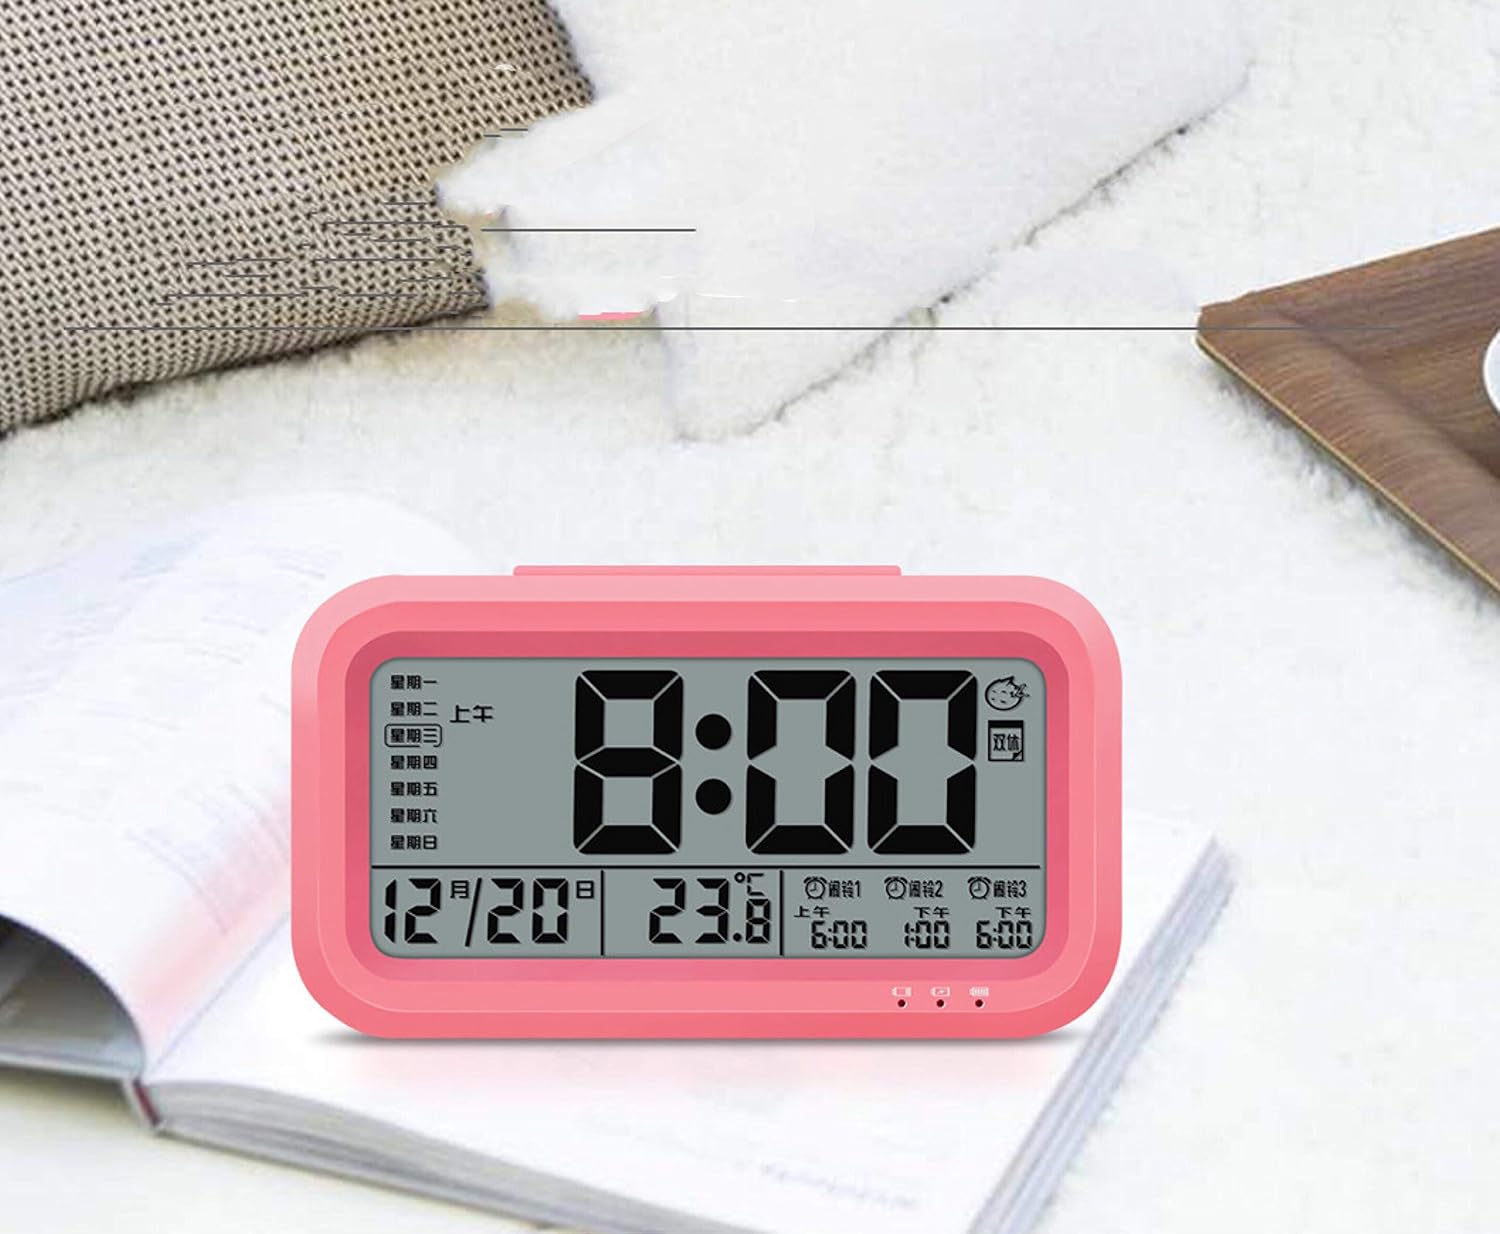
Pilt: Esikülg view of the Peakeep S8 Digital Alarm Clock. This image shows the large digital display with the time (8:00), date (12/20), and temperature (23.8°C). It also indicates alarm settings and day of the week.
Tagumised juhtnupud
The back of the clock features several buttons and switches for setting time, date, alarm, and other functions.
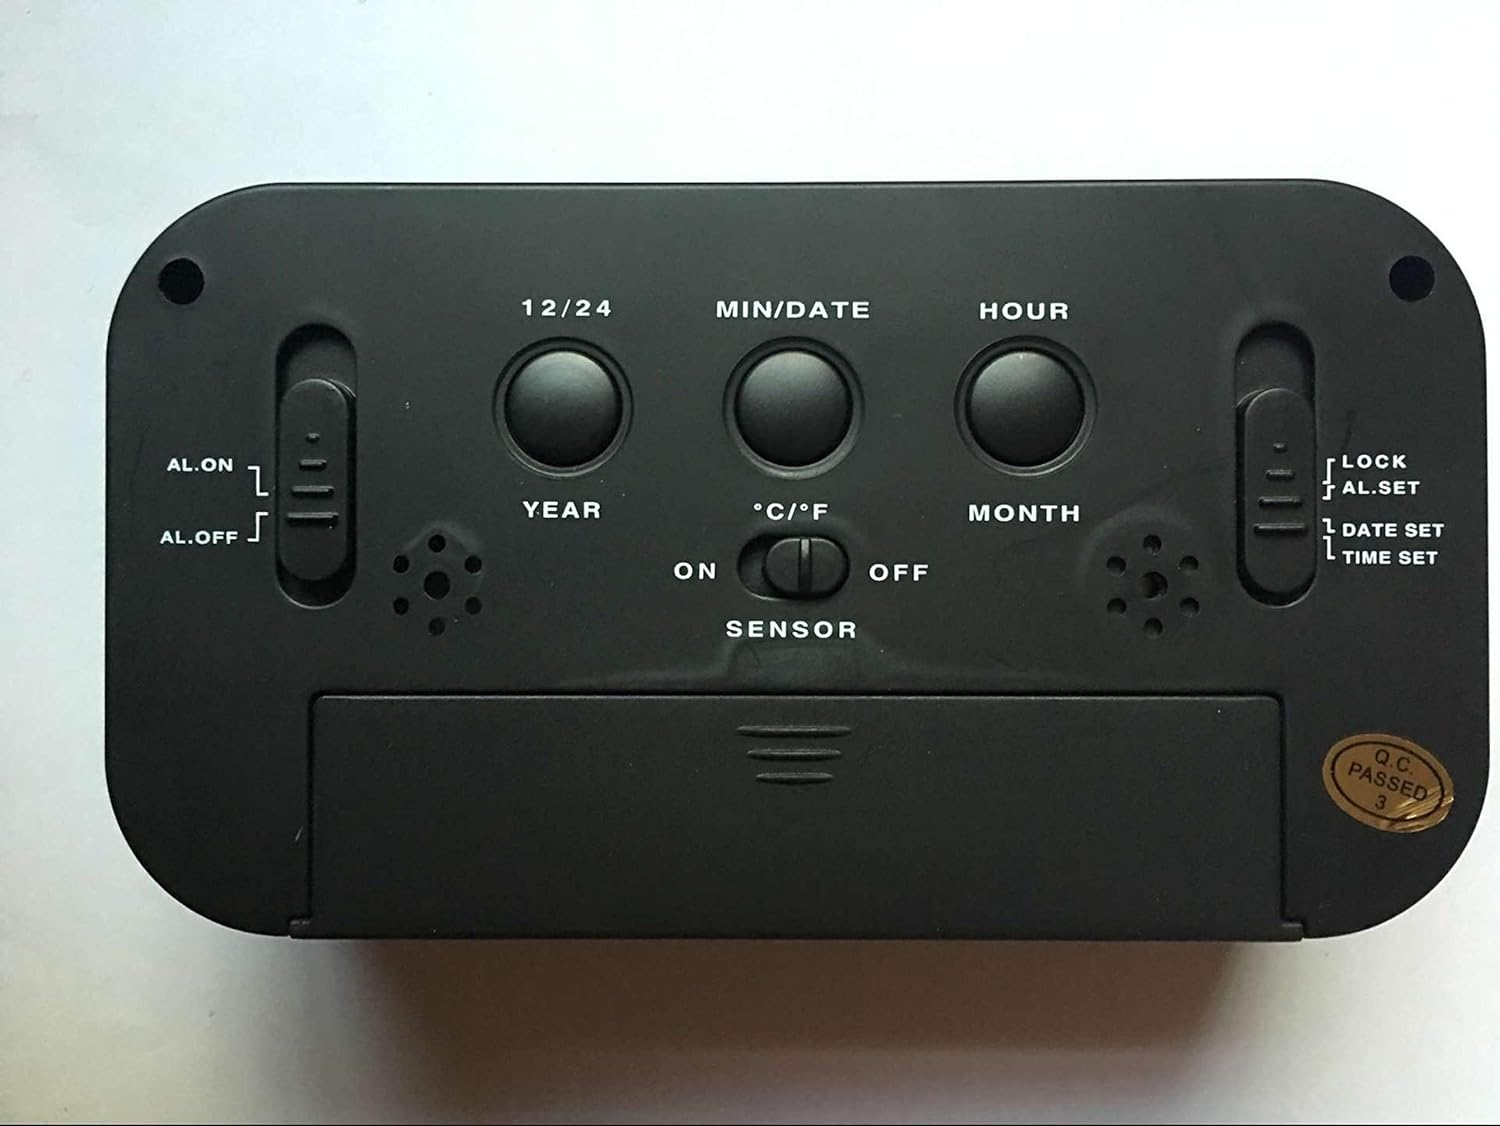
Pilt: Tagumine view of the Peakeep S8 Digital Alarm Clock. This image highlights the control panel on the back, including buttons for 12/24 hour format, MIN/DATE, HOUR, YEAR, MONTH, °C/°F, and switches for AL.ON/AL.OFF, LOCK/AL.SET/DATE SET/TIME SET, and SENSOR ON/OFF.
- 12/24 nupp: Lülitab 12-tunnise ja 24-tunnise ajavormingu vahel.
- MIN/KUUPÄEVA nupp: Used to adjust minutes during time/alarm setting, and to view kuupäeva.
- TUNDIDE nupp: Used to adjust hours during time/alarm setting.
- AASTA nupp: Used to set the year.
- KUU nupp: Used to set the month.
- °C/°F nupp: Switches temperature display between Celsius and Fahrenheit.
- AL.ON/AL.OFF lüliti: Turns the alarm function on or off.
- MODE Switch (LOCK/AL.SET/DATE SET/TIME SET):
- LUKKU: Locks current settings to prevent accidental changes.
- AL.SET: Siseneb äratuse seadistamise režiimi.
- DATE SET: Enters date setting mode.
- AJAKOMPLEKT: Siseneb aja seadistamise režiimi.
- SENSOR ON/OFF Switch: Activates or deactivates the smart light sensor for automatic backlight.
- SNOOZE/LIGHT Button (Top): Activates snooze when alarm sounds, or temporarily illuminates the display.
Seadistamine
1. Aku paigaldamine
- Avage kella tagaküljel asuv patareipesa kate.
- Insert 3 new 1.5V AAA batteries, ensuring correct polarity (+ and -).
- Sulgege akupesa kaas kindlalt.
- Märkus: Patareid ei kuulu komplekti.
2. Algaja seadistamine
- Slide the MODE switch to AJA MÄÄRAMINE.
- Vajutage nuppu TUND nuppu tundide reguleerimiseks.
- Vajutage nuppu MIN/KUUPÄEV nupp minutite reguleerimiseks.
- Once the correct time is set, slide the MODE switch back to LUKKU.
3. Initial Date Setting
- Slide the MODE switch to KUUPÄEV SET.
- Vajutage nuppu AASTA nuppu aasta reguleerimiseks.
- Vajutage nuppu KUU nuppu kuu reguleerimiseks.
- Vajutage nuppu MIN/KUUPÄEV nuppu päeva reguleerimiseks.
- Once the correct date is set, slide the MODE switch back to LUKKU.
Kasutusjuhised
Alarmi seadistamine
- Slide the MODE switch to AL.SET.
- Vajutage nuppu TUND nuppu äratustundide reguleerimiseks.
- Vajutage nuppu MIN/KUUPÄEV nuppu äratuse minutite reguleerimiseks.
- Once the desired alarm time is set, slide the MODE switch back to LUKKU.
- Äratuse aktiveerimiseks libistage AL.SEES/AL.VÄLJAS lülituda AL.ON. An alarm icon will appear on the display.
Edasilükkamise funktsiooni kasutamine
Kui äratuskell kõlab, vajutage suurt nuppu SNOOZE / VALGUS button on top of the clock. The alarm will pause for approximately 5 minutes and then sound again. This can be repeated.
Alarmi väljalülitamine
Äratuse täielikuks väljalülitamiseks libistage nuppu AL.SEES/AL.VÄLJAS lülituda AL.OFF. The alarm icon will disappear from the display.
Activating the Smart Light Sensor
To enable the automatic backlight feature, slide the SENSOR lülituda ON. The display will automatically illuminate with a soft glow in dark environments. Slide the switch to VÄLJAS selle funktsiooni keelamiseks.
Temperatuuriühiku muutmine
Vajutage nuppu ° C / ° F button on the back of the clock to switch the temperature display between Celsius and Fahrenheit.
Changing Time Format (12/24 Hour)
Vajutage nuppu 12/24 button on the back of the clock to toggle between 12-hour (with AM/PM indicator) and 24-hour time formats.
Hooldus
Puhastamine
Pühkige kella pehme ja kuiva lapiga. Ärge kasutage abrasiivseid puhastusvahendeid ega lahusteid, kuna need võivad pinda kahjustada.
Patarei vahetus
When the display becomes dim or the clock functions erratically, it is time to replace the batteries. Follow the battery installation steps in the "Setup" section. Always replace all three AAA batteries at the same time with new ones.
Veaotsing
| Probleem | Võimalik põhjus/lahendus |
|---|---|
| Ekraan on tühi või tuhm. |
|
| Äratus ei helise. |
|
| Kell kaotab või võidab aega. |
|
| Nupud ei reageeri. |
|
Tehnilised andmed
- Kaubamärk: Peakeep
- Mudeli number: S8 (Item Model Number: Crazy Curry-030)
- Kuva tüüp: Digitaalne LCD
- Materjal: Plastikust
- Värv: Black (Black-a)
- Toiteallikas: 3 x 1.5V AAA Batteries (Not included)
- Eriomadused: Alarm, Snooze, Smart Light Sensor, Temperature Display (°C/°F), 12/24 Hour Format
- Mõõdud: (Approximate, based on typical alarm clock size and weight)
- Kauba kaal: 178 g
- Saadetise kaal: 0.18 kilogrammi
- UPC: 734602860235
Garantii ja tugi
This product is designed for reliability and ease of use. For specific warranty information, please refer to the documentation provided at the time of purchase or contact your retailer.
If you encounter any issues not covered in this manual, please contact the retailer or manufacturer for assistance. Keep your purchase receipt as proof of purchase for any warranty claims.


