1. Sissejuhatus
This manual provides essential information and instructions for the safe and efficient use of your Nokia 8 Sirocco TA-1005 smartphone. Please read this guide thoroughly before operating your device to ensure optimal performance and longevity. This device is designed for use with GSM, 3G, and 4G LTE networks. Compatibility with CDMA networks, including Verizon, Sprint, and US Cellular, is not supported. Verify network compatibility with your service provider prior to use.
2. Mis on karbis
Upon unboxing your Nokia 8 Sirocco TA-1005, verify that all components are present:
- Nokia 8 Sirocco TA-1005 Device
- C-tüüpi USB-kaabel
- Toiteadapter
- Peakomplekt
- SIM -i väljatõmbamise tööriist
- Kiirjuhend
- Ohutus- ja garantiiteave
3. Seadme paigutus
Familiarize yourself with the physical components of your Nokia 8 Sirocco TA-1005.
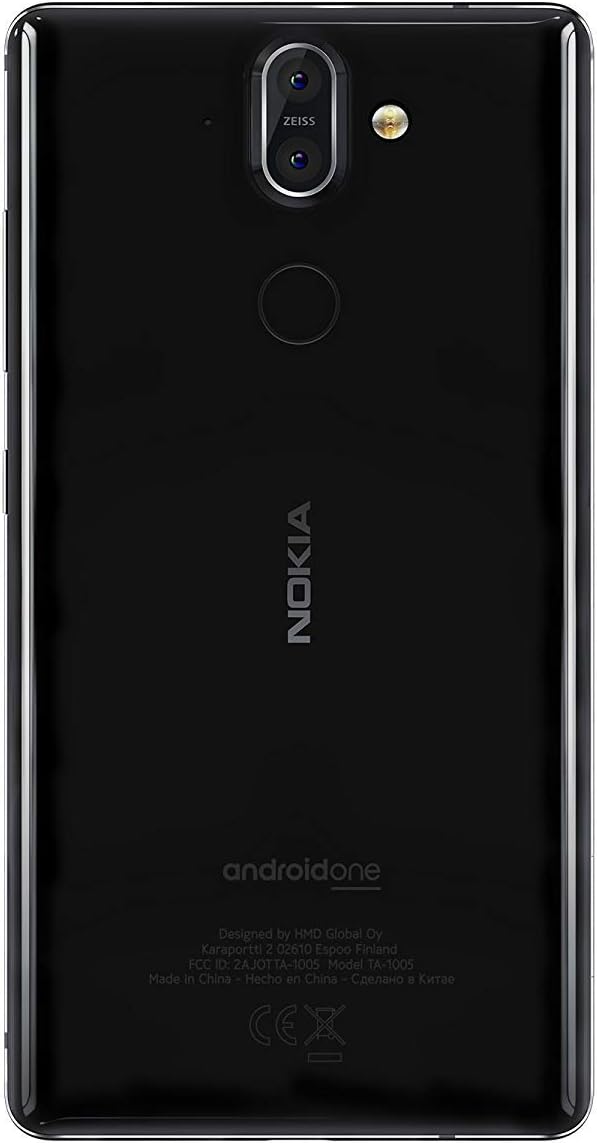
Joonis 3.1: Tagumine view of the Nokia 8 Sirocco TA-1005. This image displays the dual camera setup with ZEISS optics, the circular fingerprint sensor below the camera, and the Nokia logo centrally placed. The 'androidone' branding is visible towards the bottom.
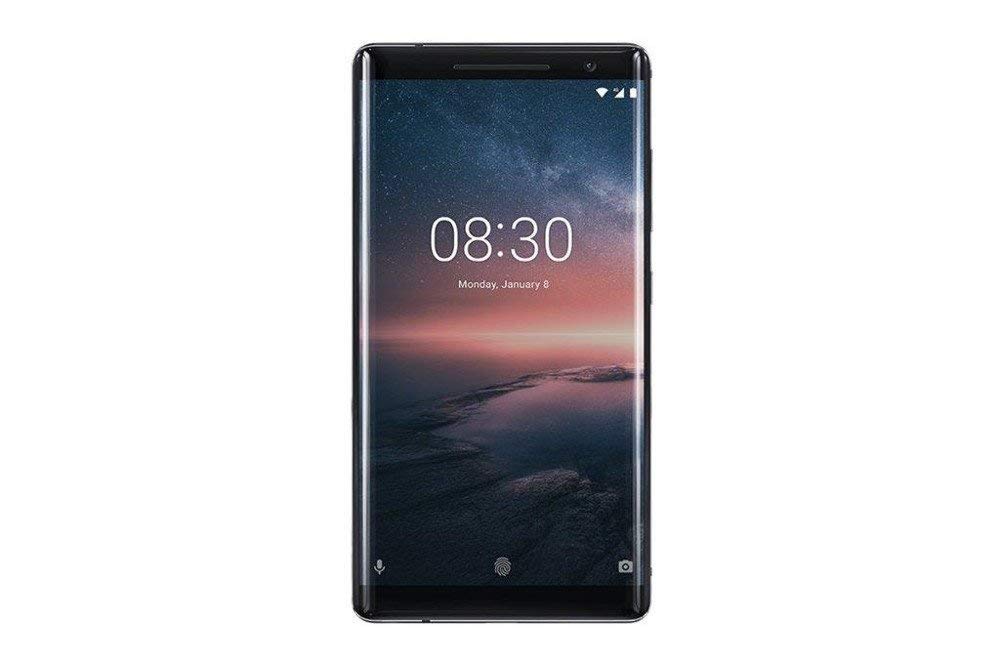
Joonis 3.2: Esiosa view of the Nokia 8 Sirocco TA-1005. The image highlights the 5.5-inch P-OLED curved display, the front-facing camera at the top, and the on-screen navigation buttons. The device features minimal bezels.

Joonis 3.3: Külg view of the Nokia 8 Sirocco TA-1005. This image illustrates the slim profile of the device, with the power button and volume rocker located on the right side for easy access.
Põhikomponendid:
- Esikaamera: Asub ekraani ülaosas.
- Kõrvaklapid: For calls, located above the display.
- Kuva: 5.5-inch P-OLED capacitive touchscreen.
- Helitugevuse nupud: On the right side, to adjust audio levels.
- Toite-/lukustusnupp: On the right side, to power on/off or lock/unlock the screen.
- C-tüüpi USB-port: Allosas laadimiseks ja andmeedastuseks.
- Mikrofon: Asub allosas ja üleval.
- Kõlar: Asub allosas.
- SIM-/mälukaardi salv: On the side, for inserting SIM cards.
- Tagumised kaamerad: Dual cameras with ZEISS optics on the back.
- Välklamp: Dual-tone flash next to the rear cameras.
- Sõrmejäljeandur: On the back, below the rear cameras.
4. Seadistamine
4.1. SIM-kaardi sisestamine
- Leidke seadme küljelt SIM-kaardi salv.
- Sisestage SIM-kaardi väljutustööriist salve väikesesse auku, et see avada.
- Place your Nano-SIM card(s) into the designated slot(s) on the tray, ensuring the gold contacts face downwards.
- Lükake salv ettevaatlikult seadmesse tagasi, kuni see oma kohale klõpsab.
Märkus. This device does not support external memory cards.
4.2. Sisse- ja väljalülitamine
- Sisselülitamiseks: Vajutage ja hoidke toite-/lukustusnuppu all, kuni ilmub Nokia logo.
- Väljalülitamiseks: Press and hold the Power/Lock button until the power options menu appears, then select "Power off".
4.3. Algseadistus
Upon first power-on, the device will guide you through the initial setup process. This includes selecting your language, connecting to a Wi-Fi network, setting up your Google account, and configuring security features like fingerprint unlock or a PIN/pattern.
5. Kasutusjuhised
5.1. Helistamine
- Open the "Phone" application.
- Sisestage telefoninumber numbriklahvistiku abil või valige kontakt oma aadressiraamatust.
- Kõne alustamiseks puudutage kõneikooni.
5.2. Sõnumite saatmine
- Open the "Messages" application.
- Tap the "Start chat" or "New message" icon.
- Sisestage saaja number või valige see kontaktide hulgast.
- Sisestage oma sõnum tekstiväljale.
- Puudutage saatmisikooni.
5.3. Kaamera kasutamine
- Avage rakendus "Kaamera".
- Raamige oma objekt ekraanil.
- Pildistamiseks puudutage päästikunuppu.
- Switch between photo and video modes, or access advanced settings like portrait mode or panorama, as desired.
5.4. Interneti-ühendus
- WiFi: Mine aadressile Seaded > Võrk ja internet > WiFi. Turn Wi-Fi on and select an available network. Enter the password if required.
- Mobiilne andmeside: Mine aadressile Seaded > Võrk ja internet > Mobiilsidevõrk. Ensure "Mobile data" is enabled.
5.5. Turvaelemendid
Your Nokia 8 Sirocco TA-1005 offers various security options:
- Sõrmejälje avamine: Registreerige oma sõrmejäljed läbi Settings > Security & Location > Fingerprint.
- Ekraanilukk: Set a PIN, pattern, or password via Settings > Security & Location > Screen lock.
6. Hooldus
6.1. Seadme puhastamine
Use a soft, lint-free cloth to clean your device. Avoid using harsh chemicals or abrasive materials, which can damage the screen or finish.
6.2. Aku hooldus
- Charge your device using only Nokia-approved chargers and cables.
- Vältige seadme kokkupuudet äärmuslike temperatuuridega.
- Ärge laske akul sageli täielikult tühjeneda.
6.3. Tarkvaravärskendused
Kontrollige regulaarselt tarkvarauuendusi ja installige need, et teie seadmel oleksid uusimad funktsioonid, turvapaigad ja jõudluse täiustused. Minge aadressile Seaded > Süsteem > Süsteemivärskendus.
7. Veaotsing
Kui teil tekib seadmega probleeme, vaadake järgmisi levinud lahendusi.
| Probleem | Lahendus |
|---|---|
| Seade ei lülitu sisse | Veenduge, et aku on laetud. Ühendage laadijaga vähemalt 30 minutiks. Kui seade ei reageeri, käivitage sundtaaskäivitus, hoides toitenuppu 10–15 sekundit all. |
| Kehv võrgusignaal | Check SIM card insertion. Move to an area with better network coverage. Restart the device. Verify network settings in Seaded > Võrk ja internet > Mobiilsidevõrk. |
| Applications are crashing | Tühjendage rakenduse vahemälu (Seaded > Rakendused ja teavitused > [Rakenduse nimi] > Salvestusruum ja vahemälu > Tühjenda vahemälu). Värskenda rakendust Google Play poest. Kui probleem püsib, desinstalli rakendus ja installi see uuesti. |
| Aku tühjeneb kiiresti | Reduce screen brightness. Close unused background apps. Disable Wi-Fi, Bluetooth, and GPS when not in use. Check battery usage in Seaded > Aku energiat tarbivate rakenduste tuvastamiseks. |
| Seade ei reageeri | Perform a force restart by holding the Power button for 10-15 seconds. If the issue continues, consider a factory reset (Seaded > Süsteem > Lähtestamisvalikud > Kustuta kõik andmed (tehaseseadetele lähtestamine)). Hoiatus: Tehase lähtestamine kustutab kõik teie seadmes olevad andmed. Enne jätkamist varundage olulised andmed. |
8. Tehnilised andmed
Detailed technical specifications for the Nokia 8 Sirocco TA-1005:
| Funktsioon | Detail |
|---|---|
| Mudeli nimi | 8 Sirocco |
| Mudeli number | TA-1005 |
| Operatsioonisüsteem | Android 8.0 (Oreo) |
| Protsessor | Qualcomm MSM8998 Snapdragon 835, Octa-core (4x2.5 GHz Kryo & 4x1.8 GHz Kryo) |
| GPU | Adreno 540 |
| RAM | 6 GB |
| Sisemälu | 128 GB |
| Ekraan | 5.5 inches, P-OLED capacitive touchscreen, 1440 x 2560 pixels, Corning Gorilla Glass 5 |
| Tagumine kaamera | 12MP Wide (f/1.7) + 13 MP Tele (f/2.6), dual-tone flash |
| Esikaamera | 5 MP |
| Aku mahutavus | 3250 mAh |
| Laadimine | Kiirlaadimise tugi |
| Ühenduvus | Wi-Fi 802.11a/b/g/n, Bluetooth, USB Type-C |
| Mõõtmed | 43.36 x 43.17 x 0.75 cm |
| Kaal | 181 g |
| SIM-kaardi tüüp | Nano-SIM |
| Võrgutugi | 2G GSM, 3G, 4G LTE (Note: Not compatible with CDMA networks) |
9. Safety and Warranty Information
9.1. Ohutusjuhised
- Do not use the device in prohibited areas, such as aircraft or hospitals.
- Vältige seadme kokkupuudet veega või liigse niiskusega.
- Kasutage ainult originaal- või heakskiidetud lisatarvikuid.
- Ärge proovige seadet ise lahti võtta ega parandada.
- Seade ja selle aku utiliseerimine peab toimuma vastutustundlikult vastavalt kohalikele eeskirjadele.
9.2. Garantii teave
Your Nokia 8 Sirocco TA-1005 is covered by a limited manufacturer's warranty. Please refer to the separate warranty document included in your product packaging or visit the official Nokia support webTäpsemate tingimustega saate tutvuda veebilehel. Garantiinõuete korral hoidke ostutõend alles.


