1. Sissejuhatus
This manual provides comprehensive instructions for the installation, operation, and maintenance of your Swann SWDVK-163208S-US 3200S 16-Channel 960H DVR Security System. Please read this manual thoroughly before using the product to ensure proper setup and functionality. Keep this manual for future reference.
The system includes a 16-channel 960H Digital Video Recorder (DVR) with a pre-installed 1TB hard drive and eight 700TVL security cameras designed for both indoor and outdoor use. It supports continuous recording, motion detection, and remote viewvõimeid.
2. Ohutusalane teave
- Ensure all power connections are secure and correctly rated for the device.
- Do not expose the DVR or cameras to water or excessive moisture.
- Vältige DVR-i asetamist otsese päikesevalguse kätte või soojusallikate lähedusse.
- Kasutage ainult süsteemiga kaasasolevaid toiteadaptereid.
- Do not attempt to open or service the DVR or cameras yourself. Refer all servicing to qualified personnel.
- Keep cables organized to prevent tripping hazards and ensure proper ventilation.
3. Pakendi sisu
Verify that all items listed below are present in your package. If any items are missing or damaged, contact Swann customer support.
- Swann SWDVK-163208S-US 16-Channel 960H DVR with 1TB HDD
- 8 x 700TVL Security Cameras
- 8 x BNC Cables (60ft/18m)
- Power Adapters for DVR and Cameras
- Etherneti kaabel
- HDMI kaabel
- USB-hiir
- Kinnituskruvid ja tüüblid
- Kiirjuhend
- Varguse peletavad kleebised
4. Süsteem läbiview
4.1 DVR Front Panel
The front panel of the DVR provides access to essential controls and indicators.
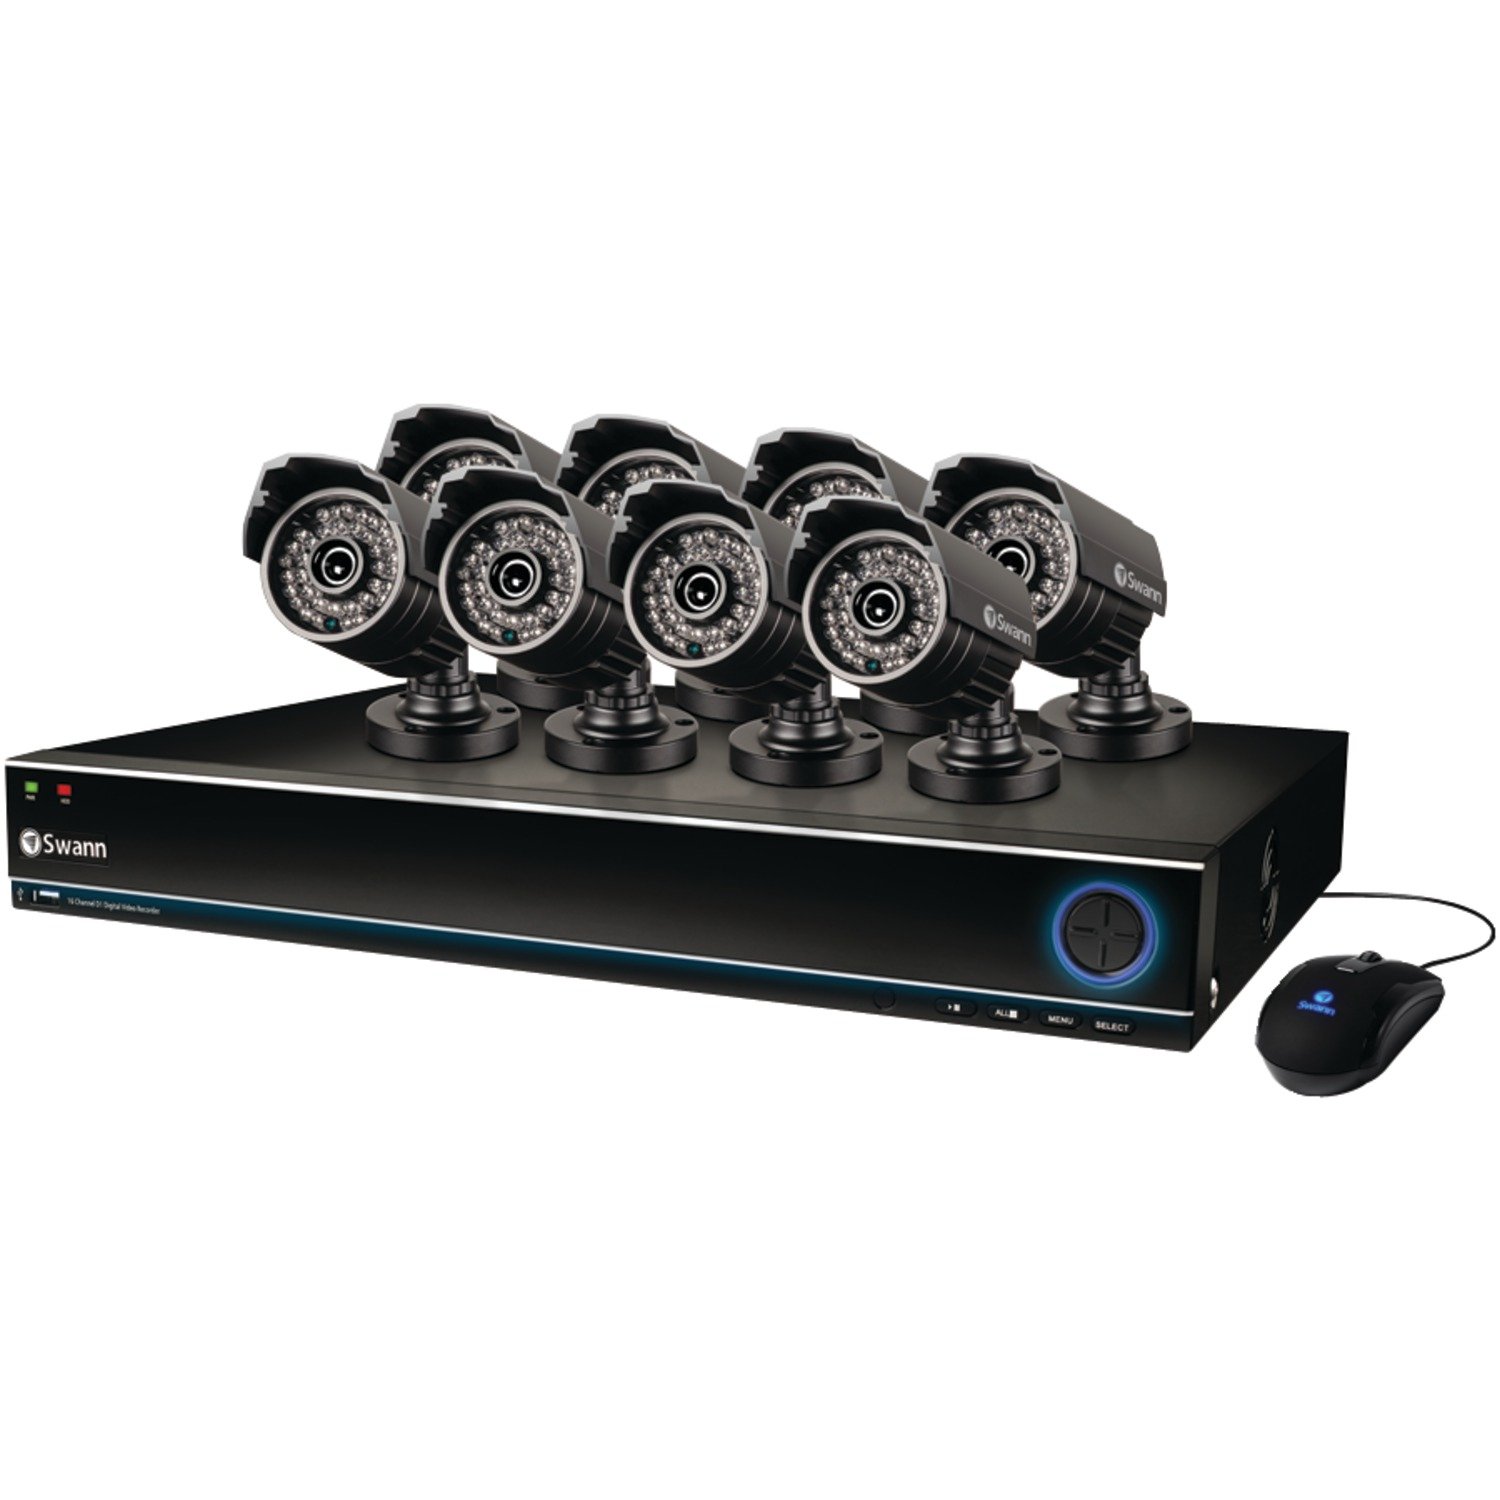
Image: The Swann SWDVK-163208S-US security system, showing the DVR unit and several cameras. The DVR features a blue-lit front panel with control buttons and status indicators.
- Toiteindikaator: Illuminates when the DVR is powered on.
- HDD indikaator: Vilgub, kui kõvaketas on aktiivne.
- Võrgu indikaator: Näitab võrguühendust.
- USB-port: For connecting a USB mouse or for data backup.
- Juhtnupud: Navigate menus and control playback.
4.2 DVR Rear Panel
The rear panel contains all the necessary ports for connecting cameras, monitors, and network cables.
- Video sisend (BNC): 16 ports for connecting security cameras.
- Video Output (HDMI/VGA): For connecting a monitor or TV.
- Heli sisend/väljund (RCA): For connecting microphones and speakers (if supported).
- Etherneti port (RJ45): Võrguühenduse jaoks.
- USB-pordid: Täiendavad USB-pordid välisseadmete jaoks.
- eSATA-port: For connecting an external hard drive for expanded storage.
- Toite sisend: For connecting the DVR power adapter.
4.3 Kaamera funktsioonid
The included 700TVL cameras offer clear video surveillance with night vision capabilities.
- Resolutsioon: 700TVL (Television Lines) for detailed images.
- Öine nägemine: Infrared LEDs provide visibility up to 82ft (25m) in low light or complete darkness.
- Ilmastikukindel: Designed for both indoor and outdoor installation.
- Paigaldamine: Adjustable brackets for flexible positioning.
5. Seadistamine
5.1 DVR-i ühendamine
- Connect the included USB mouse to one of the USB ports on the DVR.
- Connect the HDMI cable from the DVR's HDMI output to an HDMI input on your TV or monitor. Alternatively, use a VGA cable for VGA connections.
- Kaugjuhtimispuldi jaoks viewing, connect an Ethernet cable from the DVR's Ethernet port to your router or network switch.
5.2 Kaamerate ühendamine
- Mount each camera in your desired location using the provided screws and plugs. Ensure the camera has a clear field of view ja on otsese mõju eest kaitstud.
- Connect one end of the BNC cable to the camera's video output.
- Connect the other end of the BNC cable to a video input port on the DVR (e.g., Video In 1, Video In 2, etc.).
- Connect the camera's power input to the power splitter cable, then connect the power adapter to the splitter and a power outlet.
5.3 Sisselülitamine
- Connect the DVR power adapter to the DVR's power input and then to a power outlet.
- The DVR will power on automatically. The power indicator light on the front panel will illuminate.
- Wait for the system to boot up. The Swann logo will appear on your connected monitor, followed by the live view kuva.
5.4 Esialgne konfiguratsioon
Upon first boot-up, the DVR will guide you through an initial setup wizard.
- Keele valik: Valige oma eelistatud keel.
- Kuupäev ja kellaaeg: Set the correct date, time, and time zone. This is crucial for accurate recording timestamps.
- Võrguseaded: Configure network settings (DHCP is usually sufficient for automatic setup).
- Parooli seadistamine: Create a strong password for the administrator account to secure your system.
- Kõvaketta formaat: The system may prompt to format the hard drive. Confirm to proceed.
6. Süsteemi kasutamine
6.1 Otseülekanne View
Pärast esmast seadistamist kuvab DVR otseülekannet view kõigist ühendatud kaameratest. Saate vahetada ühe kaamera ja view, multi-camera grids (e.g., 4-channel, 8-channel, 16-channel), and sequence modes using the on-screen menu or front panel controls.
6.2 Salvestusrežiimid
The DVR supports various recording modes:
- Pidev salvestamine: Records 24/7, overwriting the oldest footage kui kõvaketas on täis.
- Liikumistuvastuse salvestamine: Salvestab ainult siis, kui kaameras tuvastatakse liikumist view. This conserves hard drive space. Sensitivity and detection areas can be configured for each camera.
- Plaaniline salvestamine: Records during specific times of the day or week.
- Käsitsi salvestamine: Start and stop recording manually from the DVR interface.
Access recording settings via the DVR's main menu: Menu > Record > Record Schedule.
6.3 Taasesitus
Et uuestiview salvestatud footage:
- Otseülekandest view, right-click with the mouse to open the main menu.
- Valige Taasesitus.
- Choose the desired date and camera channel(s).
- Use the timeline to navigate through recorded events. Different colors on the timeline indicate different recording types (e.g., continuous, motion).
- Kasutage taasesituse juhtnuppe (esita, peata, kerimine edasi, tagasi), etview footage.
ÄRGE KUNAGI varundage
You can back up important video footage to a USB flash drive or external hard drive.
- Insert a USB storage device into a USB port on the DVR.
- Mine aadressile Menu > Backup.
- Select the camera channel, date, and time range for the footage you wish to back up.
- Choose the backup device and file format (e.g., AVI).
- Klõpsake Alusta to begin the backup process.
6.5 Kaugjuhtimispult Viewing (SwannLink & SwannView)
The SwannLink and SwannView applications allow you to view your cameras remotely from a smartphone or tablet.
- Ensure your DVR is connected to the internet via the Ethernet port.
- Download the SwannView rakendus oma seadme rakenduste poest.
- Open the app and follow the on-screen instructions to add your DVR. This typically involves scanning a QR code displayed on the DVR's monitor (Menu > Network > SwannLink) or manually entering the device ID.
- Enter the DVR's username and password when prompted.
- Sa peaksid nüüd olema võimelised view ela lolltage and access playback remotely.
7. Hooldus
7.1 Kõvaketta haldus
1 TB kõvaketas kirjutab automaatselt üle vanimad failid.tage when full. To ensure optimal performance, it is recommended to periodically check the hard drive status via Menu > HDD > Disk Manage. You can also connect an external hard drive to the eSATA port for additional storage capacity.
7.2 Cleaning Cameras
Puhastage kaamera objektiive regulaarselt pehme lapigaamp lapiga tolmu, mustuse või veeplekkide eemaldamiseks, mis võivad varjata view. Do not use harsh chemicals or abrasive materials.
7.3 Püsivara värskendused
Swann may release firmware updates to improve system performance or add new features. Check the Swann support website for the latest firmware for your model. Follow the instructions provided with the firmware update carefully to avoid damaging the DVR.
8. Veaotsing
| Probleem | Võimalik põhjus | Lahendus |
|---|---|---|
| Monitoril pole pilti | Videokaabel on lahti, monitoril on valitud vale sisend, DVR pole sisse lülitatud. | Kontrollige HDMI/VGA-kaabli ühendusi. Veenduge, et monitoril oleks õige sisend. Kontrollige DVR-i toidet. |
| Kaamerapilti pole | Loose BNC cable, camera power issue, faulty camera. | Check BNC and power connections for the specific camera. Test camera with a known working cable/power supply. |
| DVR ei salvesta | Recording schedule not set, hard drive full or faulty, motion detection not configured. | Check recording schedule. Verify hard drive status. Ensure motion detection is enabled and configured correctly. |
| Ei saa view eemalt | No network connection, incorrect network settings, app configuration error. | Verify DVR has internet access. Check network settings (DHCP). Reconfigure the DVR in the SwannView rakendus. |
| Purple image on camera | IR filter stuck, camera malfunction. | Power cycle the camera. If the issue persists, the camera may be faulty and require replacement. |
9. Tehnilised andmed
- Mudeli number: SWDVK-163208S-US
- Video sisendid: 16 Channels BNC
- Video väljund: HDMI, VGA
- Ekraani eraldusvõime: Up to 1080p (HDMI)
- Salvestamise eraldusvõime: 960H (960x576/960x480)
- Kõvaketas: 1TB SATA HDD (expandable via eSATA)
- Tihendusvorming: H.264
- Võrgu liides: RJ45 Etherneti port
- USB-liides: 3 x USB 2.0 porti
- Kaamera eraldusvõime: 700TVL
- Camera Night Vision: Kuni 82 jalga (25 m)
- Camera Weatherproof Rating: IP66 (välistingimustes kasutamiseks)
- Dimensions (DVR): 22.5 x 15.3 x 8.1 tolli (ligikaudne)
- Weight (DVR): 14 naela (ligikaudne)
- Toiteallikas: DC 12V
10. Garantii teave
Swann products are covered by a limited warranty. The specific terms and duration of your warranty may vary by region and product. Please refer to the warranty card included with your product or visit the official Swann webÜksikasjaliku garantiiteabe ja registreerimisprotseduuride saamiseks külastage veebisaiti. Hoidke ostutõendit garantiinõuete esitamiseks.
11. Toetus
For technical assistance, product support, or to download the latest software and manuals, please visit the official Swann support website. You can typically find FAQs, troubleshooting guides, and contact information for customer service there. Have your product model number (SWDVK-163208S-US) ready when contacting support.
Swanni tugi Websait: https://www.swann.com/us/support


