1. Sissejuhatus
This manual provides comprehensive instructions for the installation, operation, and maintenance of your Hertz HDP4 4-Channel 1000W Max D-Class AmpEnne paigaldamist või kasutamist lugege see kasutusjuhend hoolikalt läbi, et tagada seadme nõuetekohane toimimine ja ohutus.
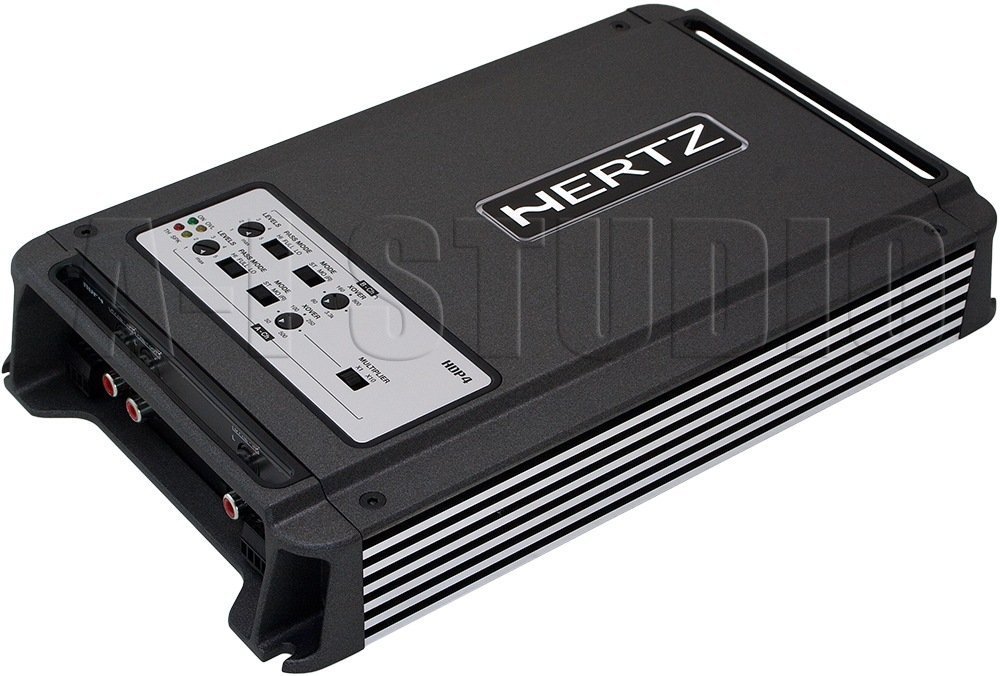
Joonis 1.1: Ülalt-alla nurga all view of the Hertz HDP4 ampelujõud, showcasinselle kompaktne must casing and control panel on the top surface. The Hertz logo is visible on the main body.
2. Ohutusalane teave
Järgige alati järgmisi ettevaatusabinõusid:
- Enne mis tahes paigaldus- või juhtmestikuühendust ühendage sõiduki aku lahti.
- Veenduge, et kõik juhtmed oleksid lühiste vältimiseks korralikult isoleeritud.
- Paigaldage amplifier securely in a well-ventilated area, away from moisture and direct heat.
- Kasutage toite- ja maandusühenduste jaoks sobiva suurusega juhtmeid, nagu on täpsustatud paigaldusjaotises.
- Kui te pole paigaldusprotsessi mis tahes osas kindel, pidage nõu professionaalse paigaldajaga.
3. Pakendi sisu
Veenduge, et pakendis on kõik esemed olemas:
- Hertz HDP4 Amptõsteüksus
- Kinnitusdetailid (kruvid, kronsteinid)
- Kasutusjuhend (see dokument)
4. Seadistamine ja installimine
4.1 Paigaldamine Ampelujõulisem
Choose a suitable location for mounting the amplifier. It should be a dry, well-ventilated area, protected from direct sunlight and excessive vibration. Ensure there is sufficient space around the amptõsteseade õhuringluseks.

Joonis 4.1: Ülemine view of the Hertz HDP4 amplifier, illustrating its compact design and potential mounting points. The amplifier features a textured black finish with the Hertz logo prominently displayed.
- Asetage amplifier in the desired mounting location and mark the screw holes.
- Drill pilot holes if necessary, ensuring not to damage any vehicle components.
- Kindlustage ampkaasasolevate kinnituskruvide abil.
4.2 Juhtmete ühendamine
Proper wiring is critical for performance and safety. Refer to the diagram below for power, ground, remote, and speaker connections.

Figure 4.2: Rear panel of the Hertz HDP4 amplifier, detailing the power input (BATT), ground (GND), remote turn-on (REM) terminals, and speaker output terminals (L/R mono for channels A and B). Two 40A fuses are also visible.
- Toide (aku): Connect a fused power cable (minimum 8 AWG recommended) directly from the vehicle's positive battery terminal to the BATT terminal on the ampelujõulisem.
- Maapind (GND): Connect a ground cable of the same gauge as the power cable from the GND terminal to a clean, unpainted metal point on the vehicle chassis.
- Kaugjuhtimispult (REM): Connect a remote turn-on wire from your head unit's remote output to the REM terminal.
- Kõlarite väljundid: Connect your speakers to the appropriate L (left) and R (right) terminals for each channel (A and B). Ensure correct polarity. The amplifier supports mono bridging for increased power output to a single speaker or subwoofer.
- Kaitsmed: The amplifier is equipped with two 40A fuses. Replace only with fuses of the same type and rating.
4.3 Input Connections and Controls
The amplifier offers both RCA (low-level) and High-Level inputs, along with various crossover and gain controls.

Figure 4.3: Input and control panel of the Hertz HDP4 amplifier. This panel includes RCA pre-inputs (A PRE-IN, B PRE-IN), high-level inputs (A HI-IN, B HI-IN), and various adjustment knobs for levels, pass mode, and crossover settings. A switch for HI-IN AUTO TURN-ON is also present.
- RCA Pre-Inputs (A PRE-IN, B PRE-IN): Connect your head unit's RCA outputs to these inputs for low-level signal.
- High-Level Inputs (A HI-IN, B HI-IN): If your head unit does not have RCA outputs, connect speaker-level signals directly to these inputs. The amplifier features an auto turn-on function for high-level inputs.
- Tasemed: Adjust the input sensitivity (gain) to match the output of your head unit. Start with the gain at minimum and slowly increase until desired volume is achieved without distortion.
- Pääsurežiim: Select the desired crossover mode (e.g., Full, HPF, LPF) for each channel pair.
- Crossover Frequency (XOVER): Adjust the frequency point for the selected crossover mode.
- kordaja: Use this switch to multiply the crossover frequency setting by 1 or 10, depending on your system requirements.
5. Kasutusjuhised
5.1 Esmane sisselülitamine
- After all connections are made and verified, reconnect the vehicle's battery.
- Lülitage peakomplekt sisse. amplifier should power on automatically (if remote wire is connected or HI-IN AUTO TURN-ON is active).
- Start with the head unit volume low and gradually increase it, listening for clear audio.
5.2 Adjusting Audio Settings
Peenhäälestage amplifier's settings for optimal sound quality:
- Võimenduse sobitamine: Reguleerige amplifier's gain controls (LEVELS) to match the output voltage of your head unit. This is crucial to prevent distortion.
- Crossoveri seaded: Set the crossover frequencies (XOVER) and pass modes (PASS MODE) according to the specifications of your speakers. For full-range speakers, a high-pass filter (HPF) is often used to protect them from low bass frequencies. For subwoofers, a low-pass filter (LPF) is used.
6. Hooldus
To ensure the longevity and optimal performance of your Hertz HDP4 amplifier, järgige neid hooldusjuhiseid:
- Puhastamine: Puhastage perioodiliselt ampPuhastage seadme välispind pehme ja kuiva lapiga. Ärge kasutage tugevatoimelisi kemikaale ega abrasiivseid puhastusvahendeid.
- Ventilatsioon: Veenduge, et amplifier's cooling fins are free from dust and obstructions to maintain proper heat dissipation.
- Ühendused: Kontrollige regulaarselt kõiki juhtmestiku ühendusi tiheduse ja korrosiooni suhtes. Lõdvad ühendused võivad põhjustada halba jõudlust või kahjustusi.
- Kaitsmed: If a fuse blows, replace it only with a fuse of the exact same type and rating (2 x 40A). Using an incorrect fuse can cause severe damage to the amplifier or vehicle electrical system.

Figure 6.1: Bottom panel of the Hertz HDP4 amplifier, displaying the serial number label and important caution notes regarding insulated screws. This area should be kept clean and free from obstructions.
7. Veaotsing
Kui teil on probleeme oma amplifier, consult the following table before contacting support:
| Probleem | Võimalik põhjus | Lahendus |
|---|---|---|
| Ei voolu / Amptõsteseade ei lülitu sisse | Läbipõlenud kaitse, lahti tulnud toite-/maandus-/kaugjuhtimisjuhe, vigane peakomplekti kaugjuhtimisväljund. | Check and replace fuses. Verify all power, ground, and remote connections are secure. Test remote wire for 12V signal. |
| Heli puudub | Lahtised RCA/kõlarijuhtmed, vale sisendvalik, amplifier in protection mode, faulty speakers. | Check all signal and speaker connections. Ensure correct input mode is selected. Check for protection light. Test speakers. |
| Moonutatud heli | Gain set too high, incorrect crossover settings, poor quality audio source, damaged speakers. | Reduce gain. Adjust crossover settings. Test with a different audio source. Inspect speakers for damage. |
| Amptõsteseade kuumeneb üle | Ebapiisav ventilatsioon, impedantsi mittevastavus, pikaajaline suure võimsusega töötamine. | Tagage piisav õhuvool ümber amptõstja. Kontrollige kõlari impedantsi sobivust amplifier's capabilities. Reduce volume or operating time. |
8. Tehnilised andmed
Technical specifications for the Hertz HDP4 4-Channel 1000W Max D-Class Ampelujõulisem:
- Mudel: HDP4
- Kaubamärk: HERTZ
- Tüüp: 4-Channel D-Class Ampelujõulisem
- Maksimaalne võimsus: 1000W (as per product title, specific RMS not provided in data)
- Toote mõõtmed (P x L x K): 11.18 x 6.73 x 1.83 tolli
- Kaal: 6.35 naela
- Voltage: 14.4 volti (töörežiimis)
- Paigaldustüüp: Pinnakinnitus
- Kaitsmed: 2 x 40A
- ASIN: B00AWBU1FQ
9. Garantii teave
Hertz products are designed and manufactured to the highest quality standards. For specific warranty terms and conditions, please refer to the warranty card included with your product or visit the official Hertz webveebisait. Hoidke ostutšekk ostutõendina garantiinõuete korral.
10. Toetus
For technical assistance, troubleshooting beyond this manual, or warranty inquiries, please contact Hertz customer support through their official website or authorized dealer. Ensure you have your product model (HDP4) and serial number ready when contacting support.
Official Hertz Websait: www.hertzaudiovideo.com


