Sissejuhatus
The OSD Audio WP8 is a Decora-style wall plate designed to provide a clean, professional, and secure connection point for up to four speakers (two pairs) to your stereo system or amplifier. This unit features gold-plated binding posts for optimal signal transfer and corrosion resistance, ensuring long-lasting performance. It is compatible with both bare speaker wire and banana plugs, offering flexibility for various audio setups.
Pakendi sisu
- 1 x OSD Audio WP8 4-Speaker Wall Plate
- Paigaldusriistvara (kruvid)
Seadistamine ja installimine
Ohutus ennekõike: Before beginning installation, ensure all audio equipment (amplifier, receiver) is powered off and disconnected from the main power supply to prevent electrical shock or damage to components.
1. Prepare the Installation Location
Identify the desired location for the wall plate. This typically involves installing a low-voltage mounting bracket or an electrical box (not included) in the wall. Ensure there is sufficient space behind the wall for wiring connections.
2. Juhtmestiku kaalutlused
The WP8 wall plate supports speaker wire up to 12-gauge for bare wire connections and 8- to 16-gauge for banana plugs. The terminals are color-coded: Punane for positive (+) and Must for negative (-). Maintain consistent polarity throughout your speaker system to ensure proper audio reproduction.
For Bare Wire Connections:
- Eemaldage kõlarijuhtmete otstest umbes 1.25 cm (1/2 tolli) isolatsiooni.
- Keerake paljad juhtmed tihedalt kinni, et vältida lahtiste kiudude teket.
- Unscrew the binding post cap on the wall plate.
- Insert the bare wire into the hole on the side of the binding post.
- Tighten the binding post cap securely to hold the wire in place. Do not overtighten, as this can damage the wire.
For Banana Plug Connections:
- Ensure your banana plugs are properly attached to your speaker wires according to their manufacturer's instructions.
- Insert the banana plug directly into the center hole of the binding post.
3. Connect Speaker Wires
Route your speaker wires through the wall to the installation location. Connect the wires from your speakers to the rear terminals of the WP8 wall plate, matching the positive and negative terminals for each speaker. Then, connect the wires from your amplifier/receiver to the front terminals of the wall plate, again ensuring correct polarity.

Pilt: Tagumine view of the OSD Audio WP8 wall plate, illustrating the gold-plated binding posts and connection points for speaker wires.
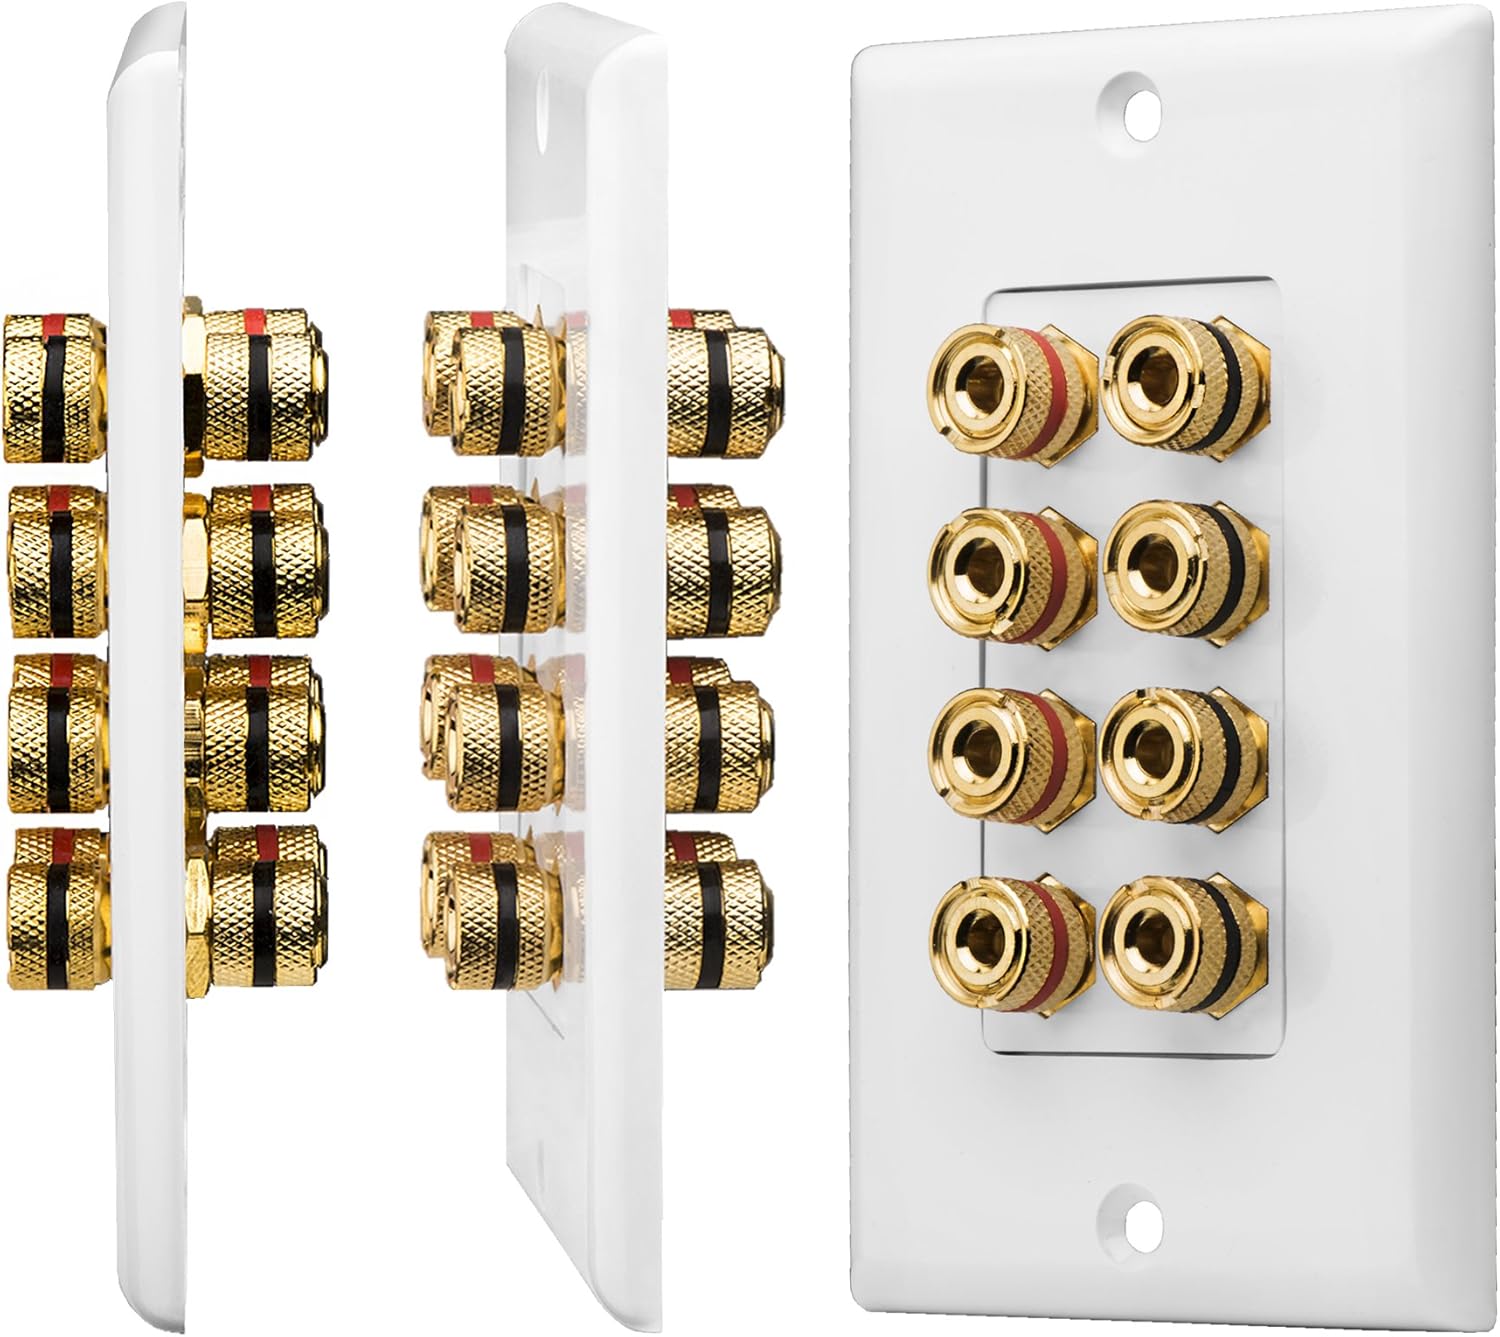
Pilt: Plahvatas view of the OSD Audio WP8 wall plate, separating the front Decora plate from the binding post assembly and the rear mounting plate, demonstrating its modular design.
4. Mount the Wall Plate
Once all connections are made, carefully push the wall plate assembly into the wall box or mounting bracket. Secure it using the provided mounting screws. Attach the Decora-style faceplate (if separate) to complete the installation.
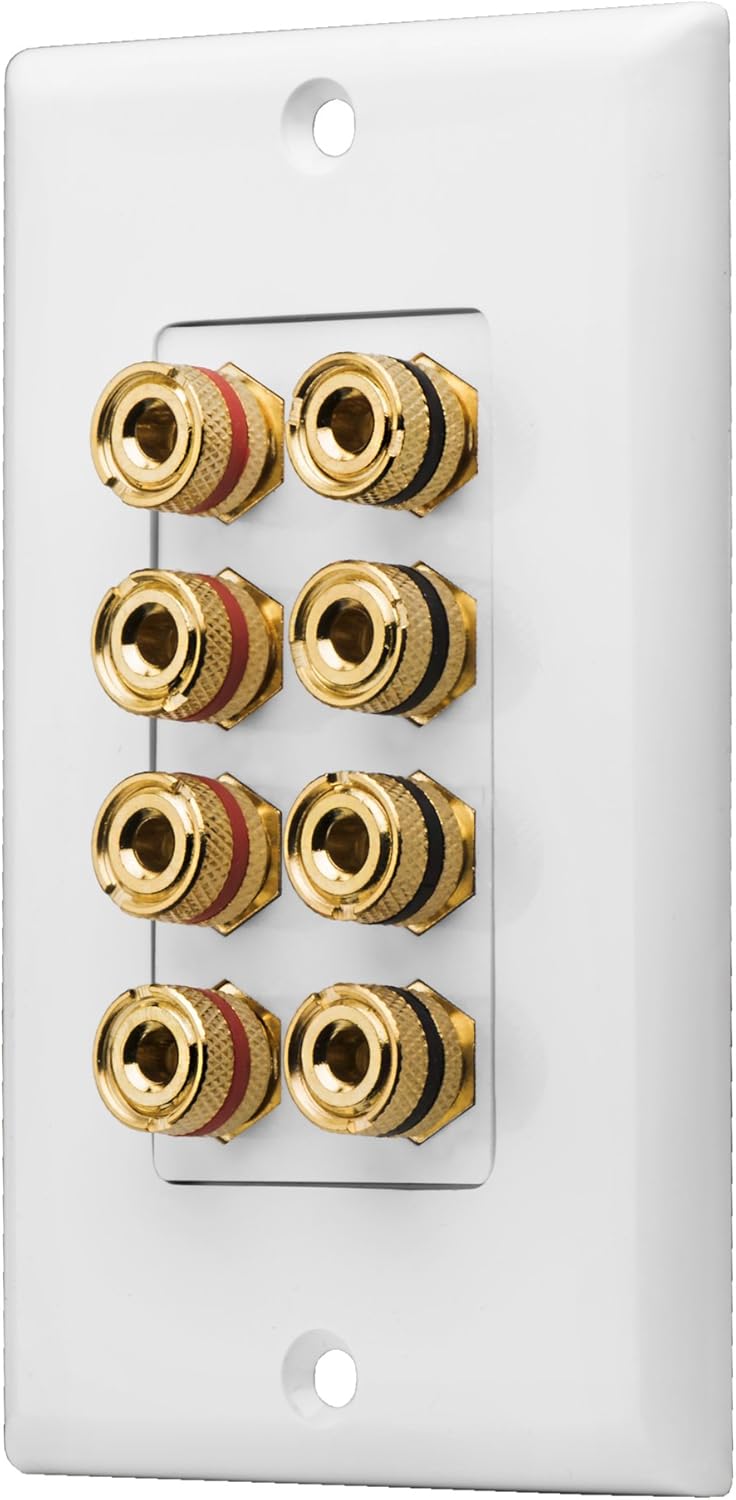
Pilt: Esiosa view of the OSD Audio WP8 wall plate, showcasing its clean Decora-style appearance with four sets of gold-plated binding posts.
Operatsioon
After installation, connect your speaker cables from your amplifier or receiver to the front of the wall plate. Ensure that the positive (+) and negative (-) terminals on the wall plate match those on your amplifier and speakers. Once connected, power on your audio equipment and enjoy your sound system.
Hooldus
The OSD Audio WP8 wall plate requires minimal maintenance. Periodically check connections to ensure they remain secure. If the plate becomes dusty, gently wipe it with a soft, dry cloth. Avoid using harsh chemicals or abrasive cleaners, as these can damage the finish or the gold plating on the terminals.
Veaotsing
Heli puudub või on katkendlik
- Kontrollige kõiki ühendusi: Ensure speaker wires are securely connected to both the wall plate and your speakers/amplifier. Verify that no bare wire strands are touching each other, which could cause a short circuit.
- Kontrollige polaarsust: Confirm that positive (+) and negative (-) connections are consistent from the amplifier, through the wall plate, to the speakers. Incorrect polarity can lead to poor sound quality or phase issues.
- Test components: If possible, test your speakers and amplifier directly to rule out issues with those components.
Halb helikvaliteet
- Check wire gauge: Ensure the speaker wire gauge is appropriate for the length of the run and the power of your amplifier. Using wire that is too thin can result in signal loss.
- Turvalised ühendused: Loose connections can degrade sound quality. Re-tighten all binding posts.
Tehnilised andmed
| Mudeli number | OSD-WP8 |
| Kaubamärk | OSD heli |
| Kõlari mahutavus | 4 Speakers (2 Pairs) |
| Terminali tüüp | Banana Binding Post, Gold Plated |
| Ühilduvus | Bare Wire (up to 12 AWG), Banana Plugs (8-16 AWG) |
| Stiil | Decora |
| Värv | Valge |
| Materjal | Plastikust |
| Kauba kaal | 5.6 untsi |
Garantii ja tehniline tugi
OSD Audio provides free lifetime product technical support for the WP8 wall plate. For any compatibility or installation questions, please contact Outdoor Speaker Depot's technical support team via phone or email. Refer to the official OSD Audio webpraeguse kontaktteabe saamiseks külastage veebisaiti.
For warranty details, please consult the official OSD Audio warranty policy available on their websaidil või ostudokumentatsioonis.


