1. Olulised ohutusjuhised
Please read these instructions carefully before operating the unit and retain them for future reference. Following these guidelines will ensure safe and proper use of your GPX R602B radio.
- Vesi ja niiskus: Do not use this apparatus near water. Avoid exposure to rain or moisture.
- Soojusallikad: Ärge paigaldage soojusallikate, näiteks radiaatorite, küttekehade, ahjude või muude seadmete (sh amptõsteseadmed), mis toodavad soojust.
- Ventilatsioon: Tagage piisav ventilatsioon. Ärge blokeerige ühtegi ventilatsiooniava.
- Toiteallikad: Kasutage seadet ainult märgistusel näidatud tüüpi toiteallikast.
- Puhastamine: Puhastage ainult kuiva lapiga.
- Manused: Kasutage ainult tootja poolt määratud tarvikuid/tarvikuid.
- Teenindus: Andke kõik hooldustööd kvalifitseeritud teeninduspersonalile. Hooldus on vajalik, kui seade on mingil viisil kahjustatud, nt toitejuhe või pistik on kahjustatud, vedelikku või seadmesse on kukkunud esemeid, seade on sattunud vihma või niiskuse kätte, ei tööta normaalselt või on maha kukkunud.
Aku ohutus
- Ärge segage vanu ja uusi patareisid.
- Ärge segage leelis-, standard- (süsinik-tsink) või laetavaid (nikkel-kaadmium) akusid.
- Insert batteries correctly, observing the + and - polarities.
- Eemaldage tühjenenud patareid viivitamatult.
- Kõrvaldage patareid õigesti. Mitte põletada.
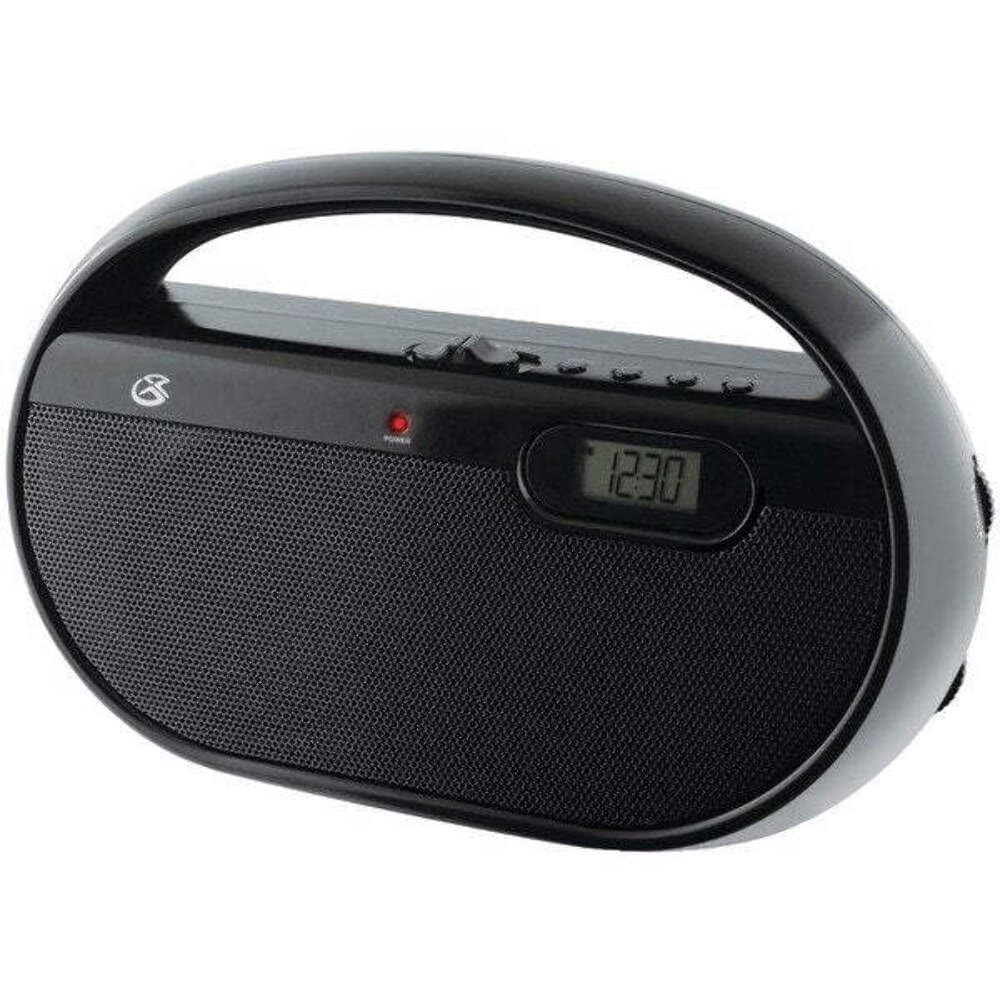
2. Omadused
The GPX R602B Portable AM/FM Radio offers a range of features designed for convenience and versatility:
- Portable AM/FM radio with a built-in handle for easy transport.
- Integrated speakers with analog volume control and durable metal grills.
- Digital clock with user-friendly setting buttons.
- Operates using the built-in AC power cable.
- Can also be powered by 3 C batteries (sold separately) for portable use.
- 3.5mm audio line input jack for connecting external audio devices.
- Telescopic antenna for improved FM reception.
- Stereo headphone jack for private listening.

Figure 2.1: Key features and connection points of the GPX R602B radio.
3. Pakendi sisu
Upon unpacking your GPX R602B radio, please ensure all the following items are present:
- GPX R602B Portable AM/FM Radio Unit
- Kasutusjuhend
- Built-in AC Power Adapter
4. Juhtnupud ja indikaatorid
Familiarize yourself with the controls and indicators on your radio for optimal operation.
Joonis 4.1: Esiosa view of the GPX R602B radio.
Control Layout (Refer to Figure 4.1)
- Toite/helitugevuse nupp: Rotates to turn the unit ON/OFF and adjust the volume level.
- Häälestusnupp: Rotates to select AM or FM radio stations.
- Sagedusala valiku lüliti: Slides to select between AM and FM radio bands.
- Digitaalne kuva: Shows the current time or radio frequency.
- Aja määramise nupp: Used in conjunction with H/M buttons to set the clock.
- H/M Buttons: Used to adjust hours and minutes when setting the clock.
- Display Time Button: Briefly shows the time when the radio is playing.
- Aux In Jack (3.5mm): Ühendage välised heliseadmed.
- Kõrvaklappide pesa (3.5 mm): Privaatseks kuulamiseks ühendage kõrvaklapid.
- Teleskoop-FM-antenn: Optimaalse FM-vastuvõtu saavutamiseks pikendage ja reguleerige.
5. Seadme toide
The GPX R602B radio can be powered by either AC power or batteries.
Vahelduvvoolu kasutamine
- Locate the built-in AC power cord. This cord is typically stored in the battery compartment when not in use.
- Plug the AC power cord into a standard wall outlet (120V AC, 60Hz).
- Seade on nüüd tööks valmis.
Akutoitel töötamine
For portable use, the radio requires 3 'C' size batteries (not included).
- Avage seadme tagaküljel asuv patareipesa kaas.
- Insert 3 'C' size batteries, ensuring the correct polarity (+ and -) as indicated inside the compartment.
- Sulgege akupesa kaas kindlalt.
- The unit is now ready for battery-powered operation.

Figure 5.1: Power options for the GPX R602B radio.
6. Seadistamine ja põhitoimingud
Algseadistus
- Toiteühendus: Connect the radio to AC power or insert batteries as described in Section 5.
- Antenni reguleerimine: For FM reception, extend the telescopic antenna fully. For AM reception, the unit has a built-in antenna, so no external adjustment is needed. Position the unit for best AM reception.
Raadio kasutamine
- Lülita sisse: Rotate the Power/Volume knob clockwise until it clicks and the unit powers on.
- Valige sagedusala: Slide the Band Selector switch to either AM or FM.
- Häälesta jaam: Rotate the Tuning knob to find your desired radio station. The frequency will be displayed on the digital screen.
- Helitugevuse reguleerimine: Rotate the Power/Volume knob to adjust the sound level.
- Lülita välja: Rotate the Power/Volume knob counter-clockwise until it clicks and the unit powers off.
Using the Line Input (Aux In)
You can connect external audio devices, such as smartphones or MP3 players, to play audio through the radio's speakers.
- Connect a 3.5mm audio cable (not included) from the headphone jack or line-out jack of your external device to the Aux In jack on the radio.
- Turn on the radio and your external device.
- Adjust the volume on both the radio and your external device for optimal sound.

Figure 6.1: Devices compatible with the Aux In feature.
Kõrvaklappide kasutamine
For private listening, plug standard 3.5mm headphones (not included) into the Headphone Jack. The internal speakers will automatically mute.
Digitaalse kella seadistamine
The digital clock can be set when the radio is turned off.
- Ensure the radio is turned OFF using the Power/Volume knob.
- Vajutage ja hoidke mõlemat nuppu Määra aeg nupp ja H/M nuppu korraga.
- Hoides käes Määra aeg button, repeatedly press the H/M button to adjust the hour and then the minutes.
- Vabastage Määra aeg nuppu, kui soovitud aeg on seatud.
- To view the time while the radio is playing, press the Kuvamise aeg button. The time will appear briefly on the digital display.
7. Hooldus
Proper care and maintenance will ensure the longevity of your GPX R602B radio.
- Puhastamine: Pühkige seadme välispind pehme ja kuiva lapiga. Ärge kasutage abrasiivseid puhastusvahendeid, vaha ega lahusteid.
- Patarei vahetus: If using batteries, replace all three 'C' batteries when the unit's performance diminishes. Always replace with new batteries of the same type.
- Hoiustamine: Kui seadet pikemat aega hoiustate, eemaldage patareid, et vältida lekkeid ja korrosiooni.
8. Veaotsing
If you encounter issues with your GPX R602B radio, refer to the following common problems and solutions:
| Probleem | Võimalik põhjus | Lahendus |
|---|---|---|
| Pole jõudu | AC cord not plugged in; Batteries exhausted or incorrectly inserted. | Ensure AC cord is securely plugged into a live outlet. Replace batteries with new ones, checking polarity. |
| Halb raadiovastuvõtt | Antenna not extended (FM); Unit poorly positioned (AM); Weak signal. | Extend and adjust the telescopic FM antenna. For AM, rotate the unit for better reception. Try moving the radio to a different location. |
| Kõlaritest ei kosta heli | Helitugevus on liiga madal; kõrvaklapid on ühendatud. | Increase the volume using the Power/Volume knob. Disconnect headphones if not desired. |
| Clock not setting correctly | Vale nuppude järjestus. | Ensure the radio is OFF. Press and hold both 'Set Time' and 'H/M' buttons simultaneously, then repeatedly press 'H/M' to adjust. Release 'Set Time' when done. |
| Heli on moonutatud või ebaselge | Volume too high; Poor reception; External device volume too high. | Lower the volume. Adjust antenna or unit position for better reception. If using Aux In, adjust volume on the external device. |
9. Tehnilised andmed
Detailed technical specifications for the GPX R602B Portable AM/FM Radio:
- Mudeli number: R602B
- Toote mõõtmed (P x L x K): 9.62 x 3.74 x 6.3 tolli (24.43 x 9.50 x 16.00 cm)
- Kauba kaal: 1.76 naela (0.80 kg)
- Toiteallikas: AC 120V, 60Hz or 3 x 'C' size batteries (not included)
- Tuneri tehnoloogia: AM/FM
- Toetatud raadiosagedused: 2-sagedusriba (AM/FM)
- Ühenduvustehnoloogia: Radio, 3.5mm Aux In
- Eriomadused: Built-In AM Antenna, Built-In Clock, Portable, Telescopic FM Antenna, 3.5mm Headphone Jack
- Värv: Must
- Tootja: Digital Products International, Inc.
- Esmakordse saadavaloleku kuupäev: 5. juuni 2012
10. Garantii ja tugi
For warranty information and customer support regarding your GPX R602B radio, please refer to the warranty card included with your purchase or visit the official GPX webveebisait. Hoidke ostutšekk ostutõendina alles garantiinõuete korral.
If you require technical assistance or have questions not covered in this manual, please contact GPX customer service directly. Contact details are typically available on the manufacturer's websaidil või toote pakendil.


