1. Sissejuhatus
Thank you for choosing the Waring Pro Professional Popcorn Maker. This appliance is designed to bring the classic movie theater popcorn experience to your home. With its vintage styling and efficient performance, you can enjoy up to 8 cups of delicious popcorn quickly. This manual provides essential information for the safe and effective operation, maintenance, and care of your new popcorn maker.
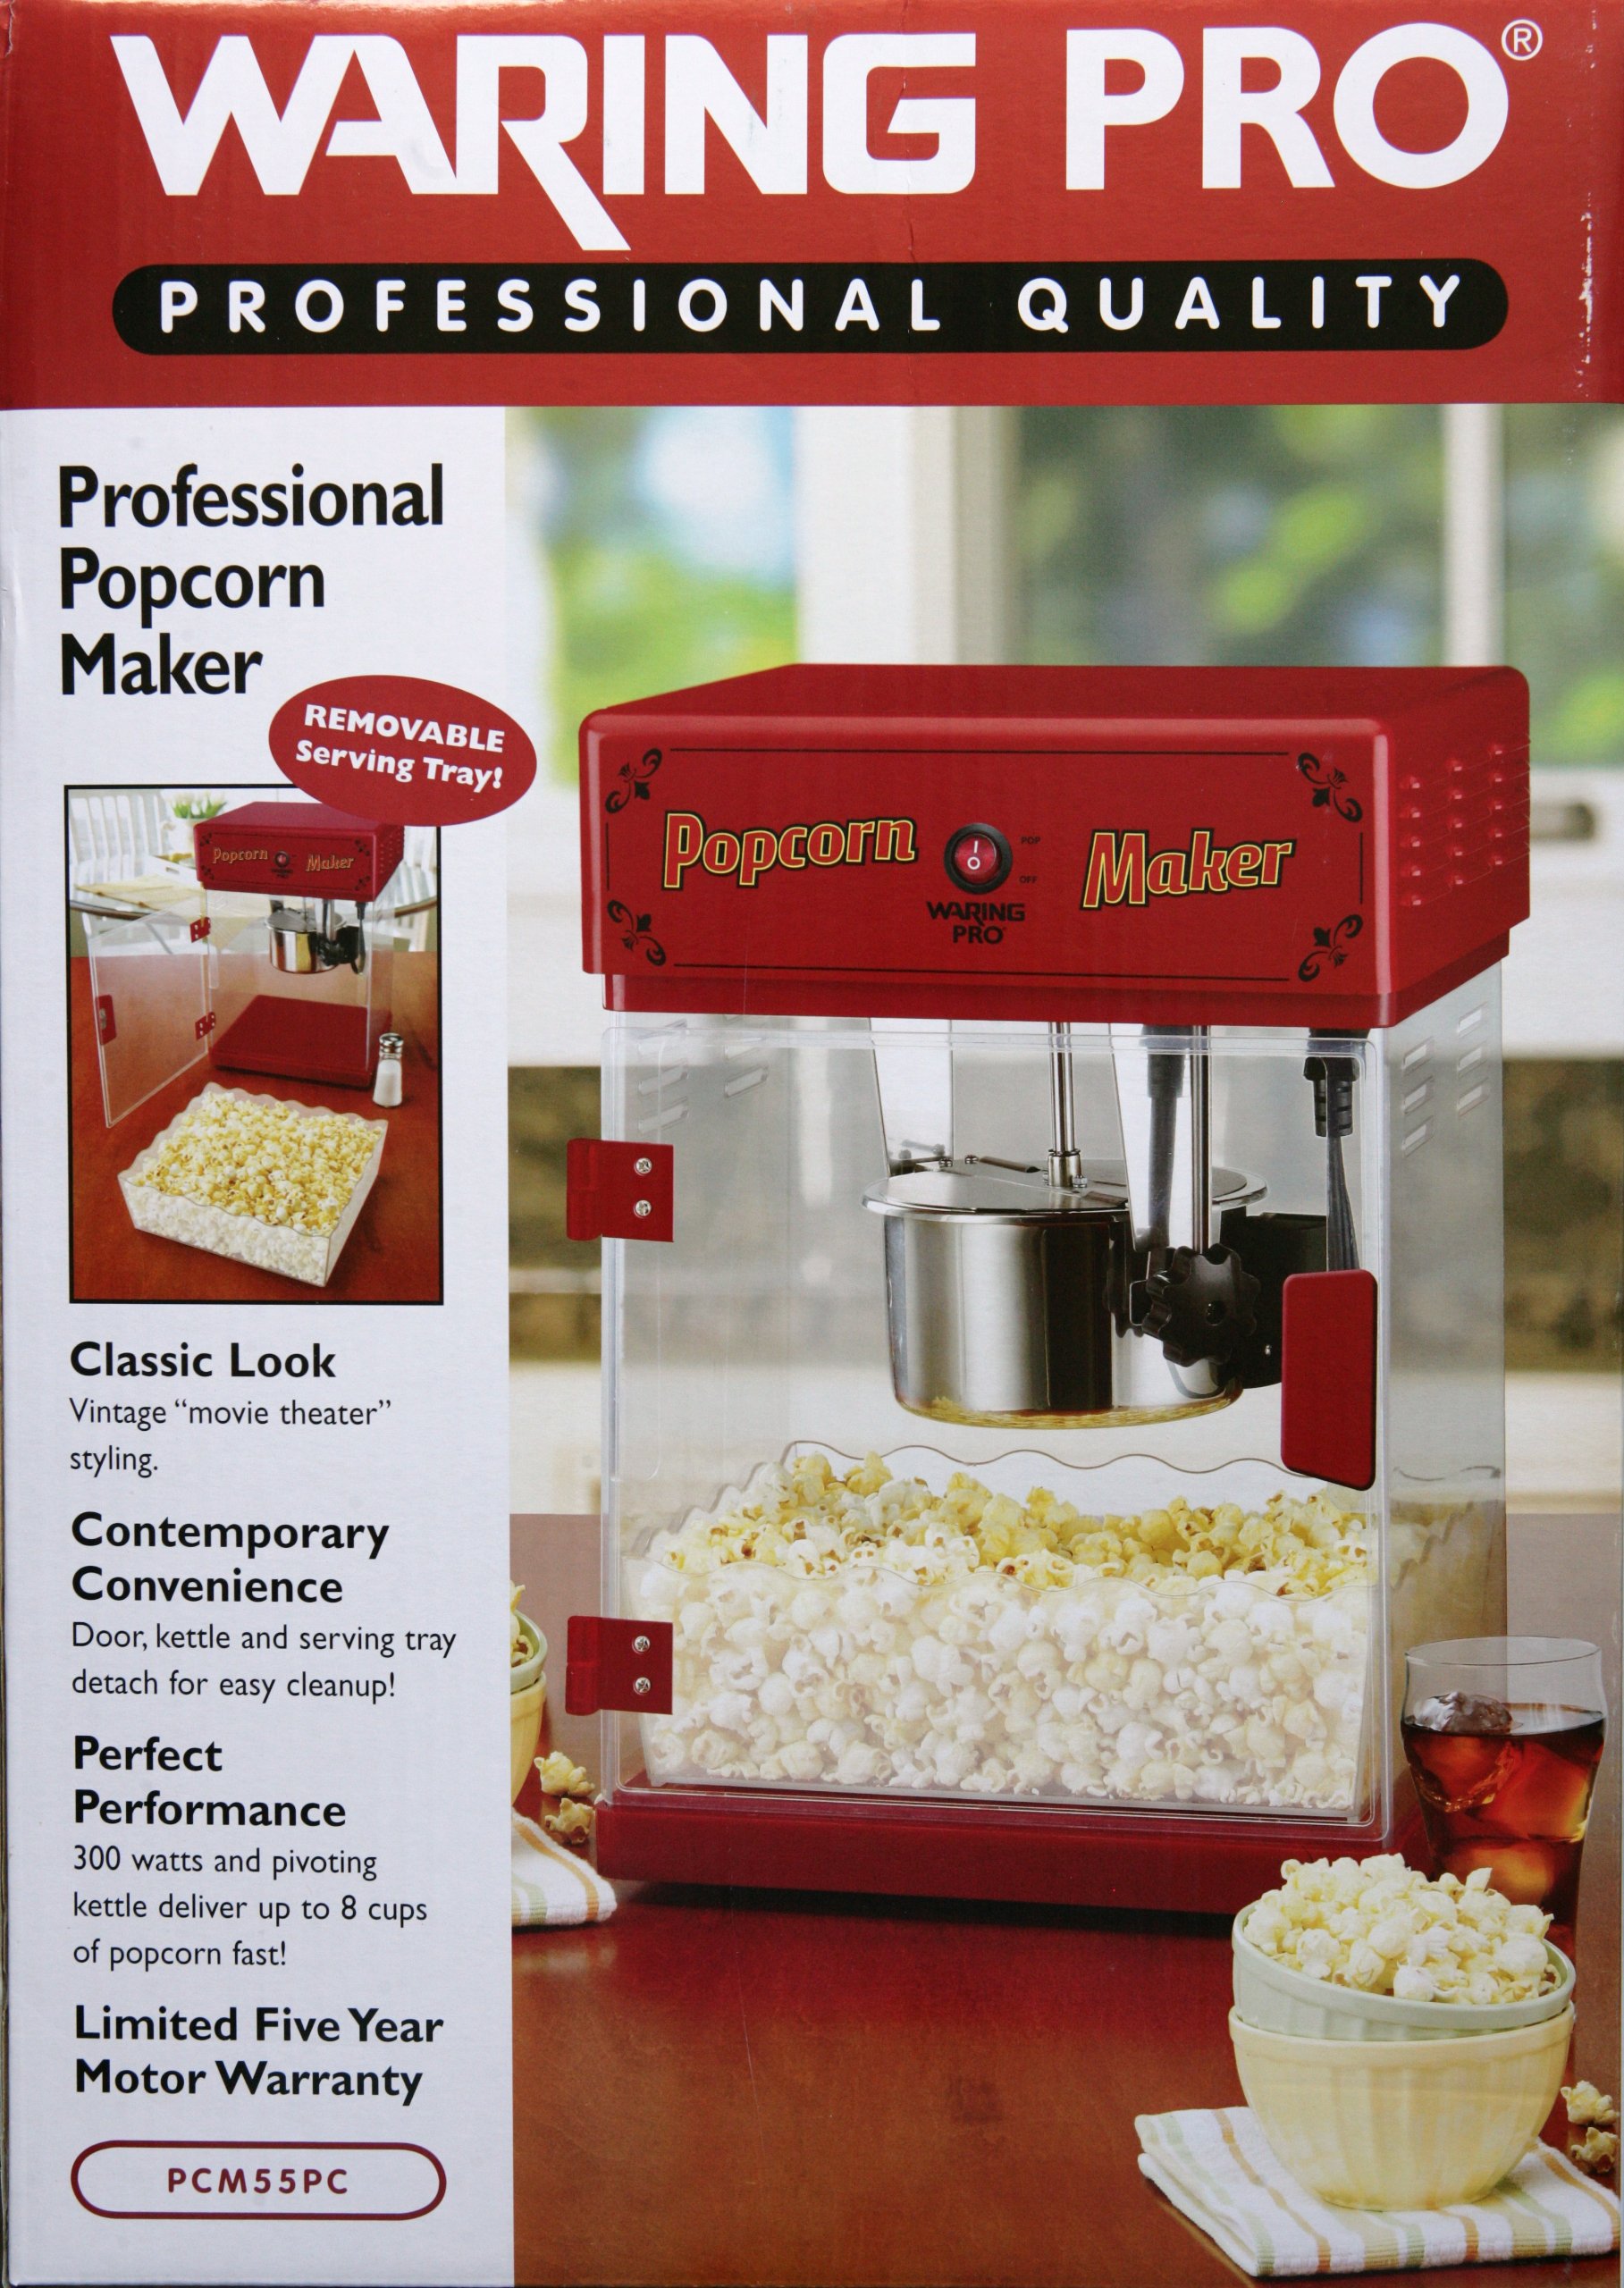
Figure 1: Waring Pro Professional Popcorn Maker (Model PCM55PC)
2. Oluline ohutusteave
Please read all instructions carefully before using the appliance. Failure to follow these safety guidelines may result in fire, electric shock, or personal injury.
- Veenduge alati, et seade oleks asetatud stabiilsele, tasasele ja kuumakindlale pinnale.
- Do not immerse the main unit or electrical components of the kettle in water or other liquids.
- Hoidke töötamise ajal käed ja riistad küttekehast ja segamismehhanismist eemal.
- Kui te seda ei kasuta ja enne puhastamist, ühendage seade vooluvõrgust lahti.
- Allow the appliance to cool completely before adding or removing parts, and before cleaning.
- Ärge kasutage seadet kahjustatud juhtme või pistikuga või pärast seda, kui seade on tõrgeteta või on mingil viisil kahjustatud.
- Kasutage ainult tootja poolt soovitatud tarvikuid ja lisaseadmeid.
- Hoolikas järelevalve on vajalik, kui seadet kasutavad lapsed või nende läheduses.
- Never pop corn in a dry kettle. Always add oil and kernels as instructed.
3. Pakendi sisu
Lahtipakkimisel veenduge, et kõik allpool loetletud esemed on olemas ja heas seisukorras:
- Popcorn Maker Main Unit (with red top and clear panels)
- Stainless Steel Kettle with Stirring Mechanism
- Eemaldatav serveerimisalus
- Popkorni kühvel
- Measuring Spoons (for oil and kernels)
- Kasutusjuhend
Note: Popcorn kernels and popping oil are not included and must be purchased separately.
4. Montaažijuhised
Your popcorn maker requires minimal assembly. All components are typically packaged inside the main unit for shipping. Carefully remove all packaging materials and components before beginning assembly.
- Attach the Front Door: The front door slides down onto the hinges located on the main unit. Ensure it is securely seated.
- Assemble the Kettle:
- Screw the lid onto the kettle using the provided wing nuts.
- Mount the assembled kettle into the device's holding brackets. Twist it to secure it in place.

Figure 2: Kettle assembly and controls.
- Attach the Serving Tray: Slide the removable serving tray into its designated slot at the bottom of the main unit. This tray can be pulled out for serving and pushed in for storage.
- Connect Kettle Power: The kettle has its own power plug. This must be plugged into the receptacle outlet located at the top of the main unit. Do not plug the kettle into any other power source, as its operation is controlled by the main unit's switches.
5. Kasutusjuhised
Maitsva popkorni valmistamiseks järgige neid samme:
- Valmistage koostisained: Measure the appropriate amount of popcorn kernels and popping oil. The machine is designed to produce up to 8 cups of popcorn per batch.
- Add Ingredients to Kettle: Open the kettle lid and carefully add the measured popping oil, followed by the popcorn kernels.
- Close Kettle and Door: Securely close the kettle lid and the front door of the popcorn maker.
- Toide sisse: Turn on the stirrer and kettle switches located on the top panel of the machine. The light switch can also be turned on to illuminate the interior.
- Popkorni tootmine: The popcorn will begin popping within a few minutes. The stirring mechanism will ensure even popping.
- Tühi veekeetja: Once popping is complete, turn off both the stirrer and kettle switches. Use the convenient tilt handle on the kettle to dump the freshly popped corn into the main chamber.
- Serveeri: Pull out the serving tray and use the included scoop to serve the popcorn.

Figure 3: Adding popcorn kernels to the kettle.
The popcorn maker has a large capacity, capable of producing up to 48 cups (384 ounces) of popcorn, making it suitable for gatherings or movie nights.
6. Hooldus ja puhastamine
Regular cleaning will ensure the longevity and optimal performance of your popcorn maker.
- Veekeetja puhastamine: The kettle should be hand washed only. EI TOHI use a dishwasher. Avoid submerging the kettle in water as it contains electrical components. Remove the wing nuts to detach the lid for easier cleaning.
- Põhiseadme puhastamine: Pühkige põhiseadme sise- ja välispinnad puhtaks reklaamigaamp lapiga. Kangekaelse rasva eemaldamiseks kasutage õrnatoimelist pesuvahendit.
- Kernel Collection Tray: The bottom of the unit features a removable kernel collection tray. Pull this tray out to dispose of unpopped kernels and small debris, then clean it as needed.
- Enne seadme kokkupanemist ja hoiule panekut veenduge, et kõik osad on täiesti kuivad.

Figure 4: Kernel collection tray for easy cleaning.
7. Veaotsing
If you encounter issues with your popcorn maker, please refer to the following common solutions:
- Seade ei lülitu sisse:
- Ensure the main power cord is securely plugged into a working electrical outlet.
- Verify that the kettle's power plug is correctly inserted into the receptacle on the main unit.
- Check that all switches (light, stirrer, kettle) are in the "ON" position.
- Popcorn not popping or poor yield:
- Ensure sufficient oil and fresh kernels are used. Stale kernels may not pop effectively.
- Confirm the kettle is properly heated before adding kernels.
- Check that the stirrer mechanism is operating correctly.
- Liigne suits:
- This may indicate too much oil or old oil. Reduce oil quantity or use fresh oil.
- Ensure the kettle is clean and free of burnt residue from previous uses.
Kui probleemid püsivad, võtke ühendust klienditoega.
8. Tehnilised andmed
| Kaubamärk: | Waring |
| Mudeli number: | PCM55PC |
| Värv: | Punane |
| Materjal: | Roostevaba teras |
| Kauba kaal: | 11.5 naela |
| Kaasatud komponendid: | Veekeetja |
| Erifunktsioon: | Kaasaskantav |
| Kas elektriline: | Jah |
| UPC: | 040072016028 |
| Pakendi mõõtmed: | 19.9 x 14.1 x 14 tolli |
| Tootja: | Waring Pro |
| Esmakordse saadavaloleku kuupäev: | 14. oktoober 2010 |
9. Garantii ja tugi
For warranty information or technical support, please refer to the documentation included with your purchase or contact Waring customer service directly. Keep your purchase receipt as proof of purchase for warranty claims.