Sissejuhatus
Tänan ostu eestasing the Technics SL-PD807 MASH 5 Disc CD Player. This manual provides detailed instructions for the proper setup, operation, and maintenance of your new audio component. Please read this manual thoroughly before using the unit to ensure optimal performance and longevity.
The SL-PD807 features a 5-disc carousel changer, allowing for extended playback without interruption, and incorporates MASH (Multi-stage Noise Shaping) D/A conversion for high-quality audio reproduction.
Oluline ohutusteave
- Toiteallikas: Ensure the unit is connected to an AC 120V, 60Hz power supply.
- Ventilatsioon: Ärge blokeerige ventilatsiooniavasid. Jätke seadme ümber piisavalt ruumi korralikuks õhuvooluks ja ülekuumenemise vältimiseks.
- Niiskus: Ärge jätke seadet vihma ega niiskuse kätte. Ärge asetage seadmele vedelikega täidetud esemeid, näiteks vaase.
- Puhastamine: Enne puhastamist eemaldage seade seinakontaktist. Kasutage puhastamiseks kuiva lappi.
- Teenindus: Ärge proovige seadet ise hooldada. Jätke kogu hooldus kvalifitseeritud hooldustöötajatele.
Pakendi sisu
Palun kontrollige, kas pakendis on kõik esemed olemas:
- Technics SL-PD807 MASH 5 Disc CD Player
- Toitejuhe
- RCA helikaablid
Note: A remote control is not included with this unit.
Seadistamine
1. Lahtipakkimine
Carefully remove the CD player and all accessories from the packaging. Retain the packaging materials for future transport or storage.
2. paigutus
Place the CD player on a stable, level surface away from direct sunlight, heat sources, and excessive dust or vibrations. Ensure there is sufficient space around the unit for proper ventilation.

Joonis 1: Esiosa view of the Technics SL-PD807 CD Player with included RCA cables.
3. Ühendused
Ühendage CD-mängija oma amplifier or receiver using the supplied RCA audio cables.
- Connect one end of the RCA audio cables (red and white plugs) to the 'LINE OUT' jacks on the rear of the SL-PD807.
- Connect the other end of the RCA audio cables to an available 'CD IN' or 'AUX IN' input on your amplifier/receiver. Match the red plug to the 'R' (right) input and the white plug to the 'L' (left) input.
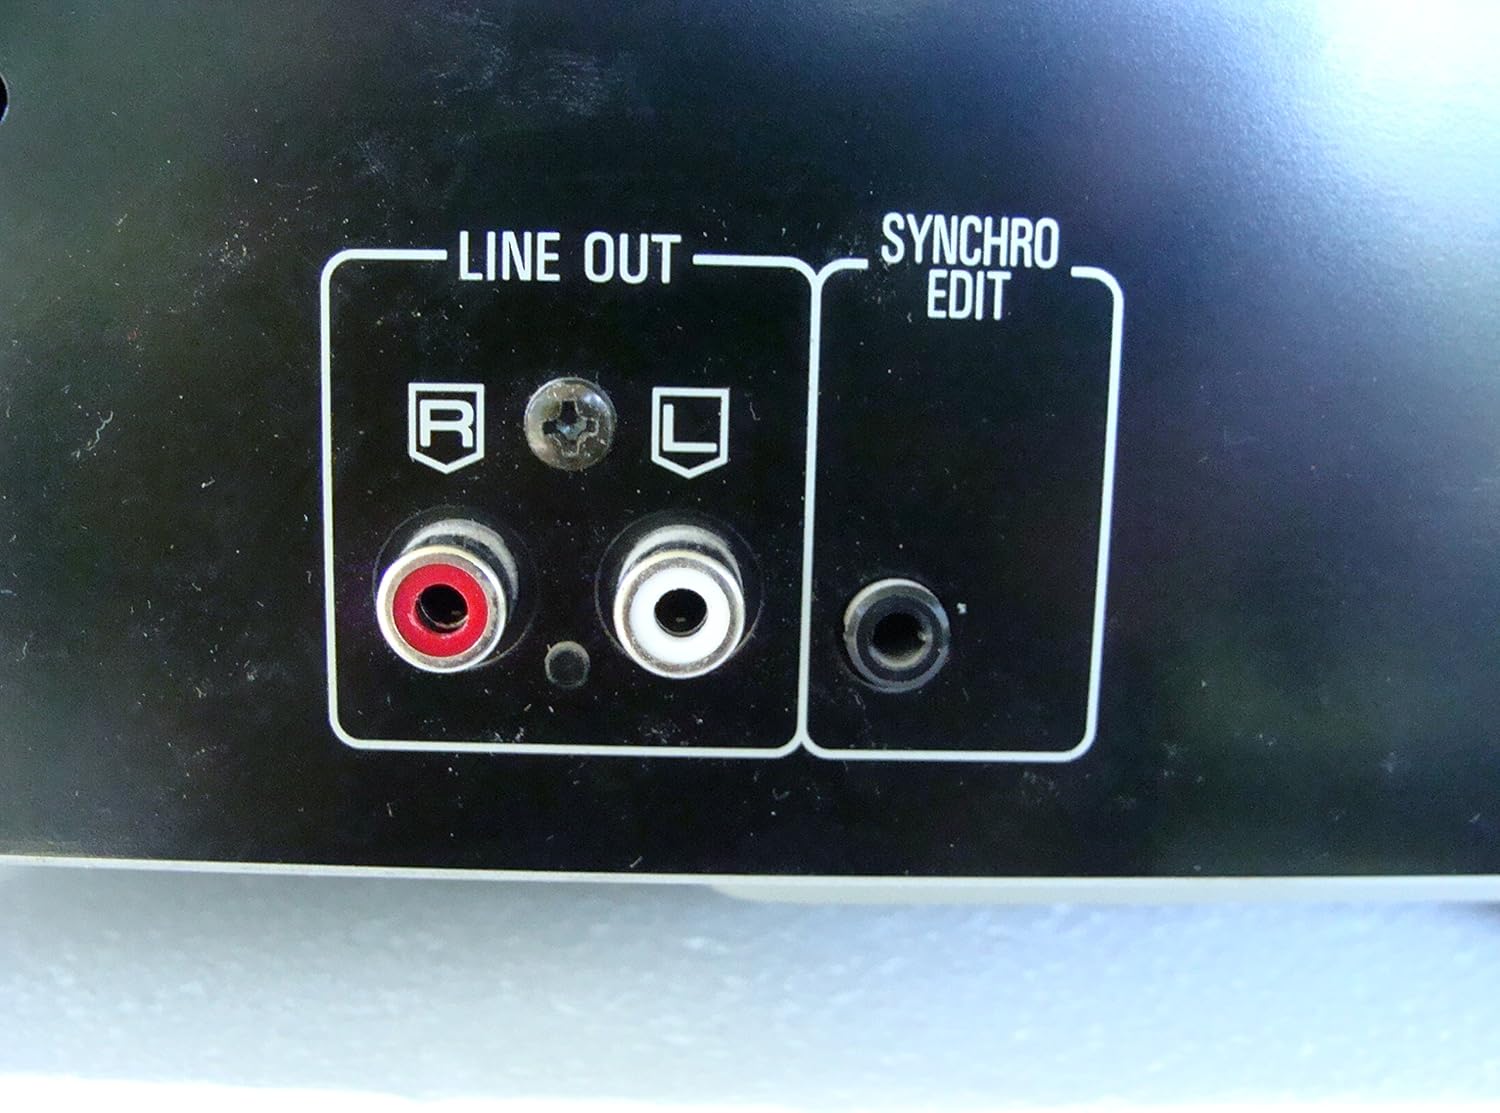
Joonis 2: Rear panel connections, highlighting the 'LINE OUT' (RCA) and 'SYNCHRO EDIT' ports.
- Plug the power cord into the AC inlet on the rear of the CD player, then plug the other end into a standard AC wall outlet.
Kasutusjuhised
1. Toide sisse/välja
Vajutage nuppu VÕIMSUS button located on the front left of the unit to turn the CD player on or off.
2. Plaatide laadimine
The SL-PD807 features a 5-disc carousel. Press the AVA/SULE button to open the disc tray. Place up to five CDs onto the numbered disc slots with the label side facing up. Press AVA/SULE uuesti salve sulgemiseks.

Joonis 3: Front panel controls including disc tray, display, and playback buttons.
3. Põhiline taasesitus
- Mängi: Vajutage nuppu MÄNGI button (►) to start playback.
- Paus: Vajutage nuppu PAUS button (⏸) to temporarily stop playback. Press again to resume.
- Peatus: Vajutage nuppu STOP nuppu (■) taasesituse peatamiseks.
- Lugude vahele jätmine: Vajutage nuppu JÄTA VÄLJA buttons (⏭︎ / ⏮︎) to skip to the next or previous track.
- Otsi: Hoidke all nuppu OTSI buttons (⏪︎ / ⏩︎) to fast forward or rewind within a track.
4. Disc Exchange
You can exchange discs while another disc is playing. Press the KETTA JÄTKAMINE button to rotate the carousel to an empty slot or a disc you wish to remove/replace. The currently playing disc will continue to play until you select a new disc to play.
5. Taasesitusrežiimid
- Juhuslik mängimine: Vajutage nuppu JUHUSLIK button to play tracks on the current disc or all loaded discs in a random order.
- Programmi esitamine: Kasutage PROGRAMM button to create a custom playback sequence of tracks from the loaded discs. Refer to the on-screen display for programming steps.
- Kordusesitus: Vajutage nuppu KORDA button to repeat the current track, current disc, or all discs.
Hooldus
1. Seadme puhastamine
Wipe the exterior of the unit with a soft, dry cloth. For stubborn stains, slightly dampen the cloth with water and a mild detergent, then wipe dry. Do not use abrasive cleaners, benzene, thinner, or alcohol, as these can damage the finish.

Joonis 4: Top surface of the unit, illustrating areas that may require cleaning or show wear.
2. Kettahooldus
- Käsitsege plaate servadest, et vältida sõrmejälgede sattumist mängupinnale.
- Keep discs clean. Wipe from the center outwards with a soft, lint-free cloth if necessary.
- Hoidke plaate nende ümbristes, et kaitsta neid tolmu ja kriimustuste eest.
Veaotsing
If you experience problems with your CD player, please consult the following table before seeking service.
| Probleem | Võimalik põhjus | Lahendus |
|---|---|---|
| Pole jõudu | Toitejuhe pole kindlalt ühendatud. | Kontrollige toitejuhtme ühendust seadme ja seinakontaktiga. |
| Ei mingit heli | RCA audio cables not connected correctly. AmpLifteri/vastuvõtja sisendit pole valitud. | Ensure RCA cables are securely connected to both the CD player and amplifier. Select the correct input on your amptõstja/vastuvõtja. |
| Disc does not play / Skipping | Plaat on määrdunud või kriimustatud. Plaat on valesti sisestatud. | Clean the disc with a soft, lint-free cloth. Ensure the disc is placed label-side up in the tray. Try another disc. |
| Carousel does not rotate | Obstruction in the disc tray. | Ensure no foreign objects are obstructing the carousel mechanism. |
Tehnilised andmed
The following are the technical specifications for the Technics SL-PD807 MASH 5 Disc CD Player:
| Funktsioon | Spetsifikatsioon |
|---|---|
| Mudeli nimi | SL-PD807 |
| Tootja | Tehnika |
| Plaadi maht | 5 plaati |
| Nõuded võimsusele | AC 120V, 60Hz, 13W |
| Pakendi mõõtmed | 17 x 17 x 5 tolli |
| Kauba kaal | 15.02 naela |
| Ühenduvustehnoloogia | Abiseade, infrapuna |
| Erifunktsioon | Hüppamise vastane kaitse |

Joonis 5: Product label displaying model number and power specifications.
Garantii ja tugi
For information regarding warranty coverage and customer support for your Technics SL-PD807 CD Player, please refer to the warranty card included with your purchase or visit the official Technics website. If you require further assistance, please contact Technics customer service.


