1. Sissejuhatus
Thank you for choosing the Generic Carburetor Replacement Part. This manual provides essential information for the safe and effective installation, operation, and maintenance of your new carburetor. Please read this manual thoroughly before attempting any installation or adjustments to ensure proper function and to prevent damage to the product or your equipment.
This carburetor is designed as a direct replacement for specific Troy-Bilt models, including 1167520678 and 34461391Mod-R36R-31692, ensuring precision OEM fit and reliable performance.
2. Ohutusalane teave
HOIATUS: Nende ohutusjuhiste eiramine võib põhjustada tõsiseid vigastusi, surma või varalist kahju.
- Always wear appropriate personal protective equipment (PPE), including safety glasses and gloves, when working with engine components and fuel.
- Ensure the engine is completely cool before beginning any work. Hot engine parts can cause severe burns.
- Disconnect the spark plug wire or battery terminal to prevent accidental engine start-up.
- Work in a well-ventilated area. Fuel vapors are flammable and hazardous.
- Keep fire extinguishers or appropriate fire suppression materials readily available.
- Handle fuel with extreme care. Do not smoke or use open flames near fuel.
- Kui te pole paigaldusprotsessi mõne etapi osas kindel, pidage nõu kvalifitseeritud mehaanikuga.
3. Pakendi sisu
Please verify that all items are present and undamaged before proceeding with installation. If any parts are missing or damaged, contact your retailer immediately.
- 1 x Generic Carburetor Assembly
- 1 x Gasket Set (typically includes mounting gaskets)
- (Note: Additional hardware may vary by specific model and supplier.)
4. Seadistamine ja installimine
This carburetor is designed for direct bolt-on replacement. No modifications should be necessary. Refer to your equipment's service manual for specific torque specifications and detailed diagrams if available.
4.1. Ettevalmistus
- Parkige seade tasasele pinnale ja tõmmake peale seisupidur.
- Veenduge, et mootor on täiesti jahtunud.
- Kogemata käivitamise vältimiseks ühendage süüteküünla juhe lahti.
- Turn off the fuel supply valve (if equipped) and drain the fuel tank or pinch off the fuel line to prevent spills.
- Gather necessary tools: wrenches, screwdrivers, pliers, clean rags, and a container for draining fuel.
4.2. Removal of Old Carburetor
- Carefully disconnect the fuel line from the old carburetor. Be prepared for residual fuel to spill.
- Disconnect the throttle linkage and choke cable (if applicable). Note their positions for reassembly. Taking a photo can be helpful.
- Remove any air filter housing or intake manifold components that obstruct access to the carburetor.
- Unbolt the old carburetor from the engine or intake manifold. Pay attention to the order and location of any spacers or gaskets.
- Remove the old carburetor and discard old gaskets.
4.3. Installation of New Carburetor
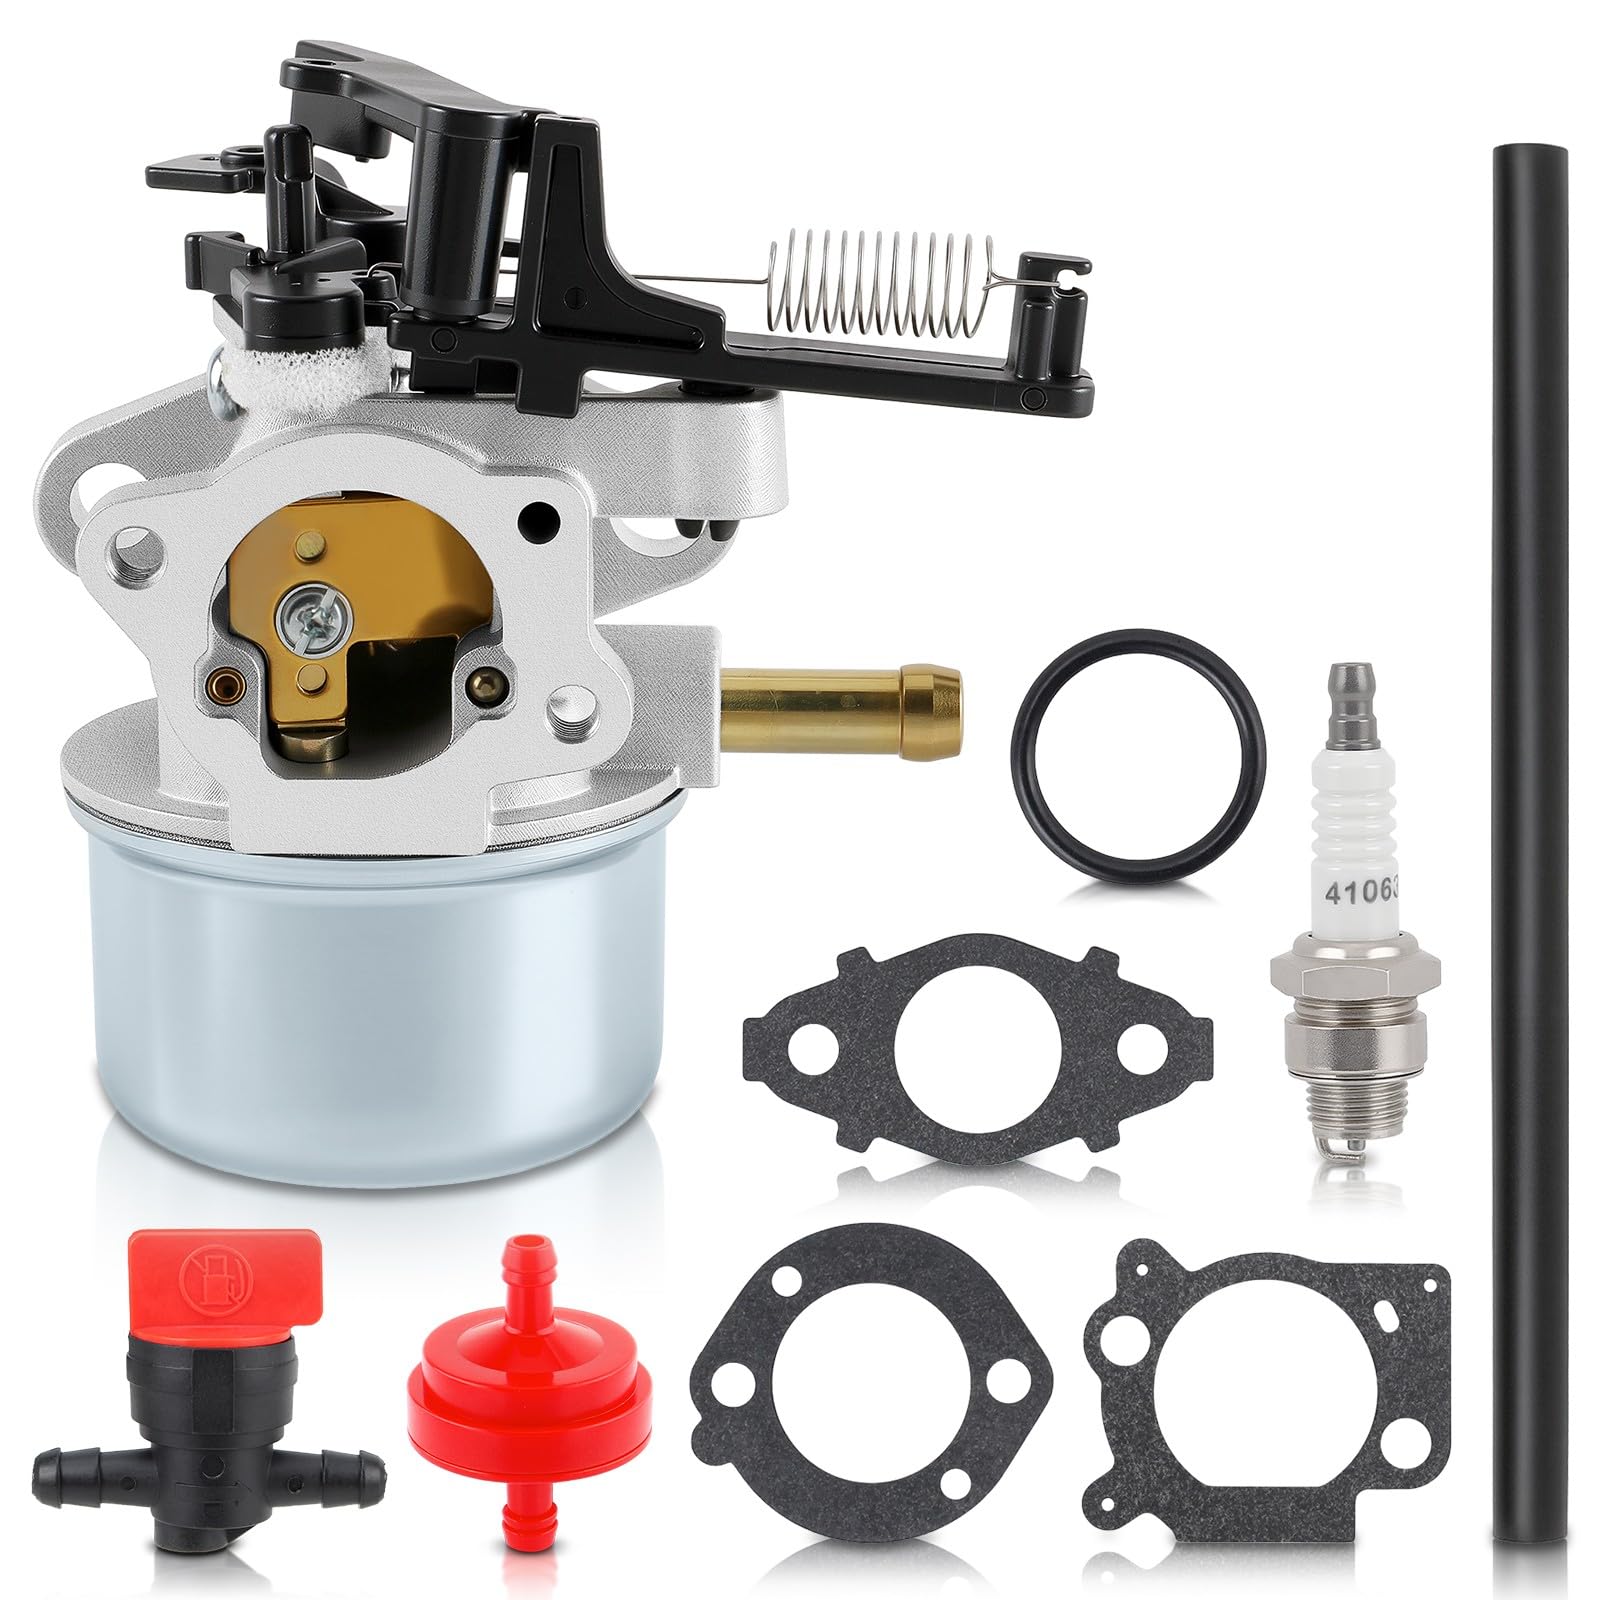
Image 1: Generic Carburetor Replacement Part. This image shows the complete carburetor assembly, including the main body, fuel inlet, and various adjustment screws. It is ready for installation into compatible engine models.
- Ensure all mounting surfaces are clean and free of old gasket material.
- Place new gaskets in their correct positions. Refer to your equipment's diagram if unsure.
- Mount the new carburetor onto the engine or intake manifold, aligning it carefully.
- Install the mounting bolts and tighten them evenly, typically in a crisscross pattern, to the manufacturer's specified torque. Do not overtighten.
- Reconnect the throttle linkage and choke cable to their respective points on the new carburetor. Ensure smooth operation without binding.
- Reconnect the fuel line. Secure it with a clamp kui vaja.
- Reinstall any air filter housing or intake manifold components removed earlier.
4.4. Paigaldamisjärgsed kontrollid
- Visually inspect all connections for tightness and proper routing.
- Turn on the fuel supply valve (if applicable) and check for any fuel leaks. Address any leaks immediately.
- Ühendage süüteküünla juhe uuesti.
5. Operating (Initial Start-up and Adjustment)
After installation, the carburetor may require minor adjustments for optimal performance. These adjustments are typically for idle speed and fuel mixture.
5.1. Esmane käivitamine
- Ensure the fuel tank has fresh, appropriate fuel.
- Engage the choke (if equipped) according to your equipment's starting procedure.
- Start the engine. It may take a few pulls or cranks to prime the fuel system.
- Kui mootor käivitub, vabastage õhuklapp järk-järgult, kui mootor soojeneb.
5.2. Idle Speed Adjustment
- Allow the engine to warm up to operating temperature (typically 5-10 minutes).
- Locate the idle speed screw on the carburetor (often a larger screw that contacts the throttle linkage).
- Turn the screw clockwise to increase idle speed or counter-clockwise to decrease it. Adjust until the engine idles smoothly without stalling or racing. Refer to your equipment's manual for recommended idle RPM.
5.3. Fuel Mixture Adjustment (if applicable)
- Some carburetors have a fuel mixture screw. This adjustment is critical and often factory-set. If adjustment is needed, turn the screw slowly.
- Typically, turn the screw clockwise until the engine begins to falter, then slowly turn it counter-clockwise until the engine runs smoothly and reaches its highest RPM, then turn it slightly further (about 1/8 to 1/4 turn) counter-clockwise to ensure a slightly rich mixture for cooling and lubrication.
- Note: Incorrect mixture adjustment can lead to engine damage. If unsure, consult a professional.
6. Hooldus
Regular maintenance ensures the longevity and optimal performance of your carburetor and equipment.
- Kütusesüsteemi puhtus: Always use fresh, clean fuel. Stale or contaminated fuel is the leading cause of carburetor issues. Consider using a fuel stabilizer if the equipment is stored for extended periods.
- Kütusefilter: Regularly inspect and replace the fuel filter according to your equipment's maintenance schedule. A clogged fuel filter can restrict fuel flow to the carburetor.
- Õhufilter: A clean air filter is crucial for proper air-fuel mixture. Inspect and clean or replace the air filter regularly. A dirty air filter can cause the engine to run rich.
- Väline puhastamine: Keep the exterior of the carburetor clean from dirt, debris, and oil buildup.
- Tihendi kontroll: Periodically check for signs of fuel leaks around the carburetor gaskets. Replace any worn or cracked gaskets promptly.
7. Veaotsing
This section outlines common issues and potential solutions. Always ensure safety precautions are followed before attempting any troubleshooting.
| Probleem | Võimalik põhjus | Lahendus |
|---|---|---|
| Mootor ei käivitu | No fuel, clogged fuel filter, incorrect choke setting, spark plug issue, no spark. | Check fuel level, replace fuel filter, adjust choke, check spark plug, verify ignition system. |
| Mootor töötab ebaühtlaselt või seiskub | Dirty carburetor, incorrect idle speed, fuel mixture too rich/lean, dirty air filter. | Clean carburetor, adjust idle speed/mixture, clean/replace air filter. |
| Karburaatorist lekib kütust | Damaged gaskets, loose connections, stuck float. | Inspect and replace gaskets, tighten connections, clean float bowl and needle valve. |
| Poor acceleration or loss of power | Clogged fuel passages, dirty air filter, incorrect fuel mixture. | Clean carburetor, clean/replace air filter, adjust fuel mixture. |
If these troubleshooting steps do not resolve the issue, it is recommended to seek assistance from a qualified service technician.
8. Tehnilised andmed
- Kaubamärk: Üldine
- Tootja: 240825ray
- ASIN: B0FZCMFSRW
- Välisviimistlus: Maalitud
- Ühilduvus: Designed for Troy-Bilt models 1167520678 and 34461391Mod-R36R-31692
- Materjal: High-quality materials (e.g., steel, reinforced polymers, OE-grade alloys)
9. Garantii ja tugi
This Generic Carburetor Replacement Part is manufactured to high-quality standards. While specific warranty details are not provided in this manual, most replacement parts come with a limited warranty against manufacturing defects. Please retain your proof of purchase.
For warranty claims, technical support, or inquiries regarding this product, please contact your original retailer or the manufacturer directly using the contact information provided at the time of purchase.
Note: Damage resulting from improper installation, misuse, neglect, or unauthorized modifications is typically not covered under warranty.