Geevon GN-228614C-T3-US
Geevon Digital Atomic Wall Clock (Model GN-228614C-T3-US) Instruction Manual
Põhjalik juhend seadistamiseks, kasutamiseks ja hooldamiseks.
1. Sissejuhatus
This manual provides detailed instructions for the setup, operation, and maintenance of your Geevon Digital Atomic Wall Clock with Moon Phase and Backlight (Model GN-228614C-T3-US). Please read this manual thoroughly before using the product to ensure proper function and longevity.
2. Mis on kaasas
Pärast lahtipakkimist veenduge, et kõik komponendid on olemas:
- One atomic clock
- One outdoor sensor
- One AC/DC power adapter
- Üks kasutusjuhend
Note: 3 AAA batteries for the main unit and 2 AAA batteries for the outdoor sensor are required but not included.
3. Seadistamine
3.1. Põhiseadme toitega ühendamine
The main unit can be powered by either the included AC/DC power adapter or 3 AAA batteries (not included).
- Vahelduvvoolu kasutamine: Connect the AC/DC power adapter to the clock's power input port and plug it into a standard electrical outlet.
- Patareide kasutamine: Open the battery compartment on the back of the clock and insert 3 new AAA batteries, observing the correct polarity (+/-).

Image: Back of the main clock unit with the battery compartment open, showing where to insert 3 AAA batteries. Control buttons are visible above the compartment.

Image: Close-up of the back of the clock showing the battery compartment and inserted batteries. A "Low Battery Indicator" graphic is also present.
3.2. Installing the Outdoor Sensor
Juhtmevaba välisandur vajab kahte AAA-patareid (ei kuulu komplekti).
- Avage välisanduri tagaküljel asuv patareipesa.
- Insert 2 new AAA batteries, observing the correct polarity (+/-).
- Sulgege patareipesa.
- Place the sensor in a covered outdoor location, such as under a patio or porch, to protect it from direct sunlight and rain. Ensure it is within 200 feet (60 meters) of the main unit.

Image: The main clock unit on a table indoors and the outdoor sensor mounted on an exterior wall, illustrating the wireless connection.
Video: This video demonstrates how to install batteries in both the main clock unit and the outdoor sensor, and how the outdoor sensor transmits temperature data to the main unit. It also shows the clock's display and various features in action.
3.3. Initial Synchronization and Time Zone Setting
The clock automatically attempts to synchronize with the WWVB atomic clock signal from Fort Collins, Colorado. This process can take 2-5 days for initial synchronization, especially if the signal is weak. During signal reception, the backlight will temporarily turn off for 1-2 minutes to avoid interference.
To manually set the time zone and other settings:
- Press and hold the "MODE" button for 3 seconds. The hour display will start to flash. Use the "UP" or "DOWN" buttons to set the correct hour.
- Press "MODE" to confirm and move to the minute setting. Use "UP" or "DOWN" to set the correct minute.
- Continue pressing "MODE" to cycle through year, month, and date settings, adjusting each with "UP" or "DOWN".
- After setting the date, the Daylight Saving Time (DST) display will flash. Use "UP" or "DOWN" to turn DST on or off as applicable.
- Next, the Time Zone display will flash. Use "UP" or "DOWN" to select your time zone (EST, AST, HST, AKST, PST, MST, CST).
- Finally, the temperature unit (°C/°F) will flash. Use "UP" or "DOWN" to select your preferred unit.
- Press "MODE" again to confirm all settings and end the setting procedures, entering the normal mode.

Image: The clock display showing time, date, and temperature, with graphics illustrating "Spring Forward" (+1h) and "Fall Back" (-1h) for Daylight Saving Time.

Image: Close-up of the back of the clock, highlighting the control buttons (LIGHT, MEM, 12/24, ALARM, SNZ, CH, DOWN UP/RCC, MODE) and a map of US time zones (PST, MST, CST, EST, AKST, HST, AST).
Video: This video demonstrates how to install batteries in both the main clock unit and the outdoor sensor, and how the outdoor sensor transmits temperature data to the main unit. It also shows the clock's display and various features in action.
4. Kasutusjuhised
4.1. Kuva üleview
The 8.8-inch LCD TN HD display shows the following information:
- Aeg (12/24H vorming)
- Date and Day of the Week
- Kuu faasid
- Indoor Temperature (°C/°F)
- Outdoor Temperature (°C/°F)
- Daily Minimum and Maximum Temperature Data
- Temperature Trends (rising/falling)

Image: The clock's large LCD display showing all its features, including time, day, date, moon phase, indoor and outdoor temperatures, and temperature trends. Dimensions of the clock are also indicated.
4.2. Taustvalgustuse juhtimine
The clock features 3 brightness levels: Off, Dim, and Bright. The backlight behavior depends on the power source:
- Vahelduvvoolu toide: The backlight can remain on continuously at your chosen brightness level.
- Aku võimsus: To conserve battery life, the backlight will illuminate for 10 seconds when the top button is tapped, then turn off.
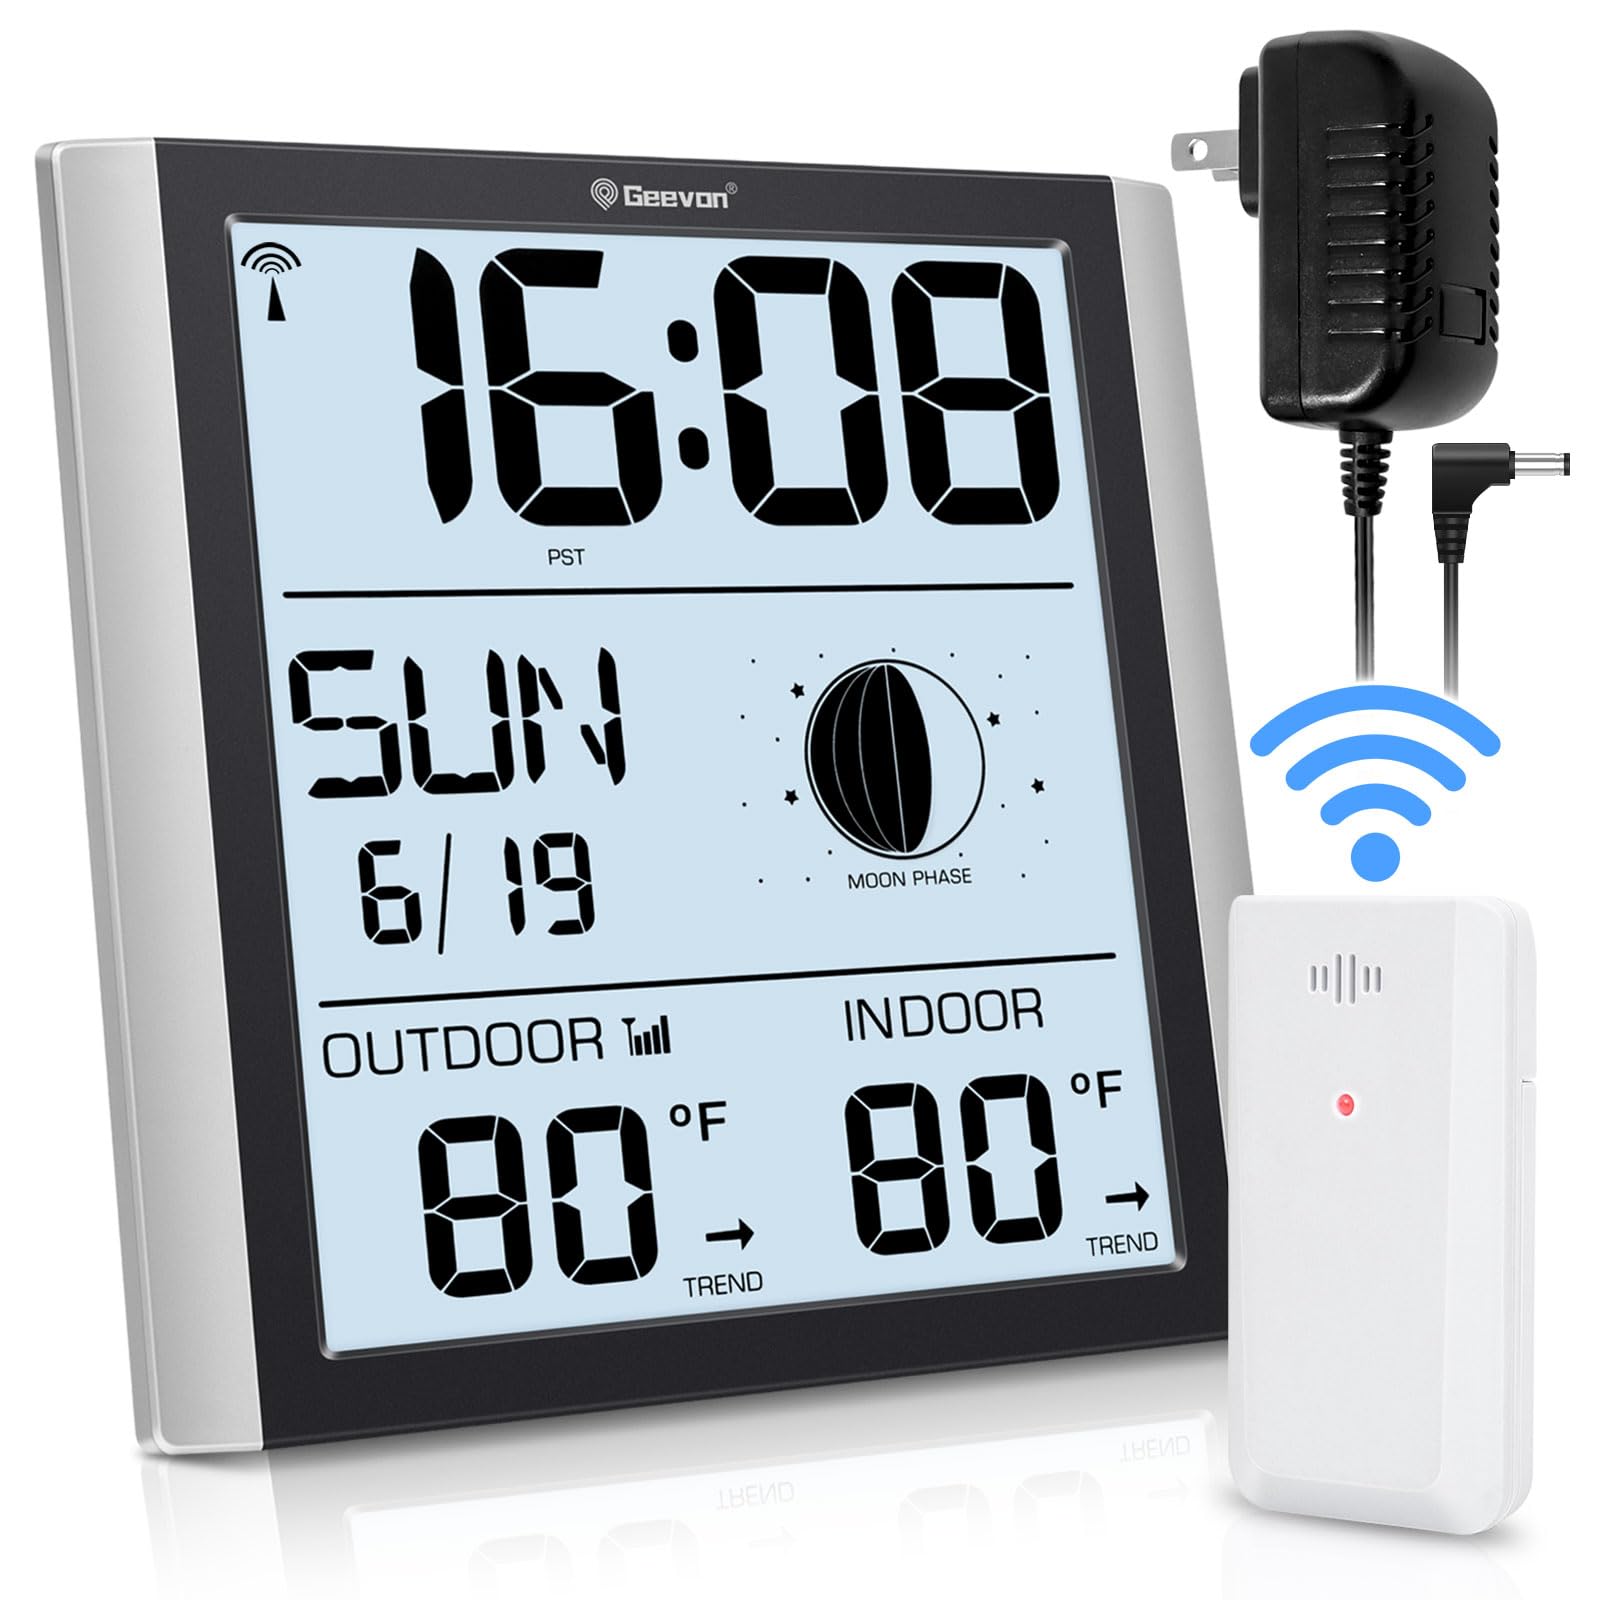
Image: The clock display shown with three different backlight settings: High, Low, and Off, demonstrating the adjustable brightness feature.
Video: This video demonstrates the three backlight brightness levels (Off, Dim, Bright) of the Geevon Atomic Wall Clock and how to adjust them by touching the top button. It also shows the clock in various room settings.
4.3. Äratus- ja edasilükkamisfunktsioon
The clock includes an alarm with a snooze feature:
- Alarmi seadistamine: Press the "ALARM" button on the back of the clock to enter alarm setting mode. Use "UP" or "DOWN" to set the desired alarm time. Press "ALARM" again to confirm.
- Activating Alarm: Once set, the alarm will sound with a gradually increasing "beep" sound.
- Kordus: Press the "SNZ" button (top button) during the alarm to activate the 5-minute snooze function.
- Alarmi peatamine: To stop the alarm completely, press any other button besides "SNZ". If no action is taken, the alarm will automatically stop after 2 minutes.
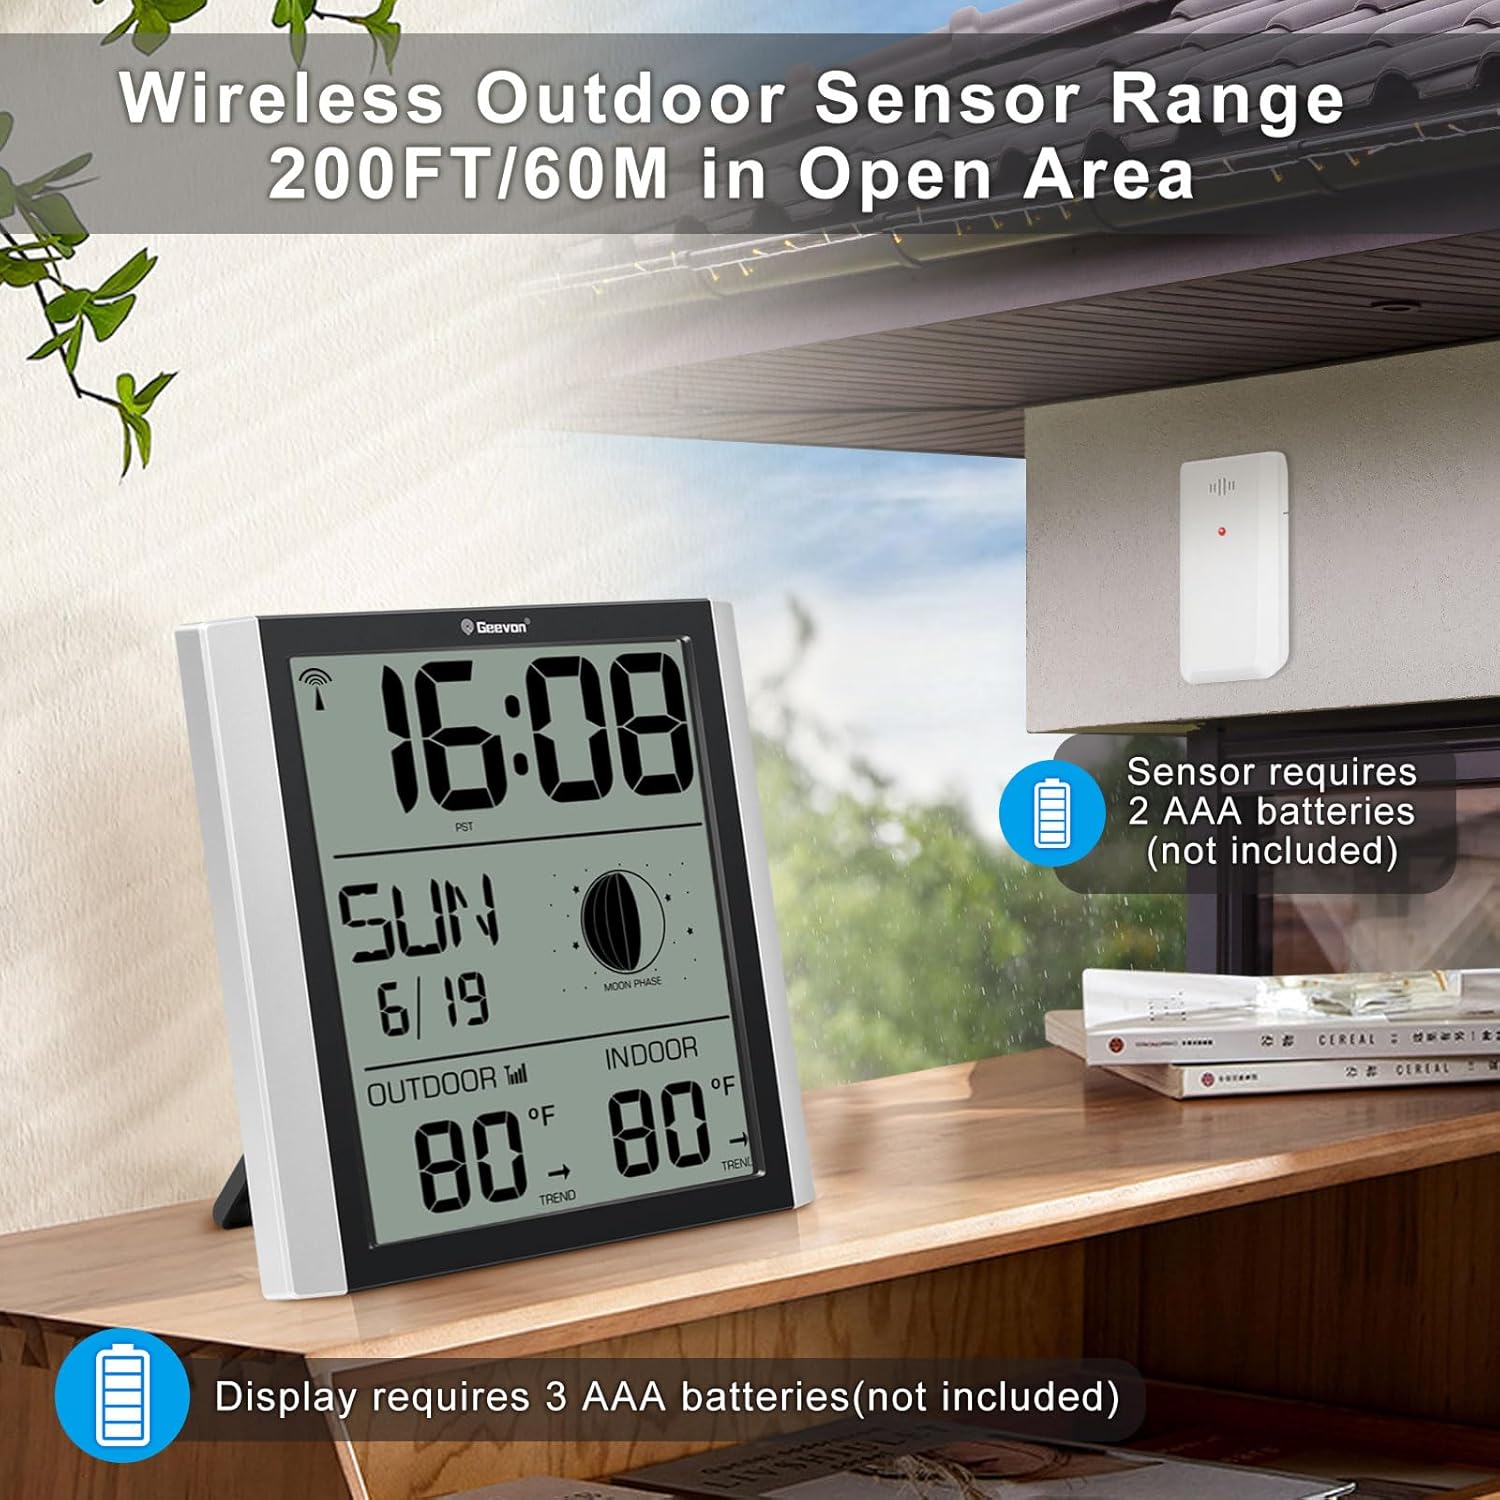
Image: The clock display with icons for "Ascending Beep" and "5-minute Snooze", illustrating the alarm features. A person is shown waking up in bed.
4.4. Temperatuuriühiku vahetamine
To switch between Celsius (°C) and Fahrenheit (°F) for temperature display, press the "UP/RCC" button on the back of the clock during normal operation.
4.5. Max/Min Temperature Records
The clock records the daily minimum and maximum indoor and outdoor temperatures. Press the "MEM" button on the back of the clock to view these records. Press it again to cycle through current, maximum, and minimum readings.
5. Paigutuse valikud
The Geevon Digital Atomic Wall Clock offers versatile placement options:
- Lauaplaadi kasutamine: Utilize the integrated tripod stand on the back for stable placement on a desk, nightstand, or shelf.
- Seinakinnitus: Use the two hanging holes on the back to mount the clock securely on a wall.
Image: The clock is shown with its foldable stand for tabletop use and also with hanging holes for wall mounting, illustrating its two placement methods.
For optimal performance, place both the main unit and the outdoor sensor at least 3 feet (1 meter) away from electronic devices such as TVs, computers, microwaves, or radios, as these can cause electromagnetic interference.
6. Hooldus
- Puhastamine: Wipe the clock and sensor with a soft, dry cloth. Do not use abrasive cleaners or solvents.
- Patarei vahetus: Replace batteries in both the main unit and outdoor sensor when the low battery indicator appears on the display. Always replace all batteries at the same time with new ones.
- Hoiustamine: Kui seadet pikemat aega hoiustate, eemaldage kõik patareid, et vältida leket.
7. Veaotsing
| Probleem | Võimalik põhjus | Lahendus |
|---|---|---|
| Põhiseadmel pole ekraani. | Toidet pole või patareid on tühjad. | Ensure AC adapter is properly connected or replace batteries. |
| Välistemperatuuri ei kuvata või see on ebatäpne. | Outdoor sensor batteries dead, out of range, or interference. | Replace sensor batteries. Move sensor closer to the main unit. Ensure no large metal objects or electronics are between units. |
| Aatomiaeg ei sünkroniseeru. | Weak WWVB signal, interference, or incorrect time zone. | Ensure correct time zone is set. Move clock to a location with better signal reception (e.g., near a window, away from electronics). Allow 2-5 days for initial synchronization. Signal reception is usually better at night. |
| Backlight not staying on (when using AC power). | Toiteadapter pole ühendatud või on vigane. | Ensure AC adapter is securely plugged in. If problem persists, contact support. |
8. Tehnilised andmed
- Mudeli number: GN-228614C-T3-US
- Kaubamärk: Geevon
- Kuva tüüp: Digital LCD TN HD
- Ekraani suurus: 8.8 tolli
- Toiteallikas (põhiseade): AC/DC Power Adapter (included) or 3 x AAA Batteries (not included)
- Toiteallikas (välisandur): 2 x AAA patareid (ei kuulu komplekti)
- Ühenduvus: Juhtmevaba (välistingimustes kasutatava anduri jaoks)
- Outdoor Sensor Range: Up to 200 ft (60 m) in open area
- Temperatuuri täpsus: ±1 °C
- Eriomadused: Atomic Clock (WWVB), Moon Phase, Backlight (3 levels), Alarm with Snooze, Indoor/Outdoor Temperature, Max/Min Temperature Records, Temperature Trend Indicator, 12/24H Time Format, Calendar (Day, Month, Date, Day of Week), Daylight Saving Time (DST) On/Off.
- Materjal: Akrüülnitriilbutadieenstüreen (ABS)
- Toote mõõtmed: 2.1" P x 7.87" L x 7.75" K
- Kauba kaal: 1.4 naela
9. Garantii ja tugi
Geevon is committed to providing high-quality products and excellent customer service. If you encounter any issues or have questions regarding your Geevon Digital Atomic Wall Clock, please contact our customer support team. We offer lifetime consulting services and are available 24/7 online.
For support, please refer to the contact information provided with your purchase or visit the official Geevon websaidile.