
1. Sissejuhatus
Tänan ostu eestasing the SONA 6.0L Smart Multi Cooker SPC 2503. This appliance is designed to provide versatile and efficient cooking solutions with its digital control system and multiple pre-programmed functions. Please read this manual thoroughly before operating the appliance to ensure safe and optimal performance. Keep this manual for future reference.
2. Olulised kaitsemeetmed
Elektriseadmete kasutamisel tuleb alati järgida põhilisi ettevaatusabinõusid, sealhulgas järgmist:
- Enne kasutamist lugege läbi kõik juhised.
- Ärge puudutage kuumi pindu. Kasutage käepidemeid või nuppe.
- Elektrilöögi vältimiseks ärge kastke juhet, pistikut ega põhiseadet vette ega muusse vedelikku.
- Hoolikas järelevalve on vajalik, kui seadet kasutavad lapsed või nende läheduses.
- Eemaldage pistik pistikupesast, kui seda ei kasutata ja enne puhastamist. Enne osade peale panemist või eemaldamist laske jahtuda.
- Ärge kasutage ühtegi seadet kahjustatud juhtme või pistikuga või pärast seda, kui seade on tõrgeteta või on mingil viisil kahjustatud.
- Seadme tootja poolt soovitamata tarvikute kasutamine võib põhjustada vigastusi.
- Ärge kasutage õues.
- Ärge laske juhtmel üle laua või leti serva rippuda ega kuumade pindadega kokku puutuda.
- Ärge asetage kuuma gaasi- või elektripliidi peale ega lähedusse ega kuumutatud ahju.
- Kuuma õli või muid kuumi vedelikke sisaldava seadme teisaldamisel tuleb olla äärmiselt ettevaatlik.
- Ühendage pistik alati esmalt seadmega ja seejärel juhtmega seinakontakti. Lahtiühendamiseks lülitage mis tahes juhtnupp välja ja eemaldage pistik seinakontaktist.
- Ärge kasutage seadet muul kui ettenähtud otstarbel.
- See seade töötab rõhu all. Ebaõige kasutamine võib põhjustada põletushaavu. Enne kasutamist veenduge, et seade on korralikult suletud.
- Never force open the multi cooker. Ensure the pressure has been completely released before opening.
- Ärge täitke seadet üle MAX täitejoone.
- This appliance has 9 built-in safety features to ensure safe operation.
3. Toote lõppview
3.1 Põhikomponendid
- Main Unit (Stainless Steel Outer Housing)
- Lid with Safety Guard and Micro Switch
- Digitaalne juhtpaneel
- Non-Stick Inner Pot (6.0L Capacity)
- Stainless Steel Inner Pot (6.0L Capacity)
- Eemaldatav toitejuhe

Figure 1: Sona 6.0L Smart Multi Cooker SPC 2503. This image displays the multi cooker with its digital control panel, highlighting its 6L capacity, 1000W power, and 15 cooking modes.
3.2 Dual Inner Pots
The multi cooker includes two interchangeable inner pots: one non-stick and one stainless steel. This allows for versatility in cooking and easy cleaning.
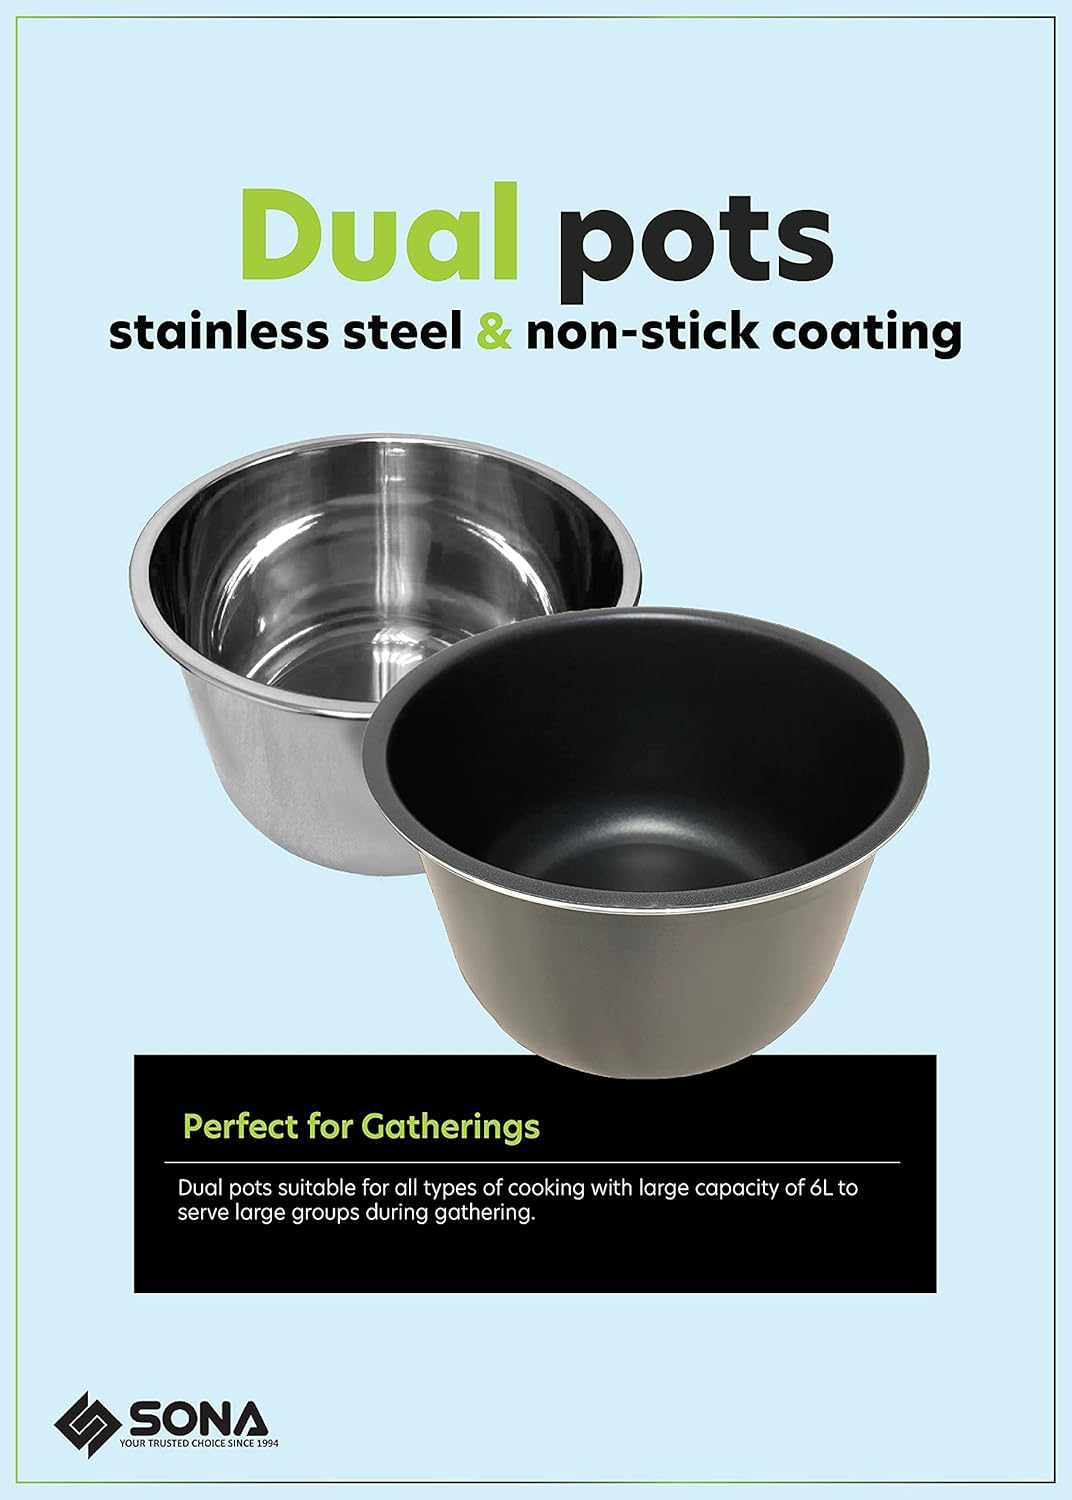
Figure 2: Dual Inner Pots. This image shows both the stainless steel and non-stick inner pots, emphasizing their suitability for different cooking requirements.
3.3 Juhtpaneel üleview
The digital control panel features an LED display and various buttons for selecting cooking functions, adjusting time, and setting pressure levels.

Figure 3: Digital Control Panel. A close-up view of the multi cooker's control panel, showing the display, function buttons, and timer controls.
3.4 Toote omadused
- Lid Safety Guard: Locks the lid and prevents opening when pressure is inside.
- Mikrolüliti: Ensures the lid is properly secured before operation can begin.
- Eemaldatav toitejuhe: Lihtsaks hoiustamiseks ja kaasaskandmiseks.
- Stainless Steel Finishing: Vastupidav ja kergesti puhastatav välispind.

Figure 4: Key Product Features. This image details the Lid Safety Guard, Micro Switch, Detachable Power Cord, and Stainless Steel Finishing of the multi cooker.
4. Seadistamine ja esmakordne kasutamine
4.1 Lahtipakkimine
Carefully remove the multi cooker and all accessories from the packaging. Retain the packaging for future storage or transport.
4.2 Esmane puhastamine
- Wash the inner pots, sealing ring, and lid components with warm, soapy water. Rinse thoroughly and dry completely.
- Pühkige põhiseadme välispinda reklaamigaamp riie. Ärge kastke põhiseadet vette.
4.3 Kokkupanek
- Place the desired inner pot (non-stick or stainless steel) into the main unit. Ensure it sits correctly.
- Ensure the sealing ring is properly seated around the lid.
- Place the lid onto the multi cooker, aligning the arrow on the lid with the arrow on the base. Rotate clockwise until it locks into place.
- Connect the detachable power cord to the appliance and then to a grounded electrical outlet (220-240V~ 50/60Hz).
5. Kasutusjuhised
5.1 Põhitoimingud
- Lisage sisemisse potti koostisained ja vedelik. Ärge ületage MAX täitejoont.
- Close the lid securely. The micro switch will prevent operation if the lid is not properly closed.
- Ensure the pressure release valve is in the correct position for pressure cooking (usually sealed).
5.2 Pre-programmed Functions
The multi cooker features 15 pre-programmed functions for various dishes:
- Liha
- Linnuliha
- Köögiviljad
- Steam
- Saute
- Aeglane kokk
- Valge riis
- Pruun riis
- Oad
- Puljong
- karri
- Supp
- Mitmeviljalised
- Congee
- Jogurt

Figure 5: 15 Pre-programmed Functions. This image displays icons for each of the 15 cooking functions, including a 'Keep Warm' feature.
Eelprogrammeeritud funktsiooni kasutamiseks:
- Press the 'Menu' button repeatedly until the desired function is selected on the display.
- The cooker will automatically set the appropriate cooking time and pressure level.
- Press 'Start' (if available, or it may start automatically after a few seconds).
5.3 Käsitsi seadistamine
For custom cooking, use the 'Manual Setting' button. You can adjust the cooking time and pressure level (Low, Medium, High) using the '+' and '-' buttons.
5.4 Preset Timer (Delay Start)
The 24-hour preset timer allows you to delay the start of cooking. This is useful for preparing meals in advance.

Figure 6: 24-Hour Preset Timer. This diagram illustrates how to use the preset timer for delayed cooking, with examples for breakfast and dinner preparation.
To use the preset timer:
- Select your desired cooking function and adjust time if necessary.
- Vajutage nuppu „Viivitustaimer”.
- Use the '+' and '-' buttons to set the desired delay time (up to 24 hours).
- The cooker will start automatically after the set delay time.
5.5 Soojas hoidmise funktsioon
After cooking is complete, the multi cooker will automatically switch to the 'Keep Warm' function for up to 60 minutes, maintaining the food at a serving temperature.
6. Hooldus ja puhastamine
Regular cleaning ensures the longevity and proper functioning of your multi cooker.
- Enne puhastamist eemaldage seade alati vooluvõrgust ja laske sellel täielikult jahtuda.
- Sisemised potid: Both the non-stick and stainless steel inner pots are dishwasher-safe. For hand washing, use warm, soapy water and a non-abrasive sponge.
- Kaas: Remove the sealing ring and wash it with warm, soapy water. Clean the lid, including the steam release valve and float valve, with a damp lapiga. Enne kokkupanekut veenduge, et kõik osad on kuivad.
- Põhiüksus: Pühkige reklaamiga välispindaamp lapiga. Ärge kastke põhiseadet vette ega muusse vedelikku.
- Enne seadme ladustamist veenduge, et kõik osad on täiesti kuivad.
7. Veaotsing
| Probleem | Võimalik põhjus | Lahendus |
|---|---|---|
| Pliit ei lülitu sisse. | Power cord not connected; Lid not properly closed. | Ensure power cord is securely plugged in; Close the lid correctly until it locks. |
| Steam leaks from lid during cooking. | Tihendusrõngas pole korralikult paigaldatud või on kahjustatud; tihendusrõngal või kaane äärel on toidujääke. | Check and re-install sealing ring; Clean sealing ring and lid rim; Replace sealing ring if damaged. |
| Rõhk ei kogune. | Steam release valve open; Insufficient liquid in inner pot. | Ensure steam release valve is in 'Sealing' position; Add more liquid as per recipe. |
| Pärast keetmist ei saa kaant avada. | Pliidi sees on endiselt rõhk. | Allow pressure to release naturally or use quick release method (if safe for recipe) until float valve drops. Never force open. |
8. Tehnilised andmed
- Mudeli number: SPC 2503
- Voltage: 220-240V~
- Sagedus: 50/60 Hz
- Wattage: 1000W
- Mahutavus: 6.0 liitrit
- Materjal: Stainless Steel (outer housing), Non-Stick / Stainless Steel (inner pots)
- Kontrollimeetod: Puudutage / vajutage nuppu
- Kauba kaal: 5.8 kilogrammi
- Eriomadused: Keep Warm Setting, 24 Hours Preset Timer, 60 Minutes Cooking Timer, 9 Built-In Safety Features
- Nõudepesumasinas ohutu: Yes (Inner Pots)

Figure 7: 9 Safety Functions. This image highlights the comprehensive safety features integrated into the Sona Multi Cooker.

Figure 8: Electricity Saver. This logo indicates the energy-efficient design of the multi cooker.
9. Garantii ja klienditugi
This SONA 6.0L Smart Multi Cooker SPC 2503 comes with a 3 Years Warranty on Electrical Parts alates ostukuupäevast. Palun hoidke ostutõend garantiinõuete esitamiseks alles.
For technical assistance, troubleshooting, or warranty inquiries, please contact Sona customer support through their official channels. Refer to the warranty card included with your product for specific contact details.